![]() DANGER
DANGER
LEAK TESTING:
To prevent fire or explosion hazard:
•DO NOT smoke or permit ignition sources in the area while conducting a leak test.
•Perform test OUTDOORS only in a well ventilated area.
•Never perform a leak test with a match or open flame.
•Never perform a leak test while the grill is in use or while grill is still hot.
![]() WARNING
WARNING
WHEN TO PERFORM A LEAK TEST:
•After assembling your grill and before lighting for the first time, even if purchased fully assembled.
•Every time the LP gas cylinder is refilled or if any of the gas components are replaced.
•Any time your grill has been moved.
•At least once per year or if your grill has not been used for more than 60 days.
CHECKING FOR LEAKS:
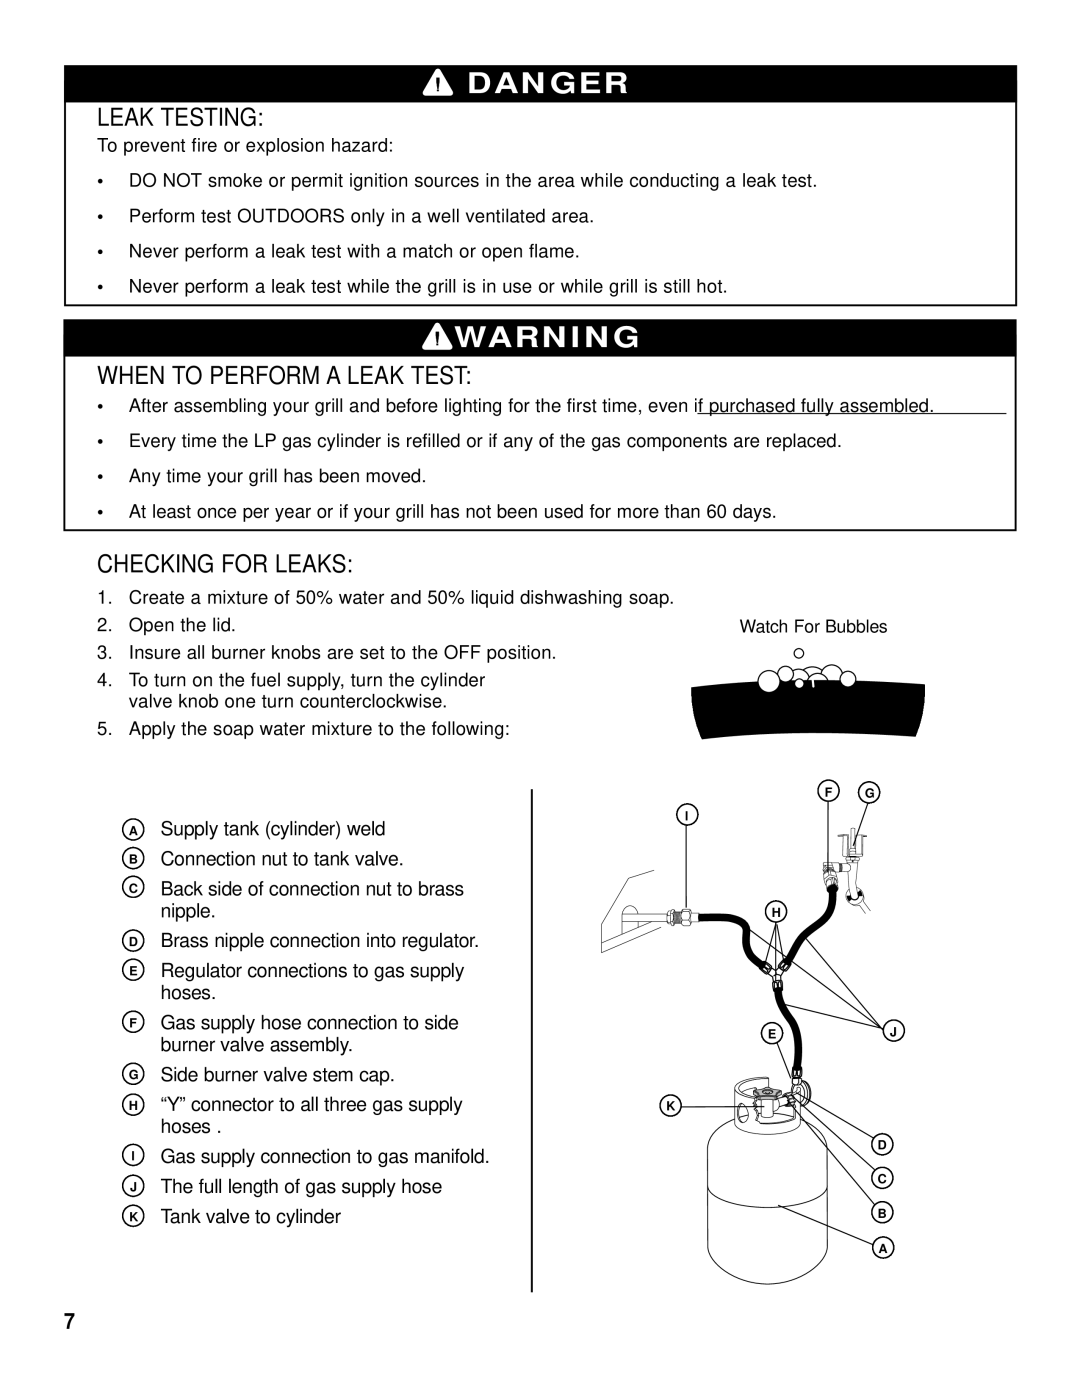
1. | Create a mixture of 50% water and 50% liquid dishwashing soap. |
|
2. | Open the lid. | Watch For Bubbles |
3. | Insure all burner knobs are set to the OFF position. |
|
4. | To turn on the fuel supply, turn the cylinder |
|
| valve knob one turn counterclockwise. |
|
5. | Apply the soap water mixture to the following: |
|
ASupply tank (cylinder) weld
BConnection nut to tank valve.
CBack side of connection nut to brass nipple.
DBrass nipple connection into regulator.
ERegulator connections to gas supply hoses.
FGas supply hose connection to side burner valve assembly.
GSide burner valve stem cap.
H“Y” connector to all three gas supply hoses .
IGas supply connection to gas manifold.
JThe full length of gas supply hose
KTank valve to cylinder
F G
I
H
EJ
K
D
C
B
A
7