OFF
HIGH
in owner’s manual before lighting.
2.Open lid before lighting burner.
3.Make sure all control knobs are in the OFF position.
4.Select the burner to be lit. Push and turn the control knob of that burner to HIGH.
OFF
HIGH
200 300
![]() 400
400
100
° F
50 500
seconds to light burner.
6.If burner does NOT ignite immediately, turn control knob to OFF, wait 5 minutes to allow gas to dissipate and repeat lighting procedure.
OFF
HIGH
use electronic igniter for lighting each burner.
8.Refer to owner’s manual for match lighting procedure.
9.For assistance, call
10.To turn off, turn control knobs clockwise until it locks in OFF position.
OFF
HIGH
INSTRUCTIONS:
1. | Follow Steps |
| |
| LIGHTING |
| INSTRUCTIONS. |
2. | Push and turn |
| SIDE BURNER |
| control knob to |
| HIGH. |
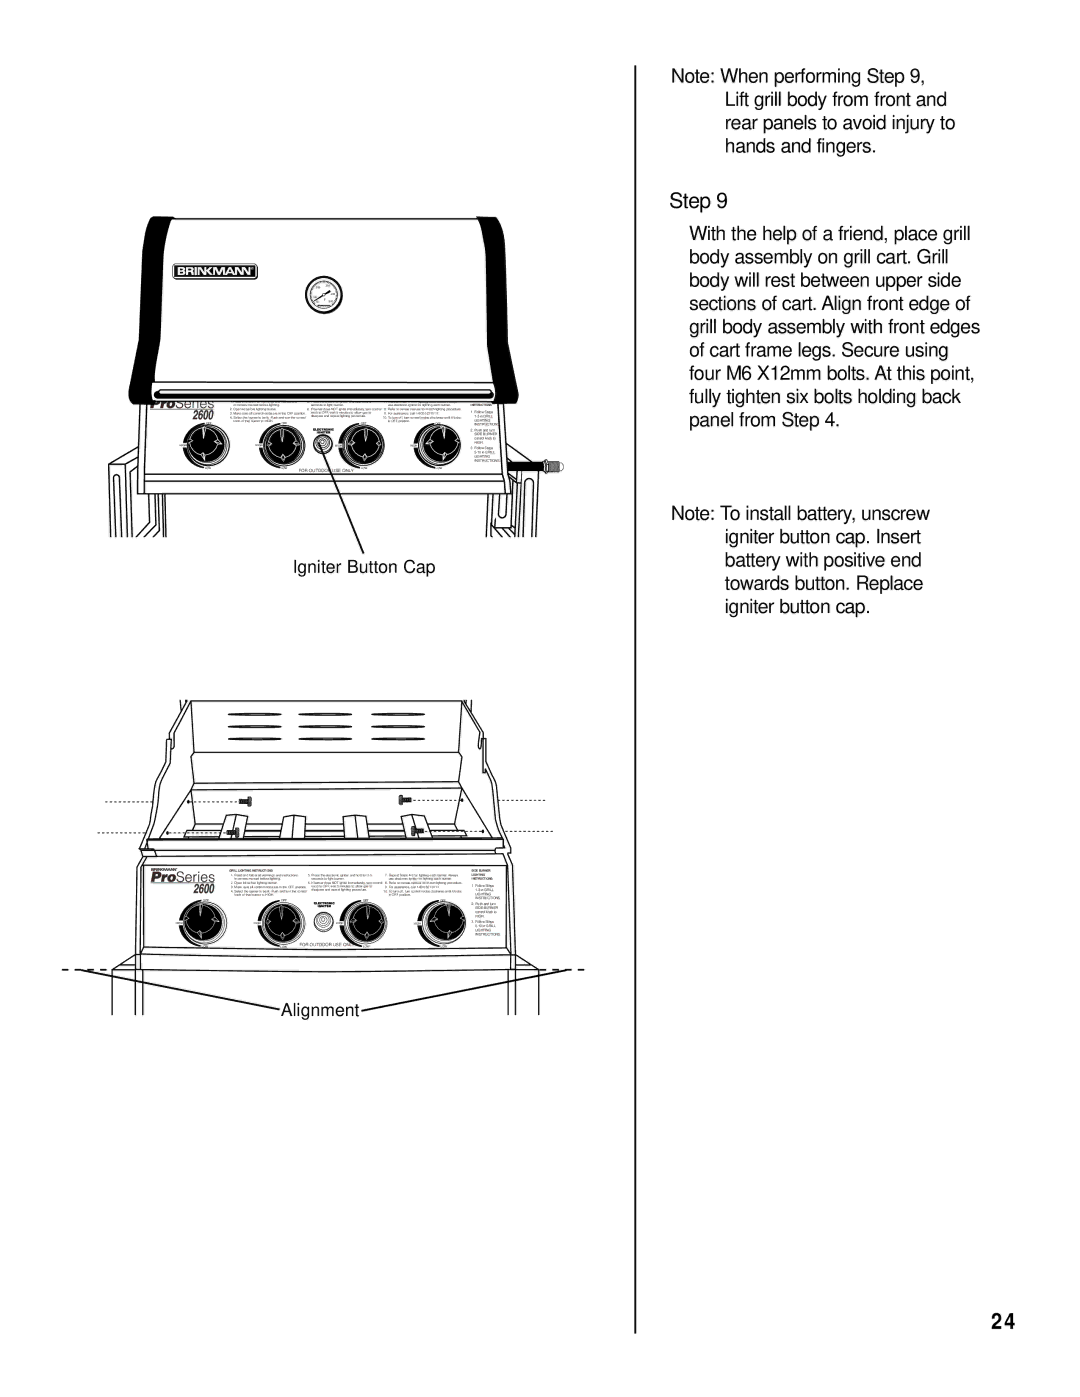
Note: When performing Step 9, Lift grill body from front and rear panels to avoid injury to hands and fingers.
Step 9
With the help of a friend, place grill body assembly on grill cart. Grill body will rest between upper side sections of cart. Align front edge of grill body assembly with front edges of cart frame legs. Secure using four M6 X12mm bolts. At this point, fully tighten six bolts holding back panel from Step 4.
![]() LOW
LOW
LOW | LOW |
| FOR OUTDOOR USE ONLY |
LOW
3. Follow Steps |
LIGHTING |
INSTRUCTIONS. |
Igniter Button Cap
Note: To install battery, unscrew igniter button cap. Insert battery with positive end towards button. Replace igniter button cap.
GRILL LIGHTING INSTRUCTIONS:
| 1. | Read and follow all warnings and instructions |
| 5. | Press the electronic igniter and hold for | 7. | Repeat Steps | ||
|
|
| in owner’s manual before lighting. |
|
| seconds to light burner. |
|
| use electronic igniter for lighting each burner. |
|
| 2. | Open lid before lighting burner. |
| 6. | If burner does NOT ignite immediately, turn control | 8. | Refer to owner’s manual for match lighting procedure. | |
3. | Make sure all control knobs are in the OFF position. |
| knob to OFF, wait 5 minutes to allow gas to | 9. | For assistance, call | ||||
4. | Select the burner to be lit. Push and turn the control |
| dissipate and repeat lighting procedure. | 10. | To turn off, turn control knobs clockwise until it locks | ||||
|
|
| knob of that burner to HIGH. |
|
|
|
|
| in OFF position. |
| OFF | OFF |
|
|
| OFF |
| OFF | |
HIGH | HIGH |
|
| HIGH |
|
| HIGH | ||
| LOW | LOW | FOR OUTDOOR USE ONLY | LOW |
| LOW | |||
 Alignment
SIDE BURNER LIGHTING INSTRUCTIONS:
1.Follow Steps
2.Push and turn
SIDE BURNER control knob to HIGH.
3.Follow Steps
24