ASSEMBLY INSTRUCTIONS
![]() READ ALL SAFETY WARNINGS & ASSEMBLY INSTRUCTIONS CAREFULLY BEFORE ASSEMBLING OR OPERATING YOUR STOVE.
READ ALL SAFETY WARNINGS & ASSEMBLY INSTRUCTIONS CAREFULLY BEFORE ASSEMBLING OR OPERATING YOUR STOVE.
Inspect contents of the box to ensure all parts are included and undamaged.
FOR MISSING PARTS, PLEASE CALL CUSTOMER SERVICE AT 1-800-527-0717.
(Proof of purchase will be required.)
Step 1
Snap down legs to form a "V" with the stove base.
Step 2
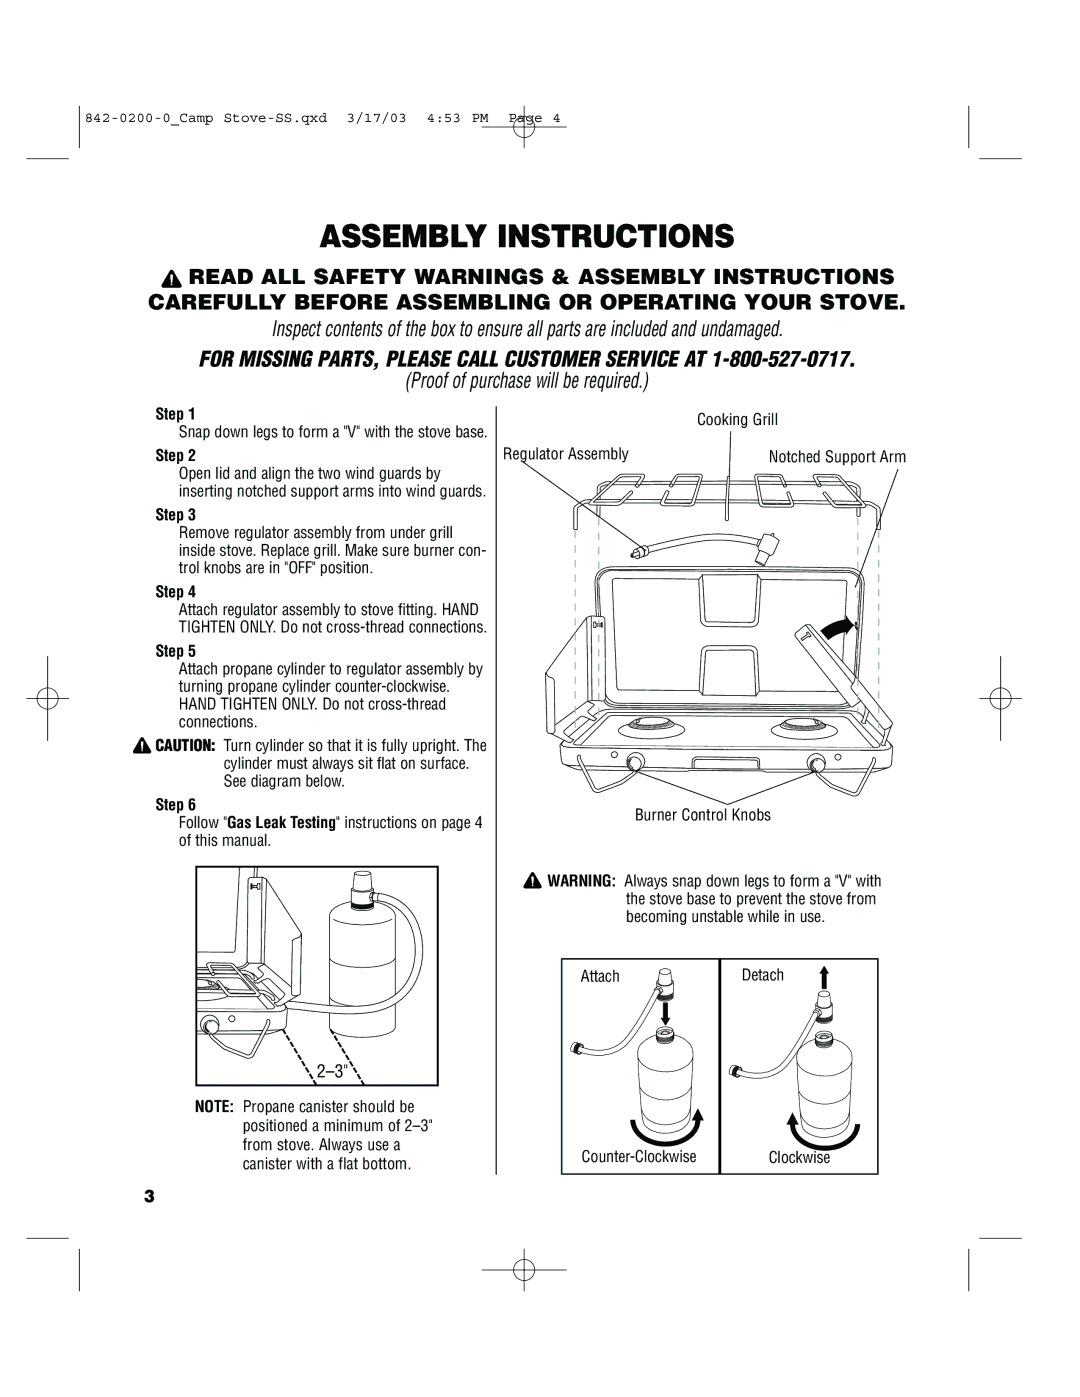
Open lid and align the two wind guards by inserting notched support arms into wind guards.
Step 3
Remove regulator assembly from under grill inside stove. Replace grill. Make sure burner con- trol knobs are in "OFF" position.
Step 4
Attach regulator assembly to stove fitting. HAND TIGHTEN ONLY. Do not
Step 5
Attach propane cylinder to regulator assembly by turning propane cylinder
![]() CAUTION: Turn cylinder so that it is fully upright. The cylinder must always sit flat on surface. See diagram below.
CAUTION: Turn cylinder so that it is fully upright. The cylinder must always sit flat on surface. See diagram below.
Step 6
Follow "Gas Leak Testing" instructions on page 4 of this manual.
NOTE: Propane canister should be positioned a minimum of
Cooking Grill
Regulator Assembly | Notched Support Arm |
Burner Control Knobs
![]() WARNING: Always snap down legs to form a "V" with the stove base to prevent the stove from becoming unstable while in use.
WARNING: Always snap down legs to form a "V" with the stove base to prevent the stove from becoming unstable while in use.
Attach | Detach |
Clockwise |
3