
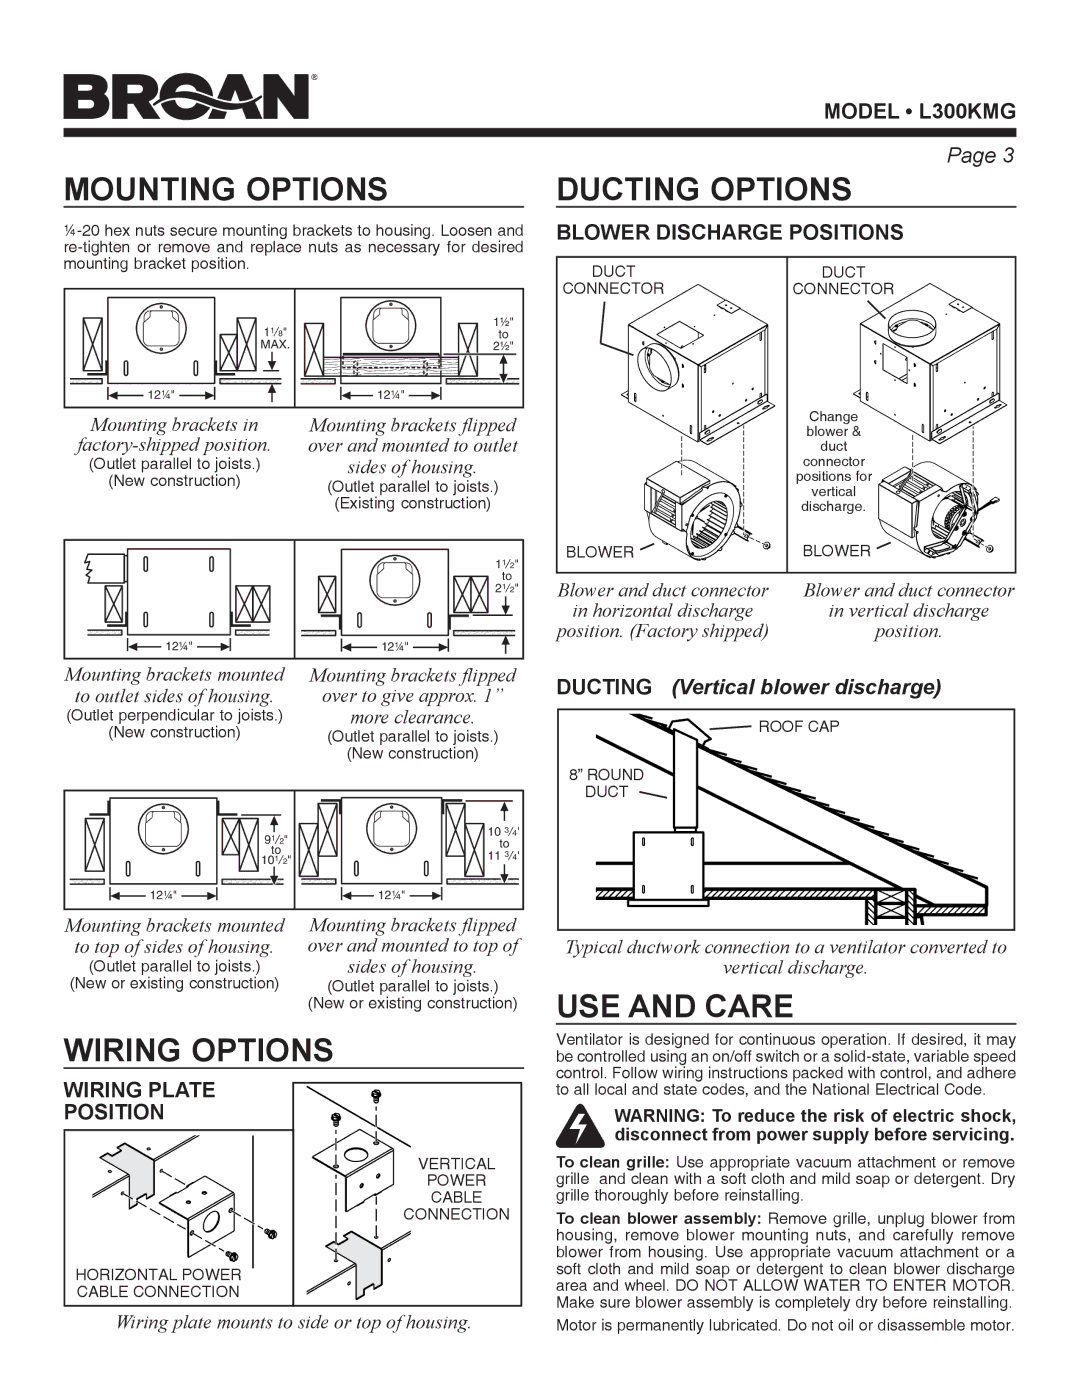
L300KMG specifications
The Broan L300KMG is a versatile and powerful range hood that stands out in the kitchen appliance market. This product is designed to effectively eliminate smoke, steam, and odors, ensuring that your cooking environment remains fresh and pleasant. With a blend of functionality and style, the L300KMG is suitable for both home cooks and professional chefs.One of the key features of the Broan L300KMG is its robust ventilation system. It is equipped with a 300 CFM blower, which provides exceptional airflow to quickly remove unwanted cooking byproducts. The powerful motor operates efficiently to maintain optimal indoor air quality, making it an ideal choice for those who enjoy frying or grilling.
The range hood is designed with a sleek, contemporary aesthetic that fits seamlessly into various kitchen styles. Made from durable stainless steel, it not only adds a modern touch but also ensures longevity and ease of cleaning. The smooth surface helps to resist fingerprints and smudges, maintaining its polished appearance over time.
In terms of technologies, the Broan L300KMG features a multi-speed control function. This allows users to adjust the ventilation speed according to their cooking needs. The quiet operation of the fan ensures that the unit is unobtrusive during meal preparation, reducing noise pollution in the kitchen without compromising on performance.
Another notable characteristic is the inclusion of dishwasher-safe aluminum filters that trap grease and particulates effectively. These filters are designed for easy removal and cleaning, making maintenance hassle-free. Regular cleaning of the filters not only enhances performance but also extends the life of the range hood.
The L300KMG also comes with integrated lighting, which enhances visibility over the cooking surface. The bright yet soft illumination allows for precision while cooking, ensuring you can see what you are working on clearly. This thoughtful design consideration adds to the overall functionality of the product.
Overall, the Broan L300KMG is a top-tier range hood that combines powerful performance, aesthetic appeal, and user-friendly features. It is an excellent addition to any kitchen, ensuring a clean and enjoyable cooking experience. Whether you're simmering sauces, grilling meats, or preparing elaborate meals, this range hood stands ready to enhance your culinary adventures while keeping your kitchen environment comfortable and fresh.