
QS330BL, QS330WW, QS342SS, QS342BL, QS342WW specifications
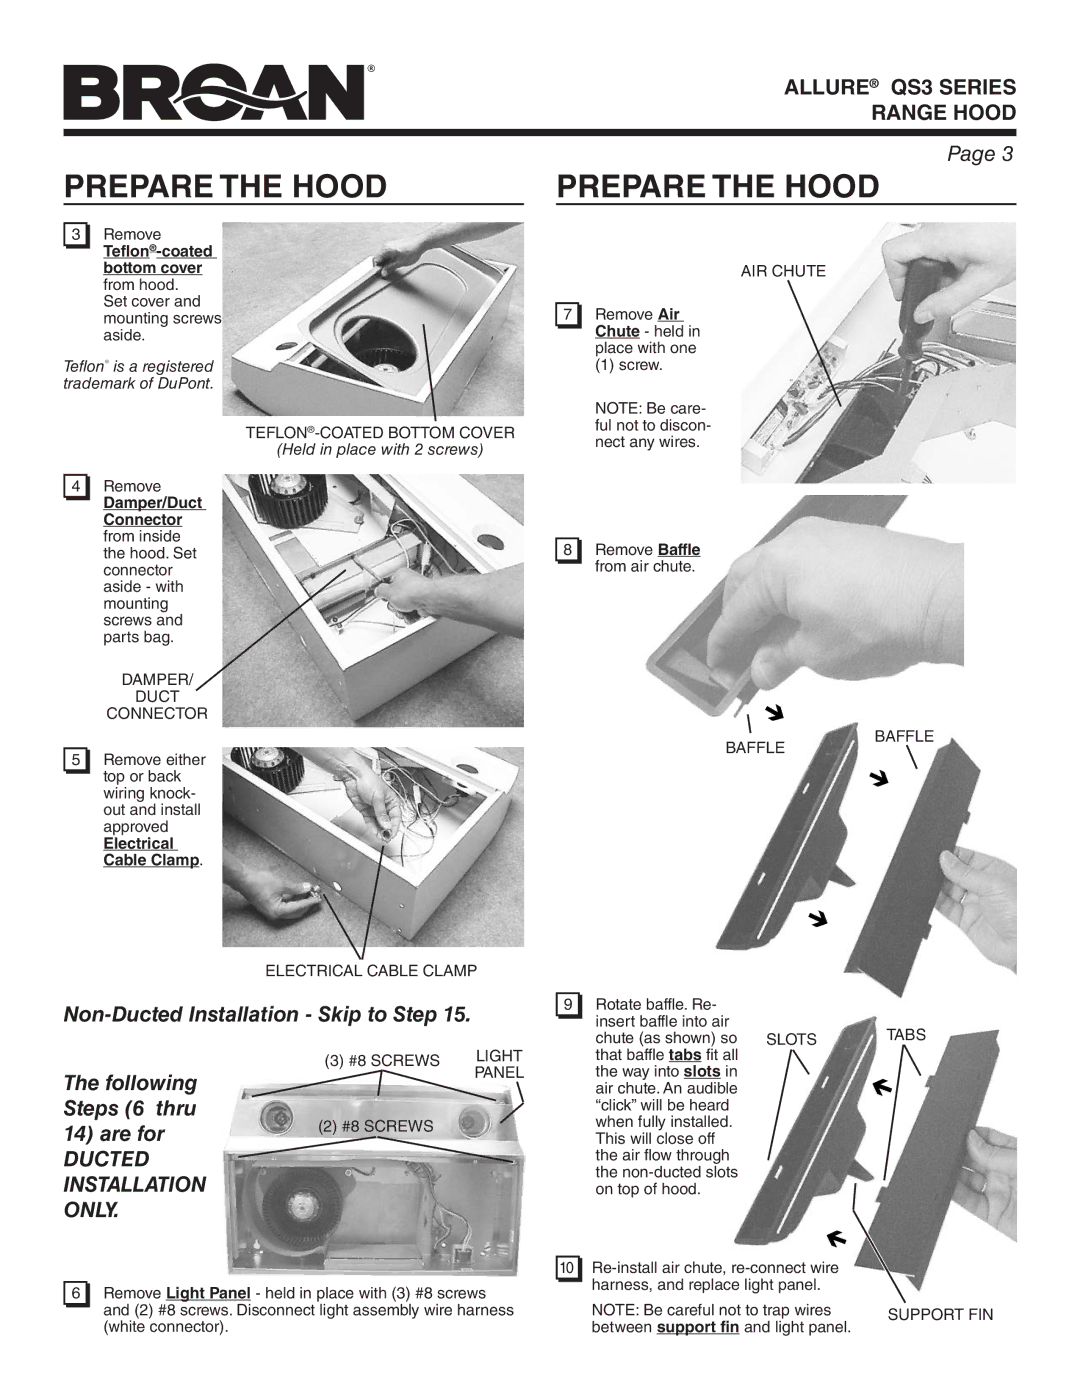
The Broan QS330SS, QS330BL, QS336SS, QS342WW, and QS342BC range hoods are renowned for their stylish designs and advanced features, making them a popular choice among homeowners looking to enhance their kitchen functionality and aesthetics. Each model showcases unique characteristics while still providing the high performance and reliability that Broan is known for.The QS330SS is a stainless steel model that combines elegance with powerful performance. It boasts a sleek, contemporary design that fits seamlessly into modern kitchens. This model features a powerful 250 CFM blower, effectively removing smoke, grease, and odors from the air. The two-speed fan allows users to adjust the ventilation according to their cooking needs, ensuring optimal air quality. Additionally, the QS330SS includes dishwasher-safe aluminum filters, making maintenance a breeze.
On the other hand, the QS330BL offers the same performance features in a stylish black finish. Ideal for those wanting a dramatic contrast in their kitchen, this model encapsulates the essence of modern design while delivering on functionality. The black finish adds an element of sophistication, making it a favorite in contemporary spaces.
The QS336SS model features a slightly larger design and increased CFM rating of 380. This model is designed for serious cooks, ensuring effective ventilation even in busy kitchen environments. With its three-speed fan setting, users can adapt to varying cooking demands. Like other models, the QS336SS comes with durable aluminum filters that are easy to clean.
Moving on to the QS342WW and QS342BC, these models are characterized by their unique color options, including white and black. They deliver the same reliable performance as their stainless steel counterparts while providing a customizable look for any kitchen design. Both models include a powerful ventilation system with multiple fan speeds, ensuring efficient and quiet operation.
All of these Broan range hoods are designed with user-friendly functions such as easy-to-reach controls and bright integrated lighting, enhancing visibility while cooking. Broan’s commitment to innovation ensures that these models not only perform well but also contribute to an overall stylish kitchen ambiance. Whether you're looking for a sophisticated stainless steel option or a striking black or white design, the Broan QS series delivers on both aesthetics and functionality, making these range hoods a commendable choice for any culinary enthusiast.