LIGHTING | MODEL: 911050 / 2000 SERIES |
|
|
|
|
 Lighting
Step 1:
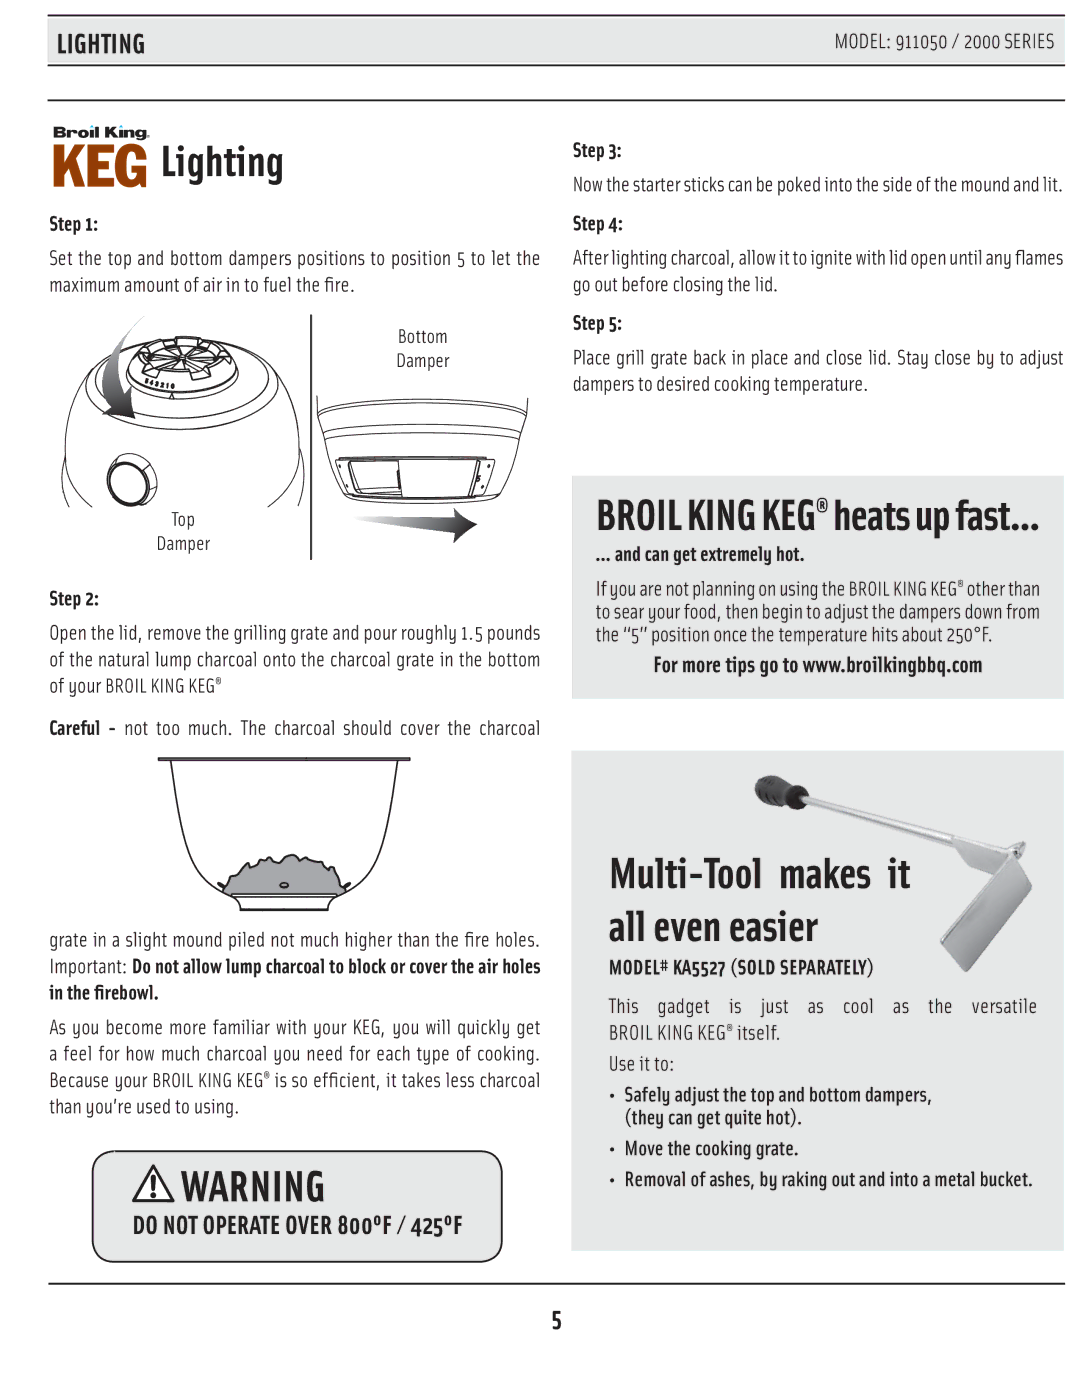
Set the top and bottom dampers positions to position 5 to let the maximum amount of air in to fuel the fire.
Bottom
Damper
Top
Damper
Step 2:
Open the lid, remove the grilling grate and pour roughly 1.5 pounds of the natural lump charcoal onto the charcoal grate in the bottom of your BROIL KING KEG®
Careful - not too much. The charcoal should cover the charcoal
grate in a slight mound piled not much higher than the fire holes. Important: Do not allow lump charcoal to block or cover the air holes
in the firebowl.
As you become more familiar with your KEG, you will quickly get a feel for how much charcoal you need for each type of cooking. Because your BROIL KING KEG® is so efficient, it takes less charcoal than you’re used to using.
![]() WARNING
WARNING
DO NOT OPERATE OVER 800ºF / 425ºF
Step 3:
Now the starter sticks can be poked into the side of the mound and lit.
Step 4:
After lighting charcoal, allow it to ignite with lid open until any flames go out before closing the lid.
Step 5:
Place grill grate back in place and close lid. Stay close by to adjust dampers to desired cooking temperature.
BROIL KING KEG® heats up fast...
... and can get extremely hot.
If you are not planning on using the BROIL KING KEG® other than to sear your food, then begin to adjust the dampers down from the “5” position once the temperature hits about 250°F.
For more tips go to www.broilkingbbq.com
Multi-Tool makes it all even easier
MODEL# KA5527 (SOLD SEPARATELY)
This gadget is just as cool as the versatile BROIL KING KEG® itself.
Use it to:
•Safely adjust the top and bottom dampers, (they can get quite hot).
•Move the cooking grate.
•Removal of ashes, by raking out and into a metal bucket.
5
