
BHAX-1, BSA-1, BBA-1, BHA-1, BDA-1 specifications
Broilmaster has long been synonymous with high-quality outdoor cooking solutions, and their lineup of gas grills including the BRB-1, BDA-1, BHA-1, BBA-1, and BSA-1 models showcases this reputation. Each of these grills is designed to bring the backyard cooking experience to new heights, equipped with features and technologies that meet the demands of grill enthusiasts.The BRB-1 is a robust and versatile grill that offers exceptional durability due to its use of premium materials. One of its standout features is the stainless steel burners, which deliver consistent, high heat for optimal cooking. The BRB-1 also incorporates a unique cooking system, allowing for even heat distribution, reducing cold spots and increasing the efficiency of cooking. Additionally, this model features a convenient side shelf, providing ample workspace for food preparation.
The BDA-1 model is characterized by its innovative dual cooking system. This grill allows users to cook different foods at various temperatures simultaneously, making it perfect for entertaining. The BDA-1 also includes an easy-to-clean grease management system, which simplifies maintenance and enhances food safety by reducing flare-ups.
The BHA-1 is ideal for those who value both functionality and aesthetic appeal. Featuring a sleek design, this grill includes a built-in thermometer for precise temperature control during cooking. The BHA-1 leverages infrared cooking technology, which seals in juices and flavors while providing high heat for searing meats perfectly. This model also boasts a spacious cooking surface, accommodating larger meals, making it suitable for family gatherings.
The BBA-1 offers further versatility with multiple cooking options, including grilling, smoking, and roasting. This grill is equipped with an automatic ignition system that ensures easy startup every time. The BBA-1 also supports a range of accessories, allowing users to customize their grilling experience according to personal preferences.
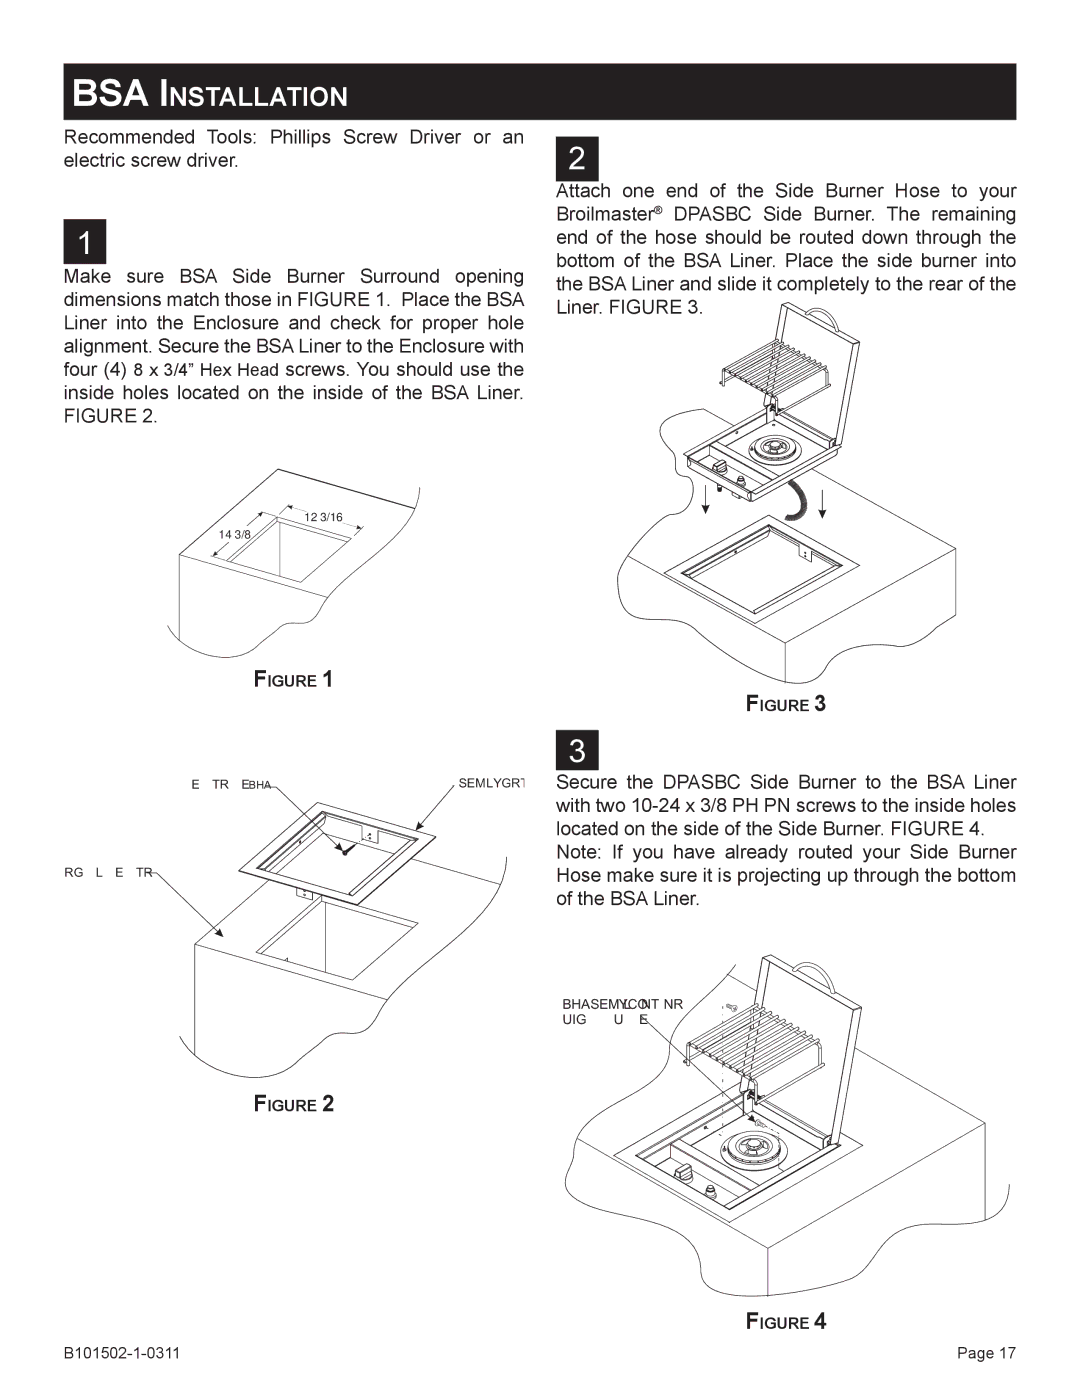
Finally, the BSA-1 stands out with its efficiency and user-friendly features. Designed for easy assembly and maintenance, this model includes tool hooks and an integrated storage cabinet to keep grilling essentials organized. The BSA-1 integrates high-grade materials that withstand the elements while providing stylish outdoor decor.
In summary, Broilmaster’s BRB-1, BDA-1, BHA-1, BBA-1, and BSA-1 models each offer unique features tailored to different grilling styles and preferences. From durability and temperature control to versatile cooking systems, these grills aim to elevate the outdoor cooking experience for enthusiasts of all levels.