GAS CONVERSION
Gas Conversion
Propane grills include a conversion kit for natural gas. If you have a natural grill and wish to convert it to propane you will need to purchase the optional conversion kit #CK195.
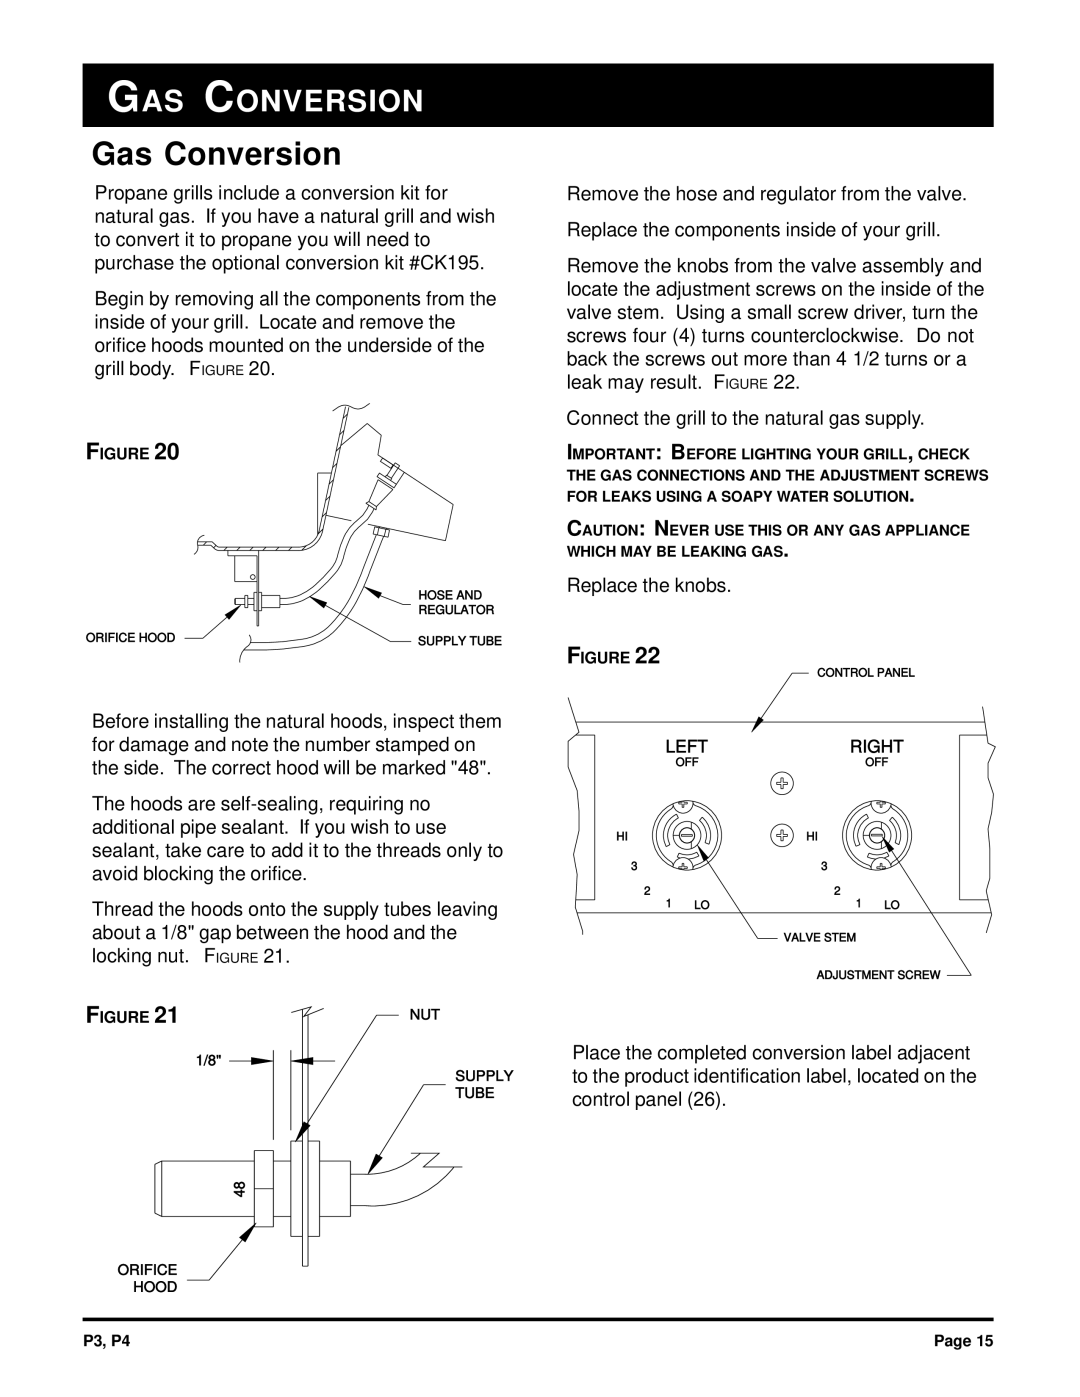
Begin by removing all the components from the inside of your grill. Locate and remove the orifice hoods mounted on the underside of the grill body. FIGURE 20.
FIGURE 20
HOSE AND
REGULATOR
ORIFICE HOOD | SUPPLY TUBE |
Before installing the natural hoods, inspect them for damage and note the number stamped on the side. The correct hood will be marked "48".
The hoods are
Thread the hoods onto the supply tubes leaving about a 1/8" gap between the hood and the locking nut. FIGURE 21.
FIGURE 21 | NUT |
| 1/8" |
SUPPLY
TUBE
48
ORIFICE
HOOD
Remove the hose and regulator from the valve.
Replace the components inside of your grill.
Remove the knobs from the valve assembly and locate the adjustment screws on the inside of the valve stem. Using a small screw driver, turn the screws four (4) turns counterclockwise. Do not back the screws out more than 4 1/2 turns or a leak may result. FIGURE 22.
Connect the grill to the natural gas supply.
IMPORTANT: BEFORE LIGHTING YOUR GRILL, CHECK THE GAS CONNECTIONS AND THE ADJUSTMENT SCREWS FOR LEAKS USING A SOAPY WATER SOLUTION.
CAUTION: NEVER USE THIS OR ANY GAS APPLIANCE WHICH MAY BE LEAKING GAS.
Replace the knobs.
FIGURE 22
CONTROL PANEL
LEFTRIGHT
OFF | OFF |
HI | HI |
3 | 3 |
2 | 2 |
1 LO | 1 LO |
VALVE STEM
ADJUSTMENT SCREW
Place the completed conversion label adjacent to the product identification label, located on the control panel (26).
P3, P4 | Page 15 |