GRILL ASSEMBLY
Igniter Assembly
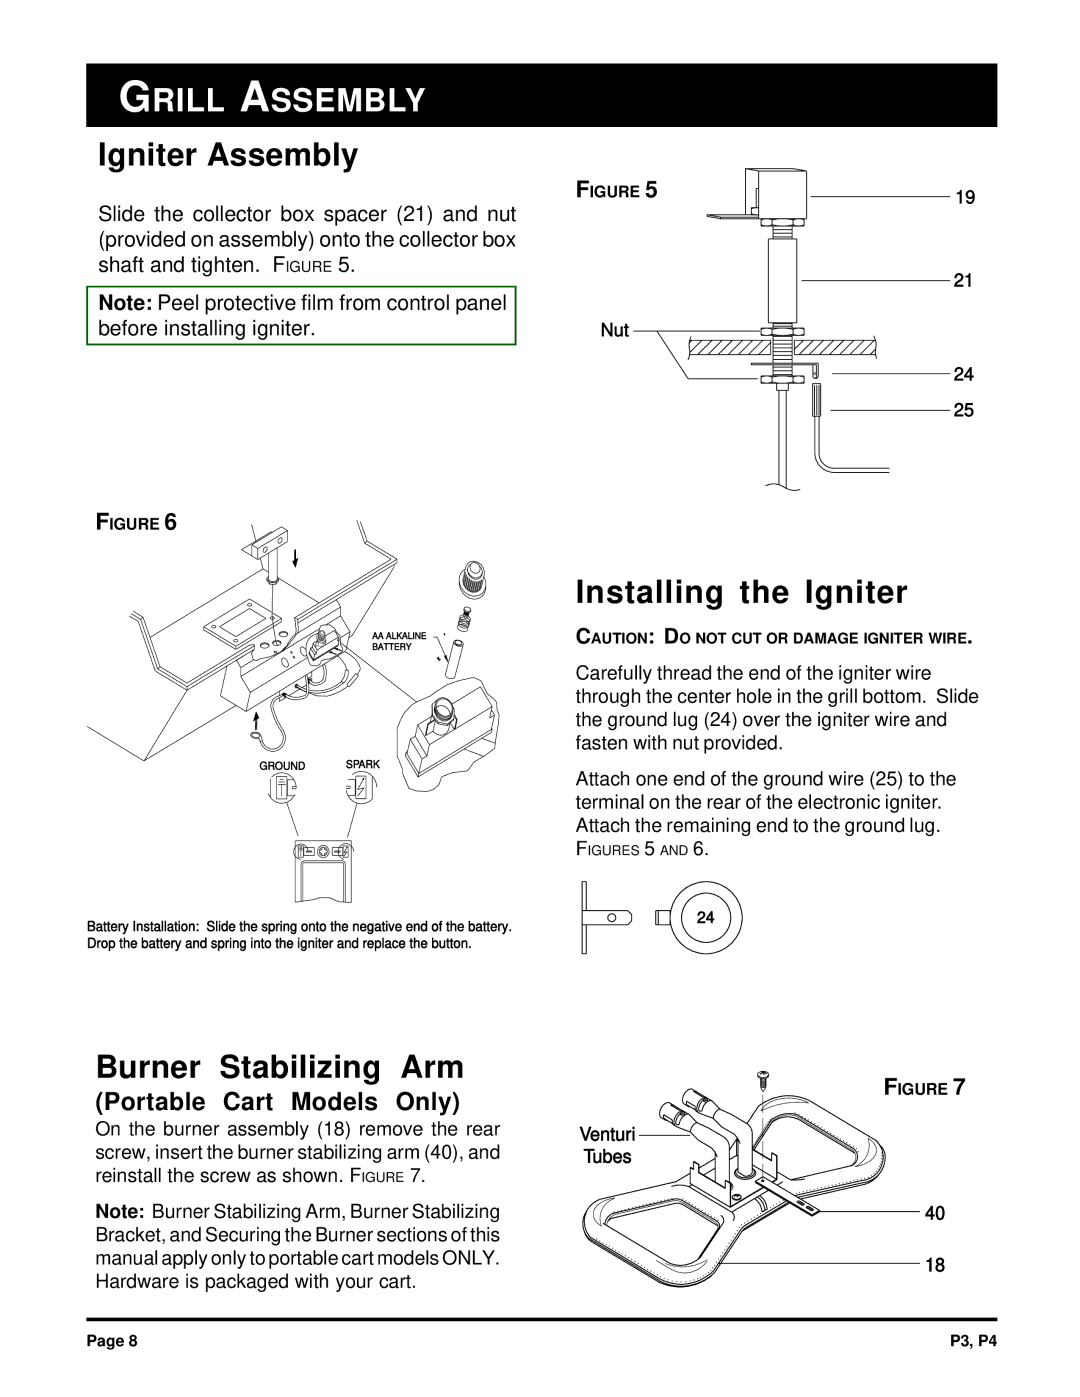
Slide the collector box spacer (21) and nut (provided on assembly) onto the collector box shaft and tighten. FIGURE 5.
Note: Peel protective film from control panel before installing igniter.
FIGURE 5
Nut
19
21
24
25
FIGURE 6
AA ALKALINE | - |
BATTERY |
|
| + |
GROUND SPARK
Battery Installation: Slide the spring onto the negative end of the battery. Drop the battery and spring into the igniter and replace the button.
Installing the Igniter
CAUTION: DO NOT CUT OR DAMAGE IGNITER WIRE.
Carefully thread the end of the igniter wire through the center hole in the grill bottom. Slide the ground lug (24) over the igniter wire and fasten with nut provided.
Attach one end of the ground wire (25) to the terminal on the rear of the electronic igniter. Attach the remaining end to the ground lug.
FIGURES 5 AND 6.
24
Burner Stabilizing Arm
(Portable Cart Models Only)
On the burner assembly (18) remove the rear screw, insert the burner stabilizing arm (40), and reinstall the screw as shown. FIGURE 7.
Note: Burner Stabilizing Arm, Burner Stabilizing Bracket, and Securing the Burner sections of this manual apply only to portable cart models ONLY. Hardware is packaged with your cart.
FIGURE 7
Venturi
Tubes
40
18
Page 8 | P3, P4 |