393AAV specifications
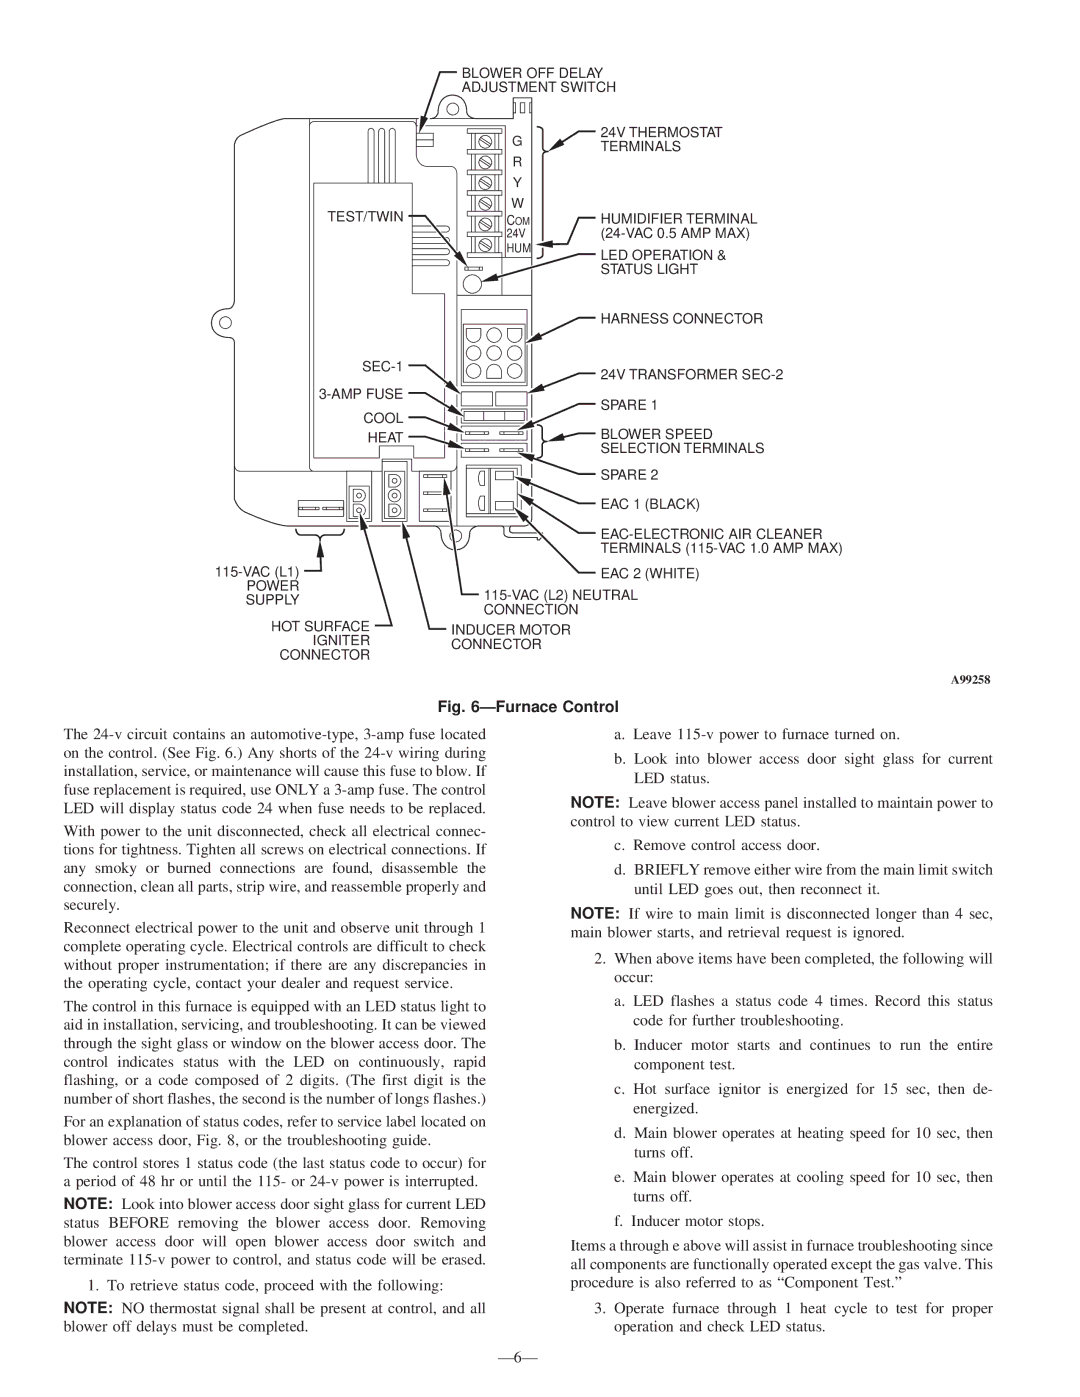
The Bryant 393AAV is a high-efficiency gas furnace designed to deliver reliable heating performance for residential applications. Crafted for homeowners seeking both comfort and energy savings, this model combines advanced technology with robust features to ensure optimal indoor climate control.One of the standout characteristics of the Bryant 393AAV is its variable-speed ECM blower motor. This innovative motor allows for smooth and quiet operation while also enhancing energy efficiency. By adjusting its speed based on the heating demands of the home, the unit promotes consistent temperatures and improved airflow, ensuring that every room is evenly heated.
The furnace has an Annual Fuel Utilization Efficiency (AFUE) rating of up to 96.5%, making it one of the most efficient options available. This high AFUE rating signifies that a significant portion of the fuel consumed is converted into usable heat, leading to reduced utility bills and a smaller carbon footprint. The 393AAV’s two-stage gas valve further contributes to its efficiency. By operating at a lower capacity during milder conditions and switching to a higher capacity when temperatures drop, this feature allows homeowners to enjoy a comfortable environment while minimizing energy consumption.
In terms of durability, the Bryant 393AAV is built to last. It features a corrosion-resistant heat exchanger constructed from premium materials to withstand the test of time. Additionally, the furnace is equipped with a reliable ignition system, ensuring safe and efficient startup with each heating cycle. The design includes an insulated cabinet that not only reduces noise levels but also improves energy efficiency by minimizing heat loss.
Installation and maintenance of the Bryant 393AAV are user-friendly. The unit has a compact design that makes it easier to fit into various spaces within the home. Regular maintenance is facilitated through access panels that allow technicians to reach key components with ease, promoting longevity and sustained performance.
In conclusion, the Bryant 393AAV is a modern gas furnace that excels in efficiency, comfort, and reliability. With features like a variable-speed blower motor, high AFUE ratings, and a robust design, homeowners can trust this unit to provide consistent heating while helping to reduce overall energy costs. This furnace is an excellent choice for those looking to invest in a heating solution that aligns with both comfort and sustainability goals.

