Manuals
/
Bryant
/
Household Appliance
/
Air Conditioner
Bryant
577C, 574D
manual
filter access SMALL CHASSIS, Small Chassis See Fig, Unit Operation Hazard
Models:
574D
577C
1
6
10
10
Download
10 pages
19.65 Kb
3
4
5
6
7
8
9
10
Warranty
Maintenance
filter access SMALL CHASSIS
Safety
Page 6
Image 6
Page 5
Page 7
Page 6
Image 6
Page 5
Page 7
Contents
577C-AWithout Economizer
Owner’s Information Manual
574D--AAND 577C--A
574D--AWithout Economizer
NOTE TO EQUIPMENT OWNER
FIRE, EXPLOSION HAZARD
SAFETY CONSIDERATIONS
FIRE, EXPLOSION, ELECTRICAL SHOCK HAZARD
FIRE, EXPLOSION, ELECTRICAL SHOCK HAZARD
Starting or Shutting Off Unit
UNIT INTRODUCTION
Fig. 3 - Accessory Filter Rack Access Panel
To start unit electric cooling
Routine Maintenance
MAINTENANCE AND SERVICE
OPERATING YOUR UNIT
Maintenance and Care for the Equipment Owner
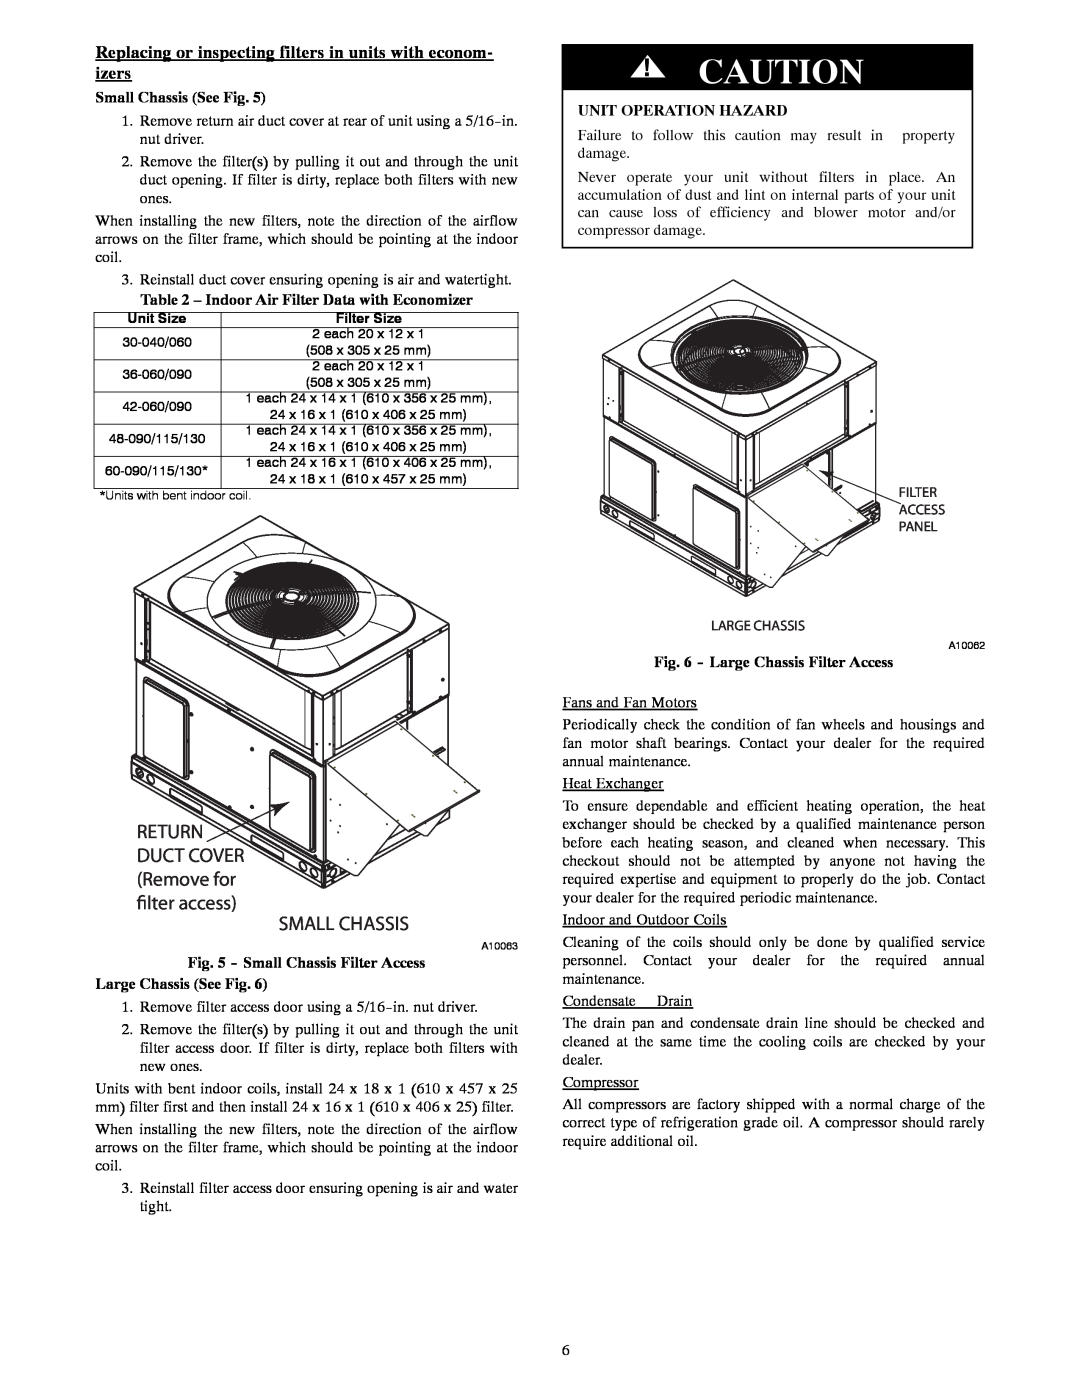
Small Chassis See Fig
filter access SMALL CHASSIS
Fig. 6 - Large Chassis Filter Access
Table 2 - Indoor Air Filter Data with Economizer
EXPLOSION AND ENVIRONMENTAL HAZARD
Regular Dealer Maintenance
PERSONAL INJURY AND UNIT DAMAGE HAZARD
FIRE, EXPLOSION HAZARD
MAIN
MAIN
MAIN
C L O S E
MAIN
Fig. 8 - To Shut-offUnit Gas Heat
C L O S E
Warranty Certificate
Before you call for service
MAIN
Top
Page
Image
Contents