
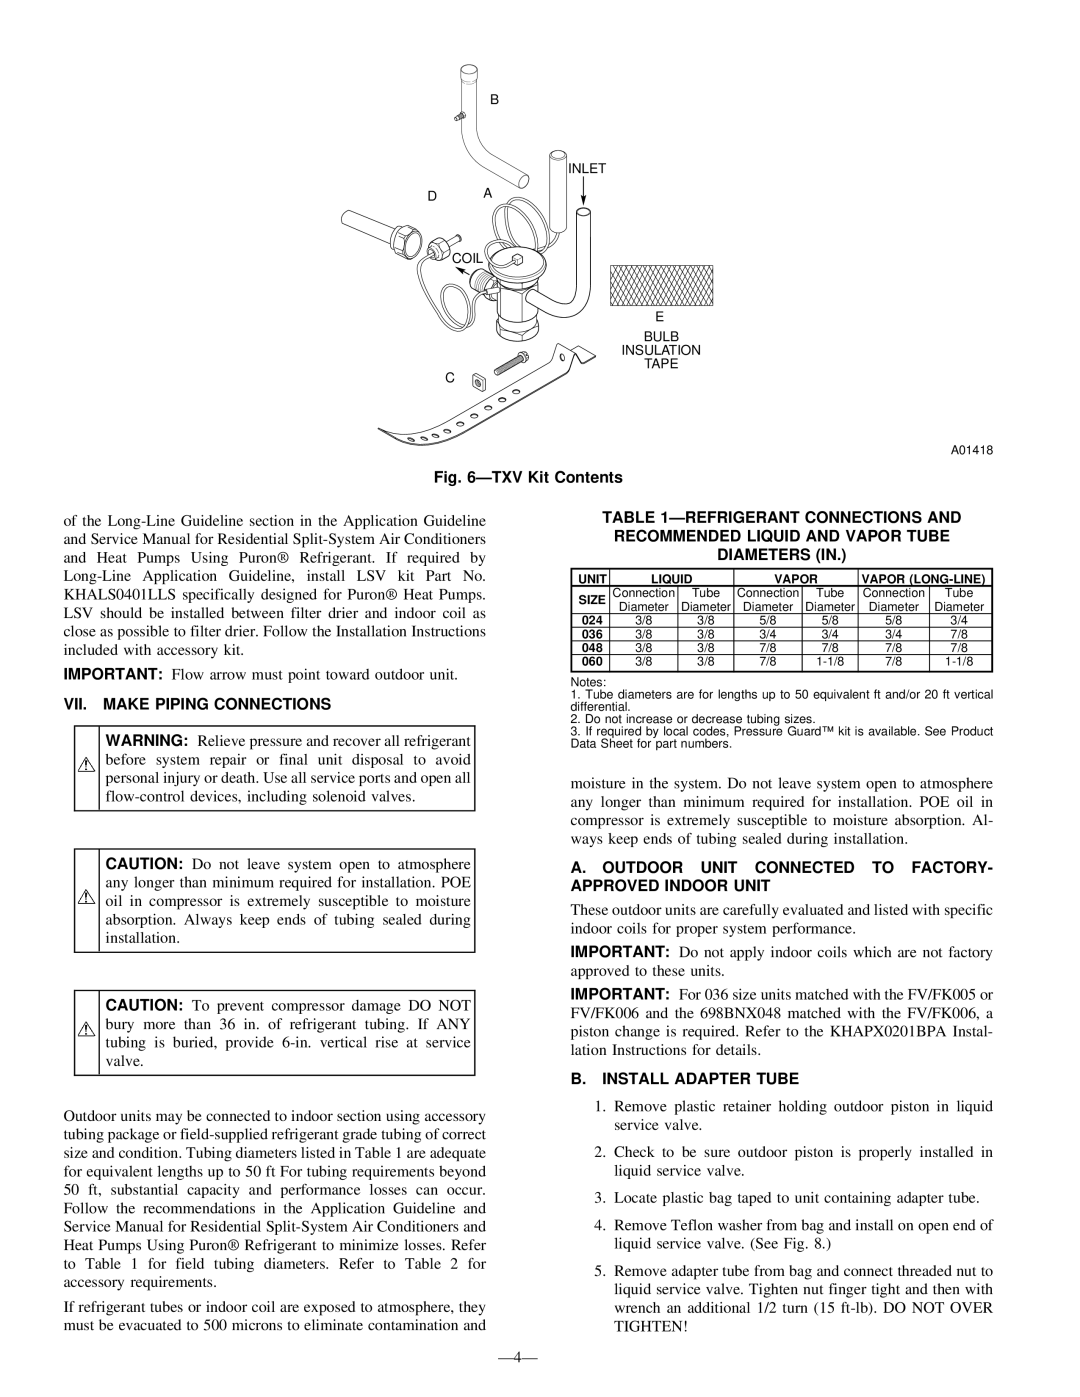
698B specifications
The Bryant 698B is an advanced residential air conditioning unit known for its efficiency and reliability in delivering optimal indoor climate control. Designed for comfort and energy savings, the Bryant 698B is a notable choice for homeowners seeking high-performance cooling solutions.One of its standout features is its impressive Seasonal Energy Efficiency Ratio (SEER) rating, which ranges from 16 to 18, depending on the specific model. This high efficiency helps to reduce energy consumption while providing consistent cooling performance, allowing homeowners to enjoy a comfortable environment without incurring high electricity bills. The unit's efficient operation is recognized by various energy efficiency certifications, helping promote a more sustainable lifestyle.
The Bryant 698B is equipped with a variable-speed compressor, which adjusts its operating speed based on the cooling needs of the home. This technology allows the system to run at lower speeds for longer periods, ensuring a more consistent temperature throughout the space and reducing wear and tear on the system. This also minimizes noise levels, making the Bryant 698B one of the quieter units available today.
In terms of build quality, the Bryant 698B features a durable steel cabinet designed to withstand harsh weather conditions. The unit is treated with a baked-on powder finish that provides corrosion resistance, ensuring its longevity even in challenging environments. Additionally, the coil is designed for easy maintenance, allowing for optimal airflow and ensuring the system runs efficiently.
Smart technology integration is another highlight of the Bryant 698B. The unit can be connected to a smart thermostat, offering homeowners remote access to control their HVAC system from their smartphones. This capability allows for more precise temperature adjustments and scheduling, contributing to enhanced energy savings and increased comfort.
The Bryant 698B also offers various customizable options, including different cooling capacities and compatibility with additional heating systems like heat pumps or gas furnaces. This versatility makes it suitable for a wide range of residential applications.
In summary, the Bryant 698B air conditioning unit stands out due to its energy efficiency, variable-speed compressor, durable construction, smart technology features, and customization options, making it an ideal choice for homeowners looking for a robust and efficient cooling solution.