CHECK THE AIR FILTER
A dirty air filter will cause excessive strain on the compressor and blower motor. This can cause the components to overheat and automatically shut down. In the extreme case, the components will fail and need to be replaced. To avoid inefficient or failed operation of your unit, CHECK THE FILTER(S) EVERY 3 TO 4 WEEKS. Replace filter(s) when necessary, or clean the filter(s) if you have the reusable type.
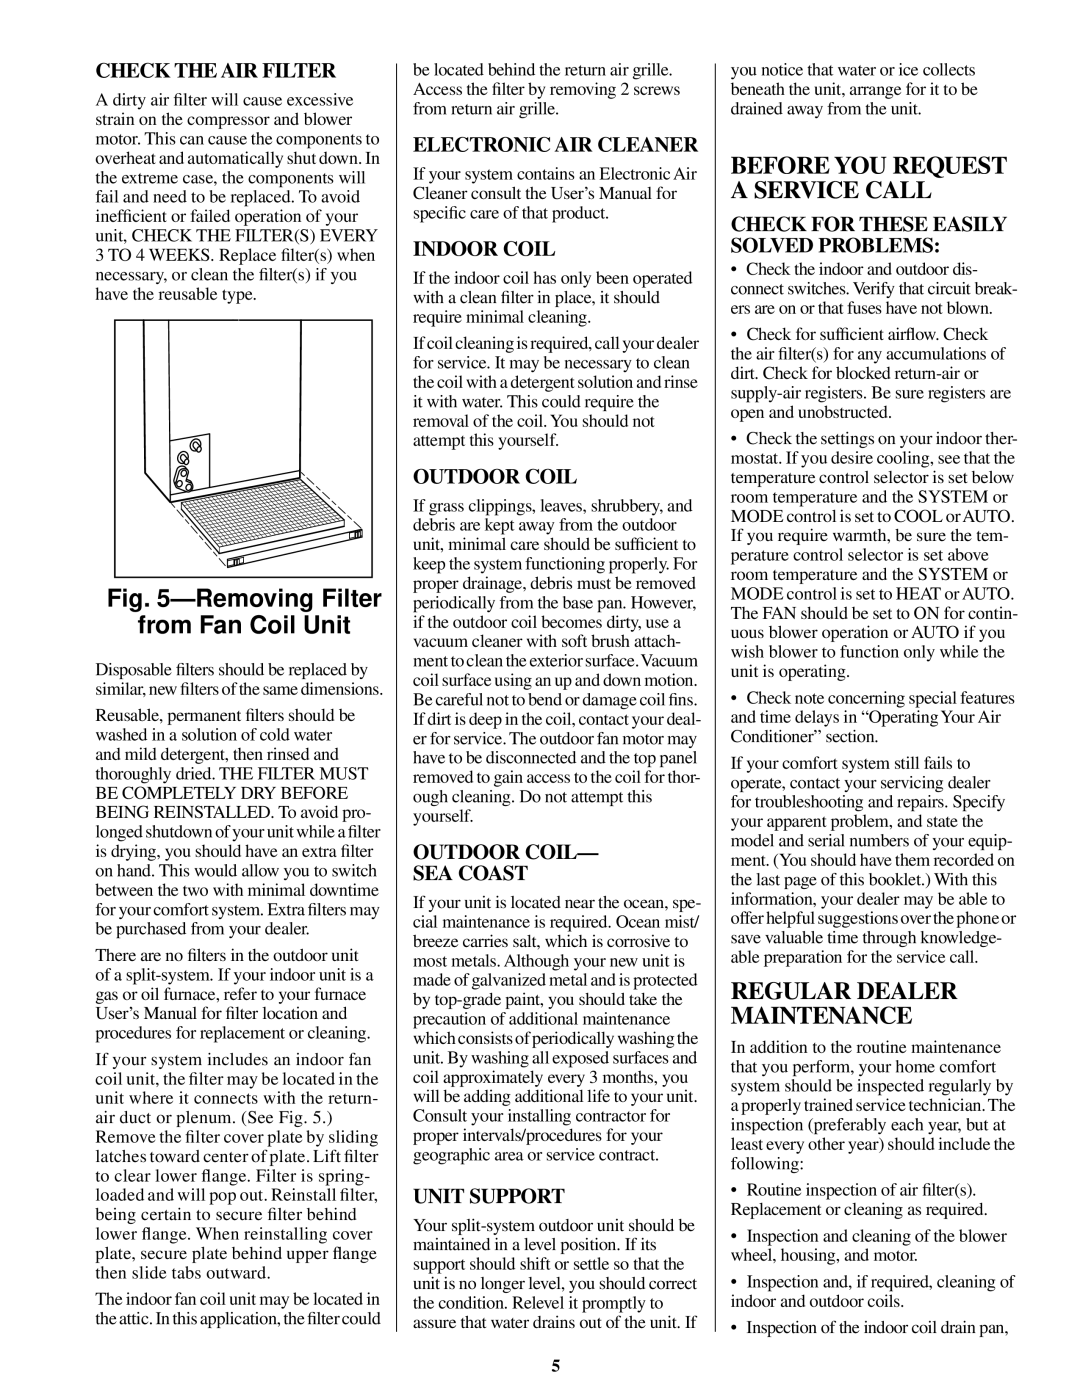
Fig. 5—Removing Filter from Fan Coil Unit
Disposable filters should be replaced by similar, new filters of the same dimensions.
Reusable, permanent filters should be washed in a solution of cold water and mild detergent, then rinsed and thoroughly dried. THE FILTER MUST BE COMPLETELY DRY BEFORE BEING REINSTALLED. To avoid pro- longed shutdown of your unit while a filter is drying, you should have an extra filter on hand. This would allow you to switch between the two with minimal downtime for your comfort system. Extra filters may be purchased from your dealer.
There are no filters in the outdoor unit of a split-system. If your indoor unit is a gas or oil furnace, refer to your furnace User’s Manual for filter location and procedures for replacement or cleaning.
If your system includes an indoor fan coil unit, the filter may be located in the unit where it connects with the return- air duct or plenum. (See Fig. 5.)
Remove the filter cover plate by sliding latches toward center of plate. Lift filter to clear lower flange. Filter is spring- loaded and will pop out. Reinstall filter, being certain to secure filter behind lower flange. When reinstalling cover plate, secure plate behind upper flange then slide tabs outward.
The indoor fan coil unit may be located in the attic. In this application, the filter could
be located behind the return air grille. Access the filter by removing 2 screws from return air grille.
ELECTRONIC AIR CLEANER
If your system contains an Electronic Air Cleaner consult the User’s Manual for specific care of that product.
INDOOR COIL
If the indoor coil has only been operated with a clean filter in place, it should require minimal cleaning.
If coil cleaning is required, call your dealer for service. It may be necessary to clean the coil with a detergent solution and rinse it with water. This could require the removal of the coil. You should not attempt this yourself.
OUTDOOR COIL
If grass clippings, leaves, shrubbery, and debris are kept away from the outdoor unit, minimal care should be sufficient to keep the system functioning properly. For proper drainage, debris must be removed periodically from the base pan. However, if the outdoor coil becomes dirty, use a vacuum cleaner with soft brush attach- ment to clean the exterior surface.Vacuum coil surface using an up and down motion. Be careful not to bend or damage coil fins. If dirt is deep in the coil, contact your deal- er for service. The outdoor fan motor may have to be disconnected and the top panel removed to gain access to the coil for thor- ough cleaning. Do not attempt this yourself.
OUTDOOR COIL—
SEA COAST
If your unit is located near the ocean, spe- cial maintenance is required. Ocean mist/ breeze carries salt, which is corrosive to most metals. Although your new unit is made of galvanized metal and is protected by top-grade paint, you should take the precaution of additional maintenance which consists of periodically washing the unit. By washing all exposed surfaces and coil approximately every 3 months, you will be adding additional life to your unit. Consult your installing contractor for proper intervals/procedures for your geographic area or service contract.
UNIT SUPPORT
Your split-system outdoor unit should be maintained in a level position. If its support should shift or settle so that the unit is no longer level, you should correct the condition. Relevel it promptly to assure that water drains out of the unit. If
5
you notice that water or ice collects beneath the unit, arrange for it to be drained away from the unit.
BEFORE YOU REQUEST A SERVICE CALL
CHECK FOR THESE EASILY SOLVED PROBLEMS:
•Check the indoor and outdoor dis- connect switches. Verify that circuit break- ers are on or that fuses have not blown.
•Check for sufficient airflow. Check
the air filter(s) for any accumulations of dirt. Check for blocked return-air or supply-air registers. Be sure registers are open and unobstructed.
•Check the settings on your indoor ther- mostat. If you desire cooling, see that the temperature control selector is set below room temperature and the SYSTEM or MODE control is set to COOL or AUTO. If you require warmth, be sure the tem- perature control selector is set above room temperature and the SYSTEM or MODE control is set to HEAT or AUTO. The FAN should be set to ON for contin- uous blower operation or AUTO if you wish blower to function only while the unit is operating.
•Check note concerning special features and time delays in “Operating Your Air Conditioner” section.
If your comfort system still fails to operate, contact your servicing dealer for troubleshooting and repairs. Specify your apparent problem, and state the model and serial numbers of your equip- ment. (You should have them recorded on the last page of this booklet.) With this information, your dealer may be able to offer helpful suggestions over the phone or save valuable time through knowledge- able preparation for the service call.
REGULAR DEALER MAINTENANCE
In addition to the routine maintenance that you perform, your home comfort system should be inspected regularly by a properly trained service technician. The inspection (preferably each year, but at least every other year) should include the following:
•Routine inspection of air filter(s). Replacement or cleaning as required.
•Inspection and cleaning of the blower wheel, housing, and motor.
•Inspection and, if required, cleaning of indoor and outdoor coils.
•Inspection of the indoor coil drain pan,