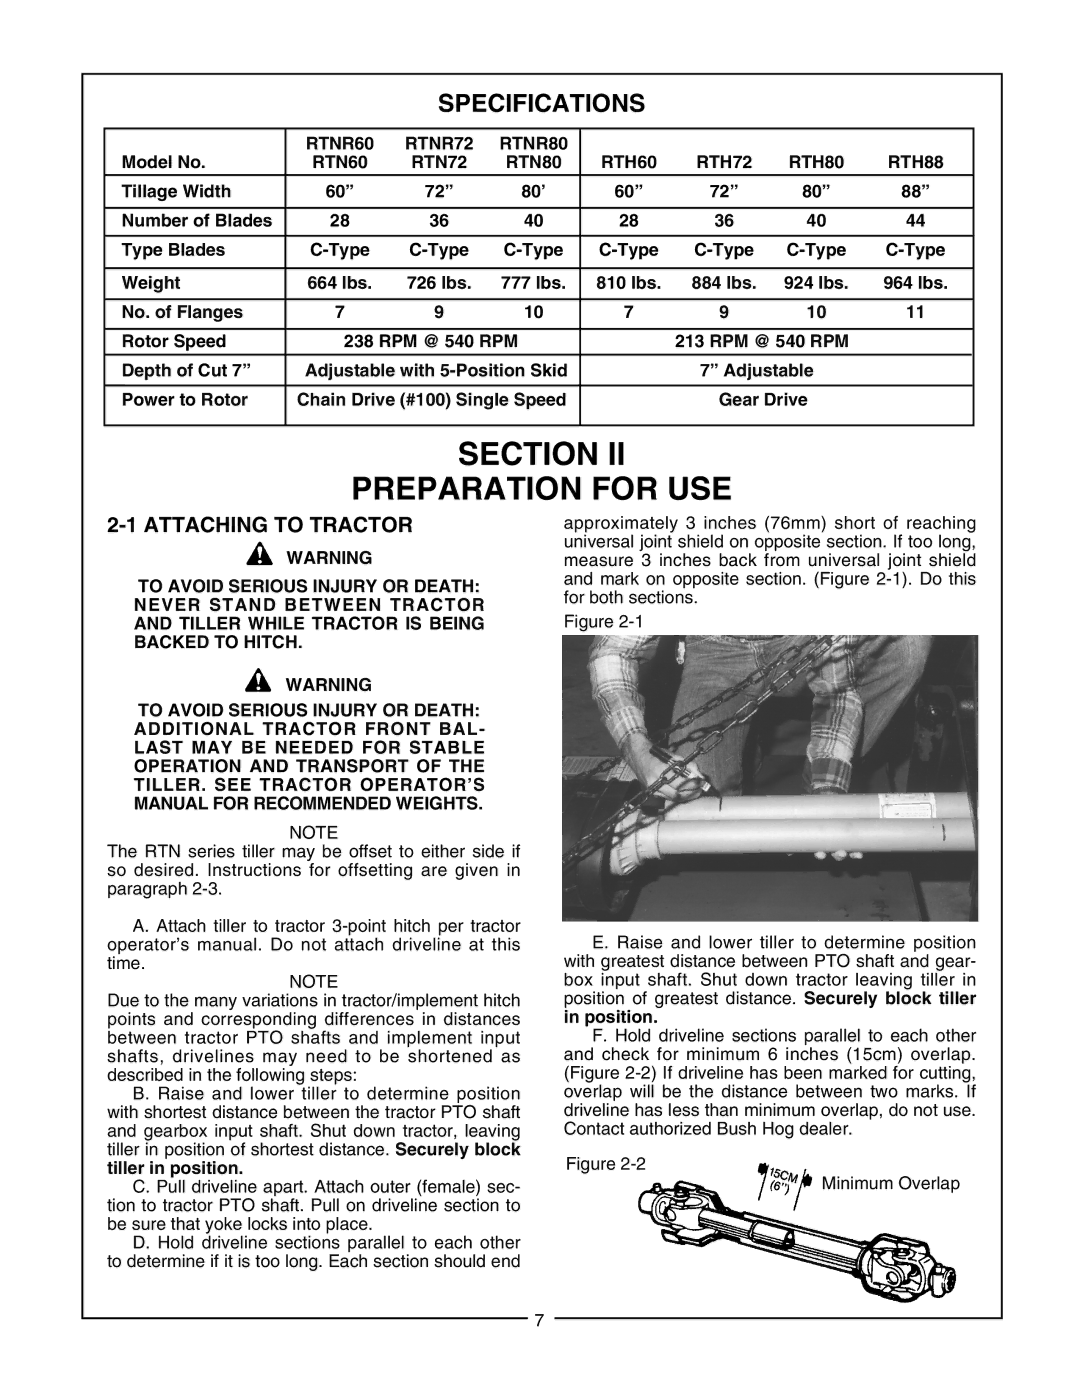
RTNR, RTH, RTN specifications
Bush Hog is a name synonymous with durable and efficient land management equipment, especially known for their rotary cutters and mowers. Among their impressive line-up, the Bush Hog RTNR, RTN, and RTH series stand out as robust solutions for farmers, landscapers, and property owners who require reliable performance for managing grass and brush in various terrains.The Bush Hog RTNR series is specifically engineered for larger tractors, providing a cutting width of up to 15 feet, making it ideal for expansive fields and meadows. This series boasts a unique design that allows for efficient grass and brush cutting while ensuring that the operator can maintain control over the machine in challenging environments. The RTNR models feature heavy-duty construction, with reinforced frames and high-strength steel components, ensuring longevity and resistance against wear and tear.
The RTN series is designed for lighter-duty applications, ideal for compact and utility tractors. With cutting widths ranging from 4 to 7 feet, these models strike a perfect balance between size and maneuverability, making them suitable for residential properties, parks, and smaller agricultural landscapes. The RTN series incorporates advanced technologies such as a quick-change blade system, enabling operators to replace blades with ease, minimizing downtime and maximizing productivity.
On the other hand, the RTH series focuses on versatility and operator comfort. These models are equipped with innovative features such as adjustable cutting heights, allowing users to select the best height for their specific mowing needs. The RTH series also includes a floating deck design, which enhances ground-following capabilities, resulting in a more even cut across uneven terrain.
In terms of technology, all three series incorporate precision-engineered gearboxes and drivetrains, ensuring smooth operation even under heavy loads. The machines are designed with safety features like shielded drive components and access panels for easy maintenance without compromising safety.
In summary, the Bush Hog RTNR, RTN, and RTH series present an outstanding array of features tailored to meet diverse mowing requirements. Their robust construction, innovative technologies, and user-friendly design make them a valuable investment for anyone looking to maintain their land efficiently and effectively while ensuring a professional cut every time.

