Savannah Rectangle Gazebo Assembly
Step 2: Roof Frame Assembly
When assembling the roof frame, it is recommended that you lay everything out and assemble it on a flat surface. It is also recommended that there be another person available when installing the roof frame on to the gazebo walls.
Check the parts list that came with your gazebo and make sure that all the parts are present. Also, please follow the written steps in conjunction with the figures that are shown.
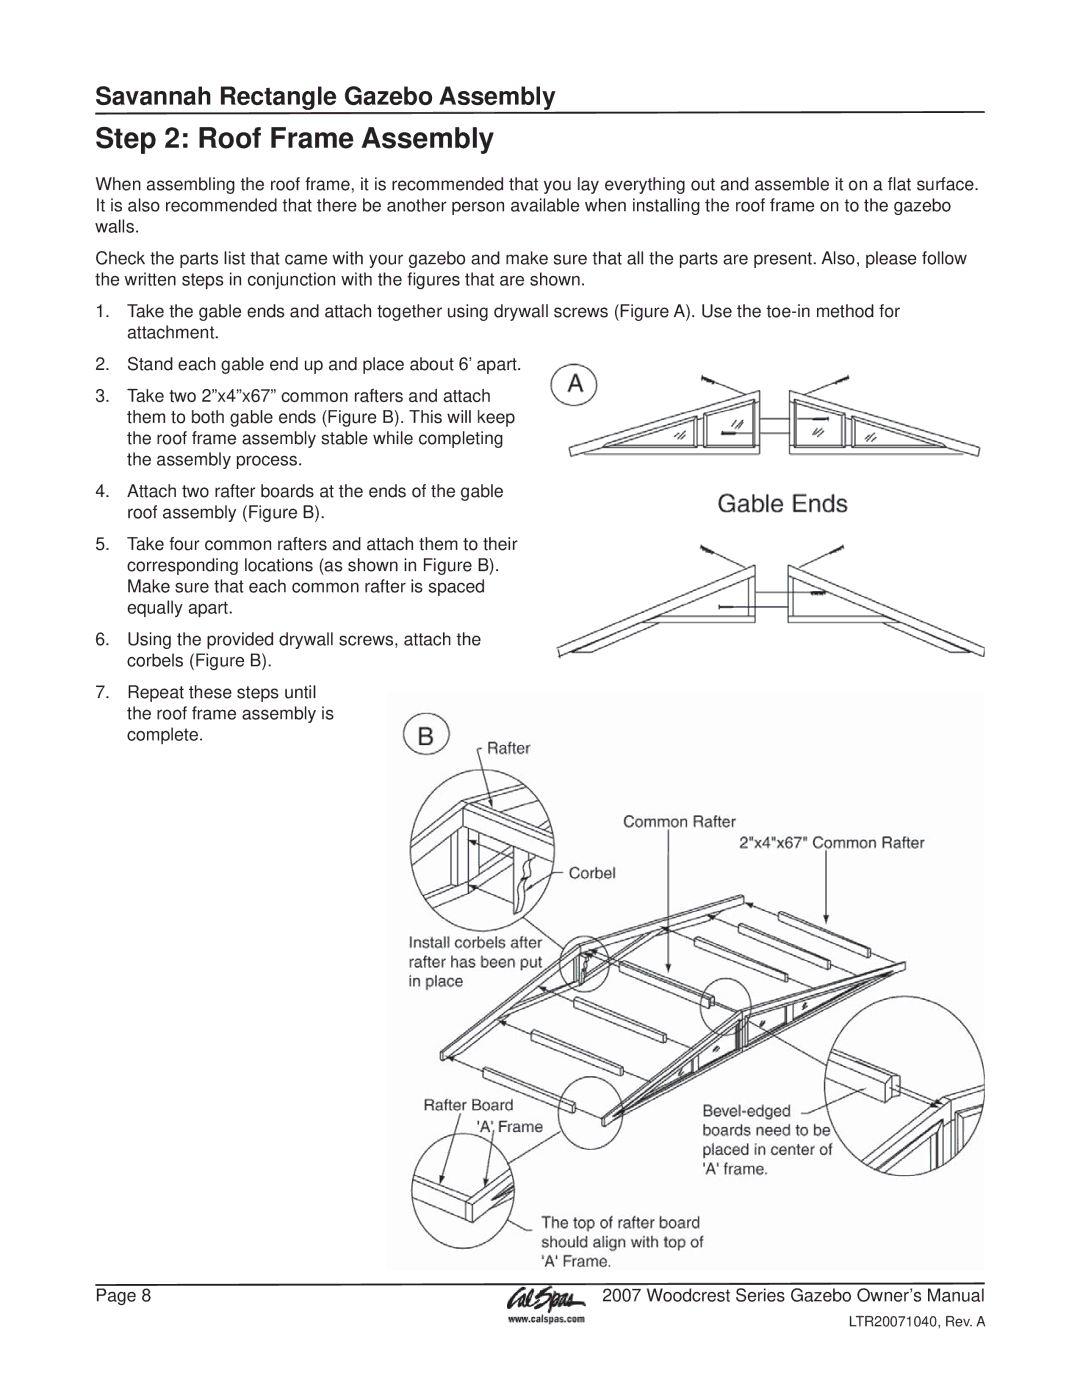
1.Take the gable ends and attach together using drywall screws (Figure A). Use the
2.Stand each gable end up and place about 6’ apart.
3.Take two 2”x4”x67” common rafters and attach them to both gable ends (Figure B). This will keep the roof frame assembly stable while completing the assembly process.
4.Attach two rafter boards at the ends of the gable roof assembly (Figure B).
5.Take four common rafters and attach them to their corresponding locations (as shown in Figure B). Make sure that each common rafter is spaced equally apart.
6.Using the provided drywall screws, attach the corbels (Figure B).
7.Repeat these steps until the roof frame assembly is complete.
Page 8 | 2007 Woodcrest Series Gazebo Owner’s Manual |
LTR20071040, Rev. A