Manual de Instrucciones & Lista de Repuestos
Model EZ111A
Guía de Diagnóstico de Averías
Problema | Posible(s) Causa(s) | Acción a tomar |
|
|
|
Set-Up (Cont.)
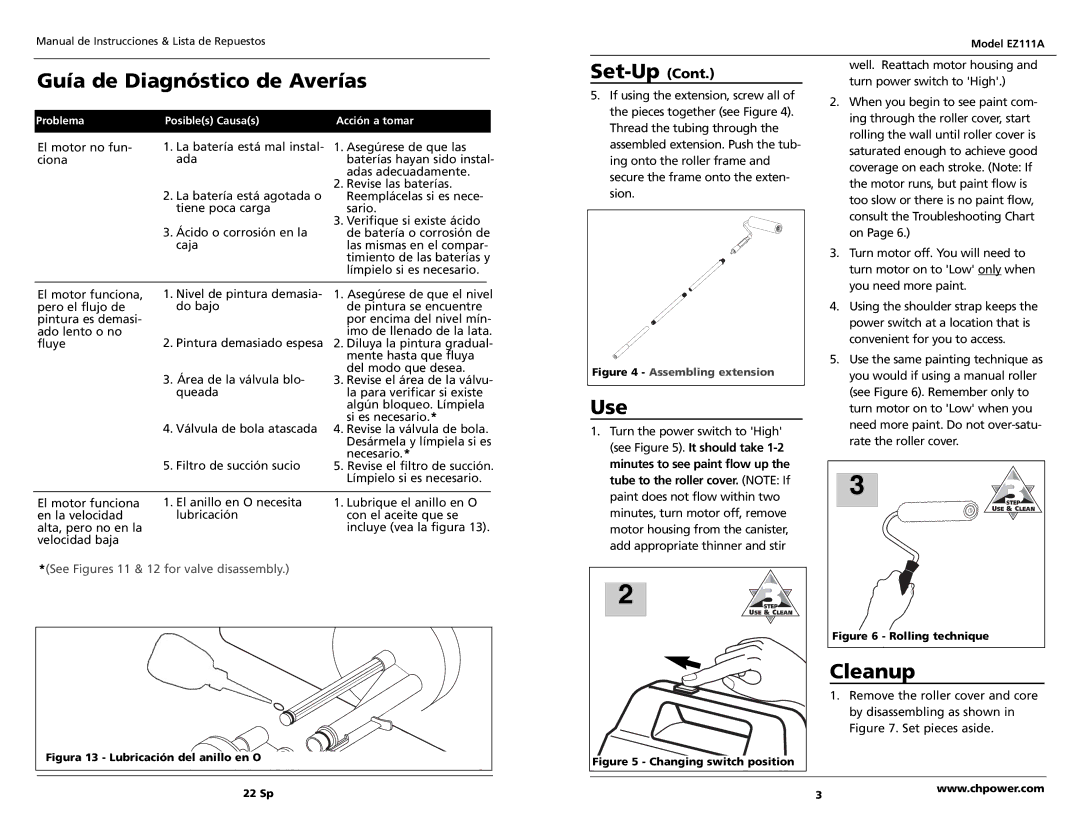
5. If using the extension, screw all of |
the pieces together (see Figure 4). |
Thread the tubing through the |
well. Reattach motor housing and turn power switch to 'High'.)
2. When you begin to see paint com- |
ing through the roller cover, start |
rolling the wall until roller cover is |
El motor no fun- ciona
1.La batería está mal instal- ada
2.La batería está agotada o tiene poca carga
3.Ácido o corrosión en la caja
1.Asegúrese de que las baterías hayan sido instal- adas adecuadamente.
2.Revise las baterías. Reemplácelas si es nece- sario.
3.Verifique si existe ácido de batería o corrosión de las mismas en el compar- timiento de las baterías y límpielo si es necesario.
assembled extension. Push the tub- |
ing onto the roller frame and |
secure the frame onto the exten- |
sion. |
saturated enough to achieve good |
coverage on each stroke. (Note: If |
the motor runs, but paint flow is |
too slow or there is no paint flow, |
consult the Troubleshooting Chart |
on Page 6.) |
3. Turn motor off. You will need to |
turn motor on to 'Low' only when |
you need more paint. |
El motor funciona, pero el flujo de pintura es demasi- ado lento o no fluye
1.Nivel de pintura demasia- do bajo
2.Pintura demasiado espesa
3.Área de la válvula blo- queada
4.Válvula de bola atascada
5.Filtro de succión sucio
1.Asegúrese de que el nivel de pintura se encuentre por encima del nivel mín- imo de llenado de la lata.
2.Diluya la pintura gradual- mente hasta que fluya del modo que desea.
3.Revise el área de la válvu- la para verificar si existe algún bloqueo. Límpiela si es necesario.*
4.Revise la válvula de bola. Desármela y límpiela si es necesario.*
5.Revise el filtro de succión. Límpielo si es necesario.
Figure 4 - Assembling extension
Use
1. Turn the power switch to 'High' |
(see Figure 5). It should take |
minutes to see paint flow up the |
tube to the roller cover. (NOTE: If |
paint does not flow within two |
4. | Using the shoulder strap keeps the |
| power switch at a location that is |
| convenient for you to access. |
5. | Use the same painting technique as |
| you would if using a manual roller |
| (see Figure 6). Remember only to |
| turn motor on to 'Low' when you |
| need more paint. Do not |
| rate the roller cover. |
3 | 3 |
El motor funciona | 1. El anillo en O necesita | 1. Lubrique el anillo en O |
en la velocidad | lubricación | con el aceite que se |
alta, pero no en la |
| incluye (vea la figura 13). |
velocidad baja |
|
|
*(See Figures 11 & 12 for valve disassembly.)
Figura 13 - Lubricación del anillo en O
minutes, turn motor off, remove |
motor housing from the canister, |
add appropriate thinner and stir |
2 | STEP |
USE | 3& CLEAN |
Figure 5 - Changing switch position | |
STEPSTEP |
USE & CLEAN |
Figure 6 - Rolling technique |
Cleanup
1.Remove the roller cover and core by disassembling as shown in Figure 7. Set pieces aside.
22 Sp | 3 | www.chpower.com |
|