Electronic Clock & Automatic Cooking Feature

AUTOMATIC COOKING

HINTS ON AUTOMATIC COOKING

SETTINGTHE TIME OF DAY:

When you first switch on the appliance you will be prompted to set the “Time of Day” on the display.You must ensure you have done this before attempting to use the automatic cooking feature.

The 1st oven can be controlled automatically.

-Select food which will require the same cooking time and temperature.

-To ensure food does not cool down and require reheating, set the end time so the food is ready when you require it.

-Always ensure that meat and poultry is defrosted before placing in the oven.

-Whenever possible, take food out of the refrigerator and keep it as cool as possible.

-If cooking food that requires frying before placing in the oven for automatic cooking, keep the delay time to a minimum.

-Never place hot or warm food in the oven for delayed start cooking as it could cause the oven to be warm and produce harmful bacteria in the food.

-We advise that dishes containing left-over cooked poultry and meat, eg. shepherds pie, should not be cooked automatically if there is to be a delay period.

-Ensure that delay start times are kept to a minimum to prevent bacterial growth in food.

-Wine or beer may ferment and cream may curdle during the delay period, so it is best to add these ingredients just before serving.

-Foods which discolour should be protected by coating in fat or tossing in water to which lemon juice has been added, prior to placing food in the oven.

-Dishes containing liquid should not be filled too full to prevent boiling over.

-Food should be well sealed (but not airtight) in a container to prevent the loss of liquid during cooking. Aluminium foil gives a good seal.

-Always ensure that food is piping hot and cooked thoroughly before serving.

-Only reheat food once.

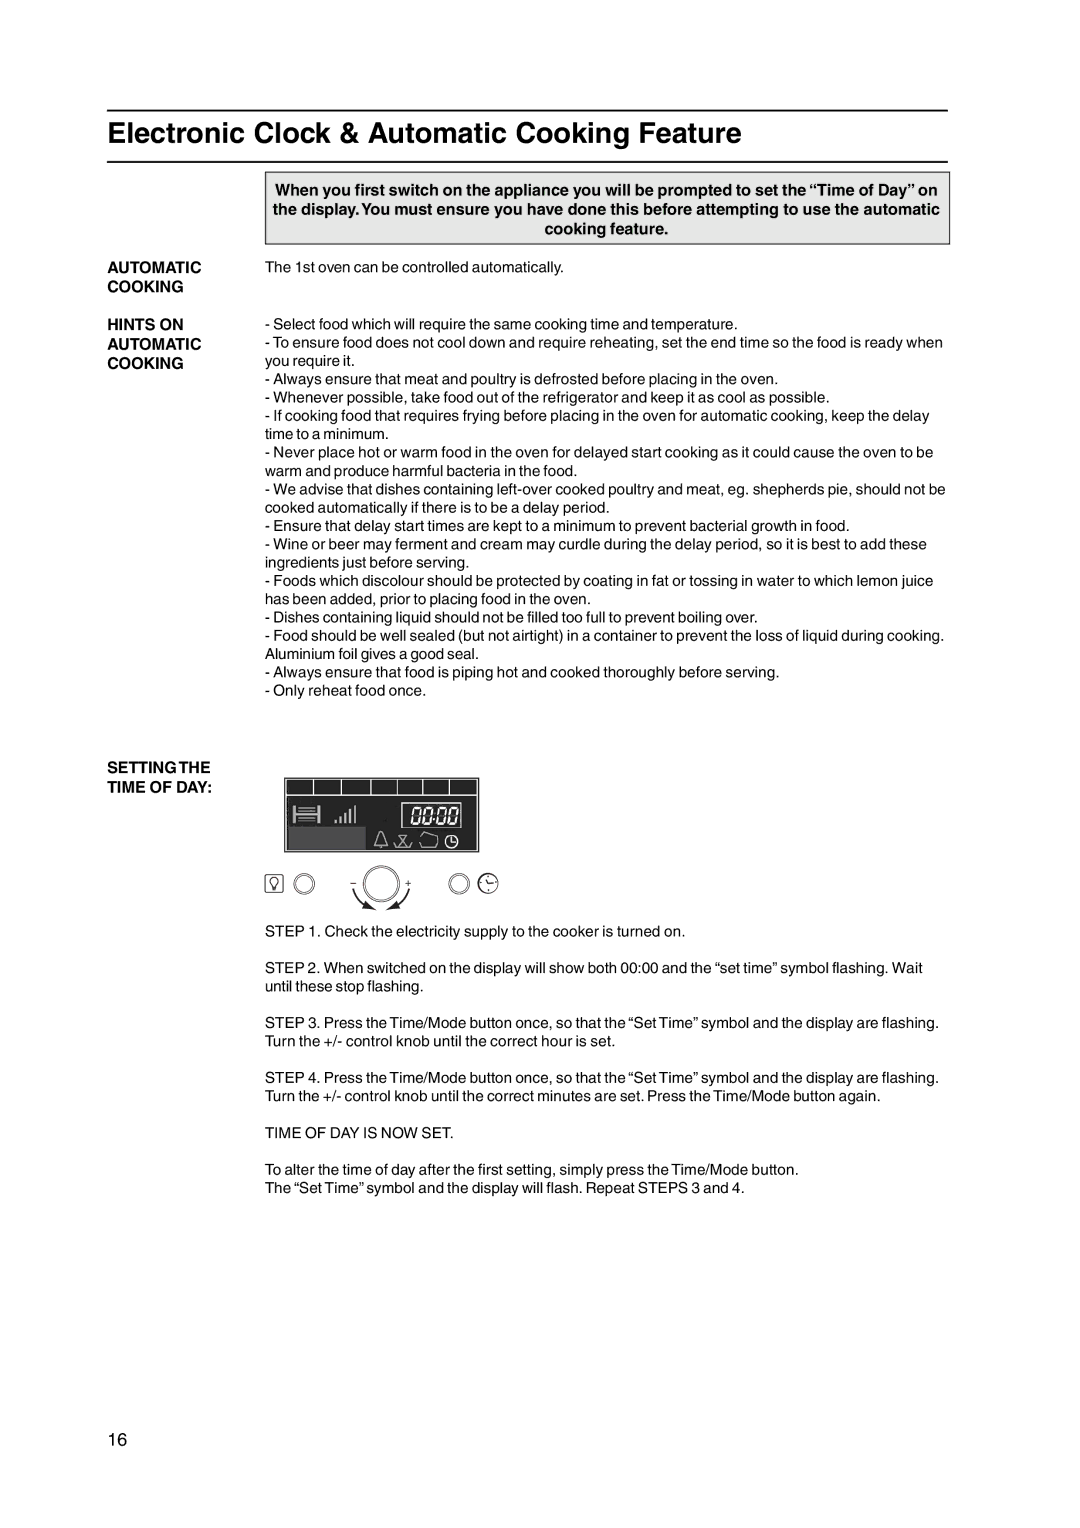
STEP 1. Check the electricity supply to the cooker is turned on.

STEP 2. When switched on the display will show both 00:00 and the “set time” symbol flashing. Wait until these stop flashing.

STEP 3. Press the Time/Mode button once, so that the “Set Time” symbol and the display are flashing. Turn the +/- control knob until the correct hour is set.

STEP 4. Press the Time/Mode button once, so that the “Set Time” symbol and the display are flashing. Turn the +/- control knob until the correct minutes are set. Press the Time/Mode button again.

TIME OF DAY IS NOW SET.

To alter the time of day after the first setting, simply press the Time/Mode button. The “Set Time” symbol and the display will flash. Repeat STEPS 3 and 4.

16

Page 16
Image 16
Cannon C110DPX manual Electronic Clock & Automatic Cooking Feature, Time of DAY is NOW SET

C110DPX specifications

The Cannon C110DPX is a powerful and versatile digital projector designed for a wide range of applications. Known for its outstanding image quality and advanced features, the C110DPX has become a popular choice for businesses, educational institutions, and event venues.

One of the standout features of the Cannon C110DPX is its exceptional brightness. With a luminous output of up to 10,000 ANSI lumens, this projector can easily deliver clear and vibrant images even in well-lit environments. This makes it ideal for use in conference rooms, classrooms, and large auditoriums. The projector supports a wide range of resolutions, including Full HD and 4K, ensuring that users can enjoy stunning visuals regardless of their content.

The C110DPX employs advanced DLP technology, which contributes to its impressive color reproduction and sharpness. With a high contrast ratio, this projector can produce deep blacks and brilliant whites, allowing for better detail in both bright and dark scenes. This technology ensures that presentations, videos, and images are displayed with remarkable clarity and fidelity.

Portability is another key characteristic of the Cannon C110DPX. Weighing in at a manageable size, it is designed for easy transportation, making it suitable for both fixed and mobile setups. Additionally, the projector features a variety of connectivity options, including HDMI, DisplayPort, and USB, ensuring compatibility with a wide array of devices. This flexibility allows users to connect laptops, tablets, and smartphones with ease.

The C110DPX also incorporates intelligent networking capabilities, allowing for seamless integration into existing IT infrastructures. This connectivity allows for remote management and monitoring, making it easier for IT professionals to maintain and troubleshoot the device without being physically present. With built-in network features, users can control the projector via a web interface or through various control systems.

Furthermore, the Cannon C110DPX emphasizes energy efficiency. It is equipped with features that help reduce power consumption without compromising performance, making it an environmentally friendly choice.

In conclusion, the Cannon C110DPX digital projector stands out for its exceptional brightness, advanced DLP technology, portability, extensive connectivity options, intelligent networking capabilities, and energy efficiency. These features make it an excellent choice for anyone looking to deliver high-quality presentations in a variety of settings. Whether for corporate events, educational purposes, or entertainment, the C110DPX is sure to meet and exceed user expectations.