4.7 Mounting the flashlight in the housing
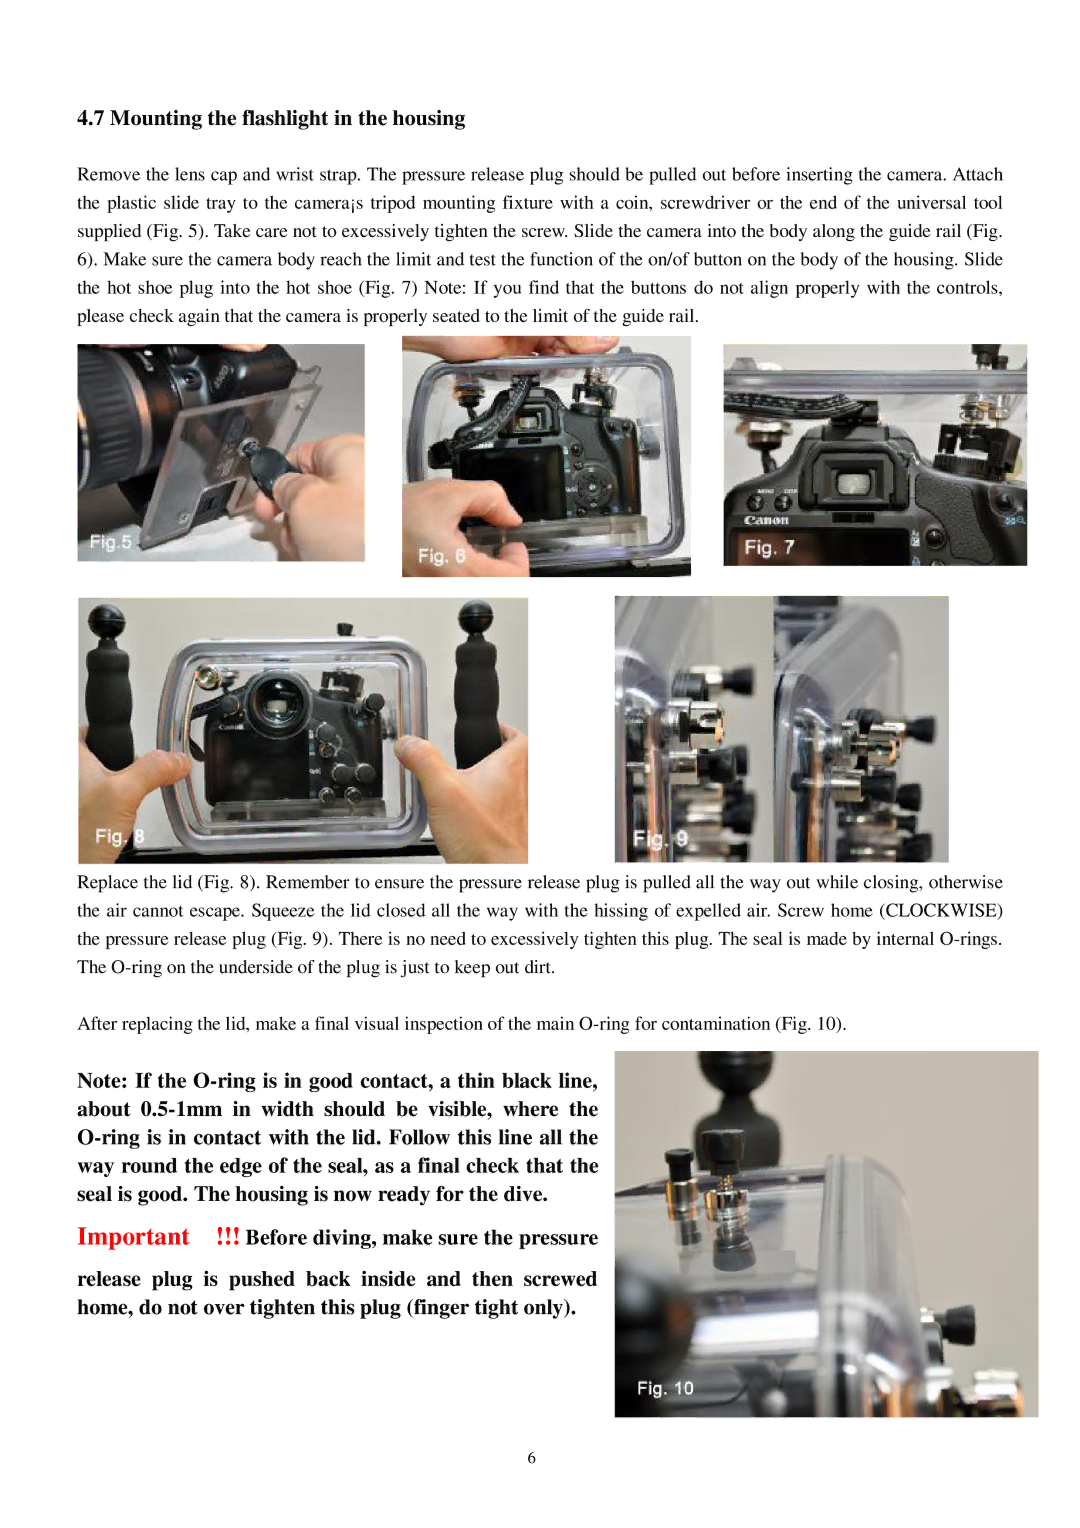
Remove the lens cap and wrist strap. The pressure release plug should be pulled out before inserting the camera. Attach the plastic slide tray to the camera¡s tripod mounting fixture with a coin, screwdriver or the end of the universal tool supplied (Fig. 5). Take care not to excessively tighten the screw. Slide the camera into the body along the guide rail (Fig. 6). Make sure the camera body reach the limit and test the function of the on/of button on the body of the housing. Slide the hot shoe plug into the hot shoe (Fig. 7) Note: If you find that the buttons do not align properly with the controls, please check again that the camera is properly seated to the limit of the guide rail.
Replace the lid (Fig. 8). Remember to ensure the pressure release plug is pulled all the way out while closing, otherwise the air cannot escape. Squeeze the lid closed all the way with the hissing of expelled air. Screw home (CLOCKWISE) the pressure release plug (Fig. 9). There is no need to excessively tighten this plug. The seal is made by internal
After replacing the lid, make a final visual inspection of the main
Note: If the
Important !!! Before diving, make sure the pressure
release plug is pushed back inside and then screwed home, do not over tighten this plug (finger tight only).
6
