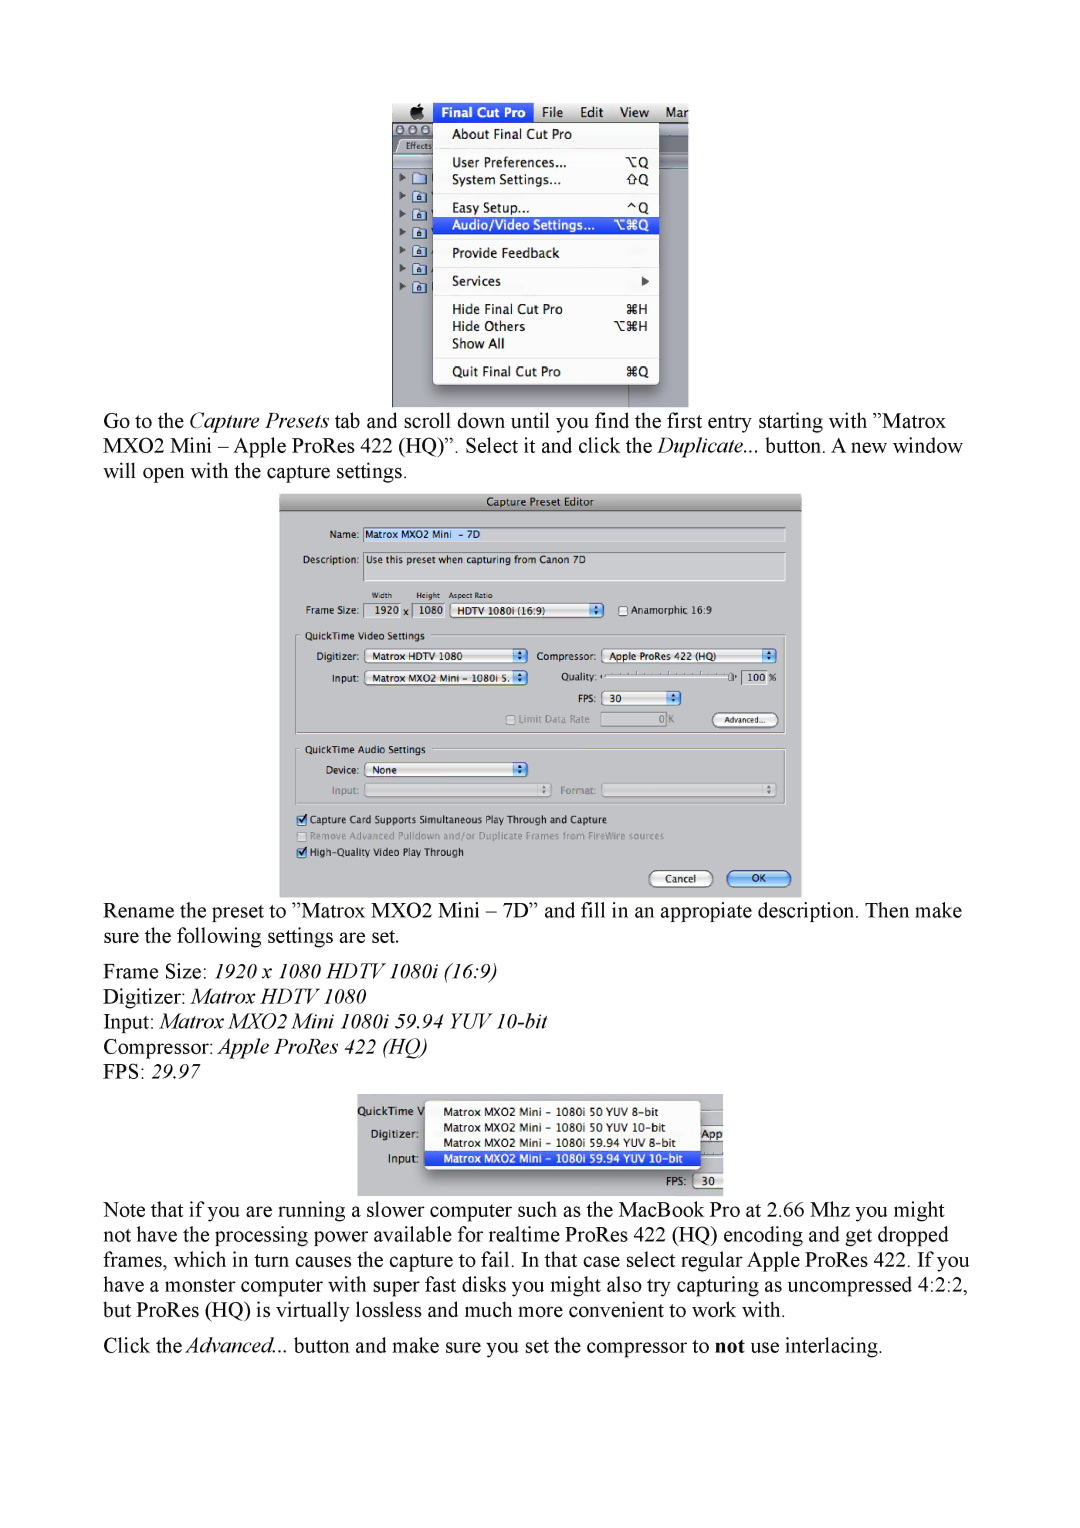
Go to the Capture Presets tab and scroll down until you find the first entry starting with ”Matrox MXO2 Mini – Apple ProRes 422 (HQ)”. Select it and click the Duplicate... button. A new window will open with the capture settings.
Rename the preset to ”Matrox MXO2 Mini – 7D” and fill in an appropiate description. Then make sure the following settings are set.
Frame Size: 1920 x 1080 HDTV 1080i (16:9)
Digitizer: Matrox HDTV 1080
Input: Matrox MXO2 Mini 1080i 59.94 YUV
Compressor: Apple ProRes 422 (HQ)
FPS: 29.97
Note that if you are running a slower computer such as the MacBook Pro at 2.66 Mhz you might not have the processing power available for realtime ProRes 422 (HQ) encoding and get dropped frames, which in turn causes the capture to fail. In that case select regular Apple ProRes 422. If you have a monster computer with super fast disks you might also try capturing as uncompressed 4:2:2, but ProRes (HQ) is virtually lossless and much more convenient to work with.
Click the Advanced... button and make sure you set the compressor to not use interlacing.
