5. Warming Internal Components and Cups
Before making espresso, it is important to
a)Turn on machine.
b)Set the function switch to Coffee/Hot Water.
c)Fill the water container with fresh, cold water and place in appliance.
d)Insert the porta filter, without coffee and lock into place.
e)Place one or two cups underneath the porta filer.
f)After the green ready light illuminates, turn the Control Dial to the right to the
g)Turn the Control Dial back to the 0 position to stop the flow.
h)Empty the cups, remove the Porta Filter.
TIP! Place espresso cups upside down on the warming plate to keep them warm. As long as the machine is on, the internal heater will keep the top plate warm.
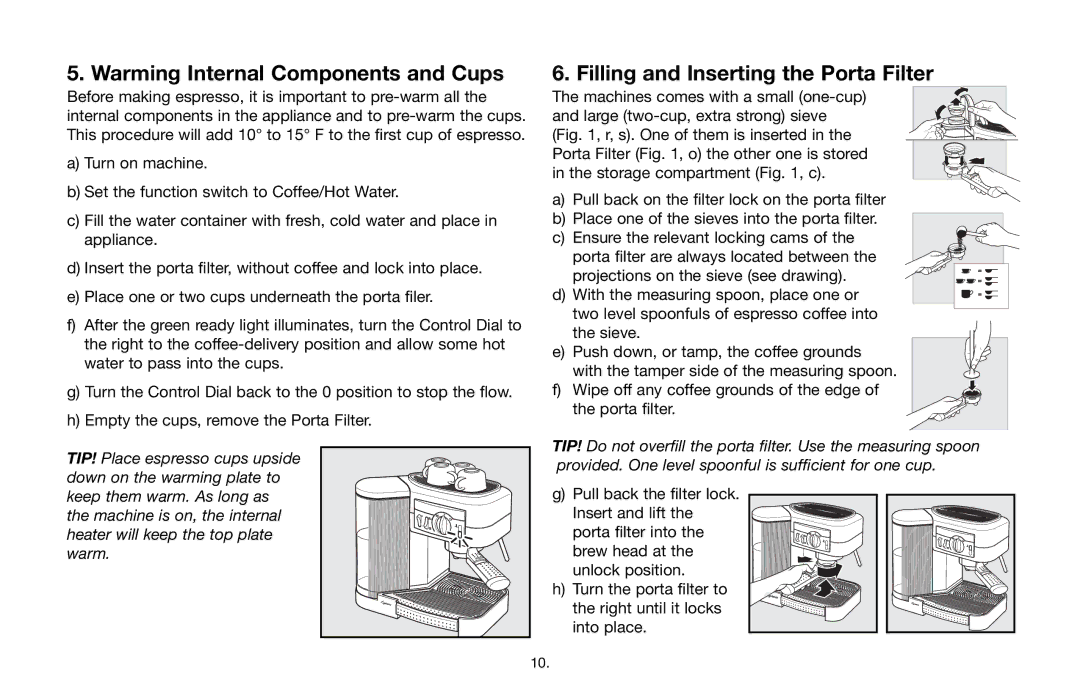
6. Filling and Inserting the Porta Filter
The machines comes with a small
a) Pull back on the filter lock on the porta filter b) Place one of the sieves into the porta filter. c) Ensure the relevant locking cams of the
porta filter are always located between the projections on the sieve (see drawing).
d) With the measuring spoon, place one or two level spoonfuls of espresso coffee into
the sieve.
e) Push down, or tamp, the coffee grounds with the tamper side of the measuring spoon.
f) Wipe off any coffee grounds of the edge of the porta filter.
TIP! Do not overfill the porta filter. Use the measuring spoon provided. One level spoonful is sufficient for one cup.
g) Pull back the filter lock. Insert and lift the porta filter into the brew head at the unlock position.
h) Turn the porta filter to the right until it locks into place.
10.