Mobile PDA Cradle

CMPC-41 PalmOne Universal 16 Pins Connector

Installing the Mobile PDA Cradle

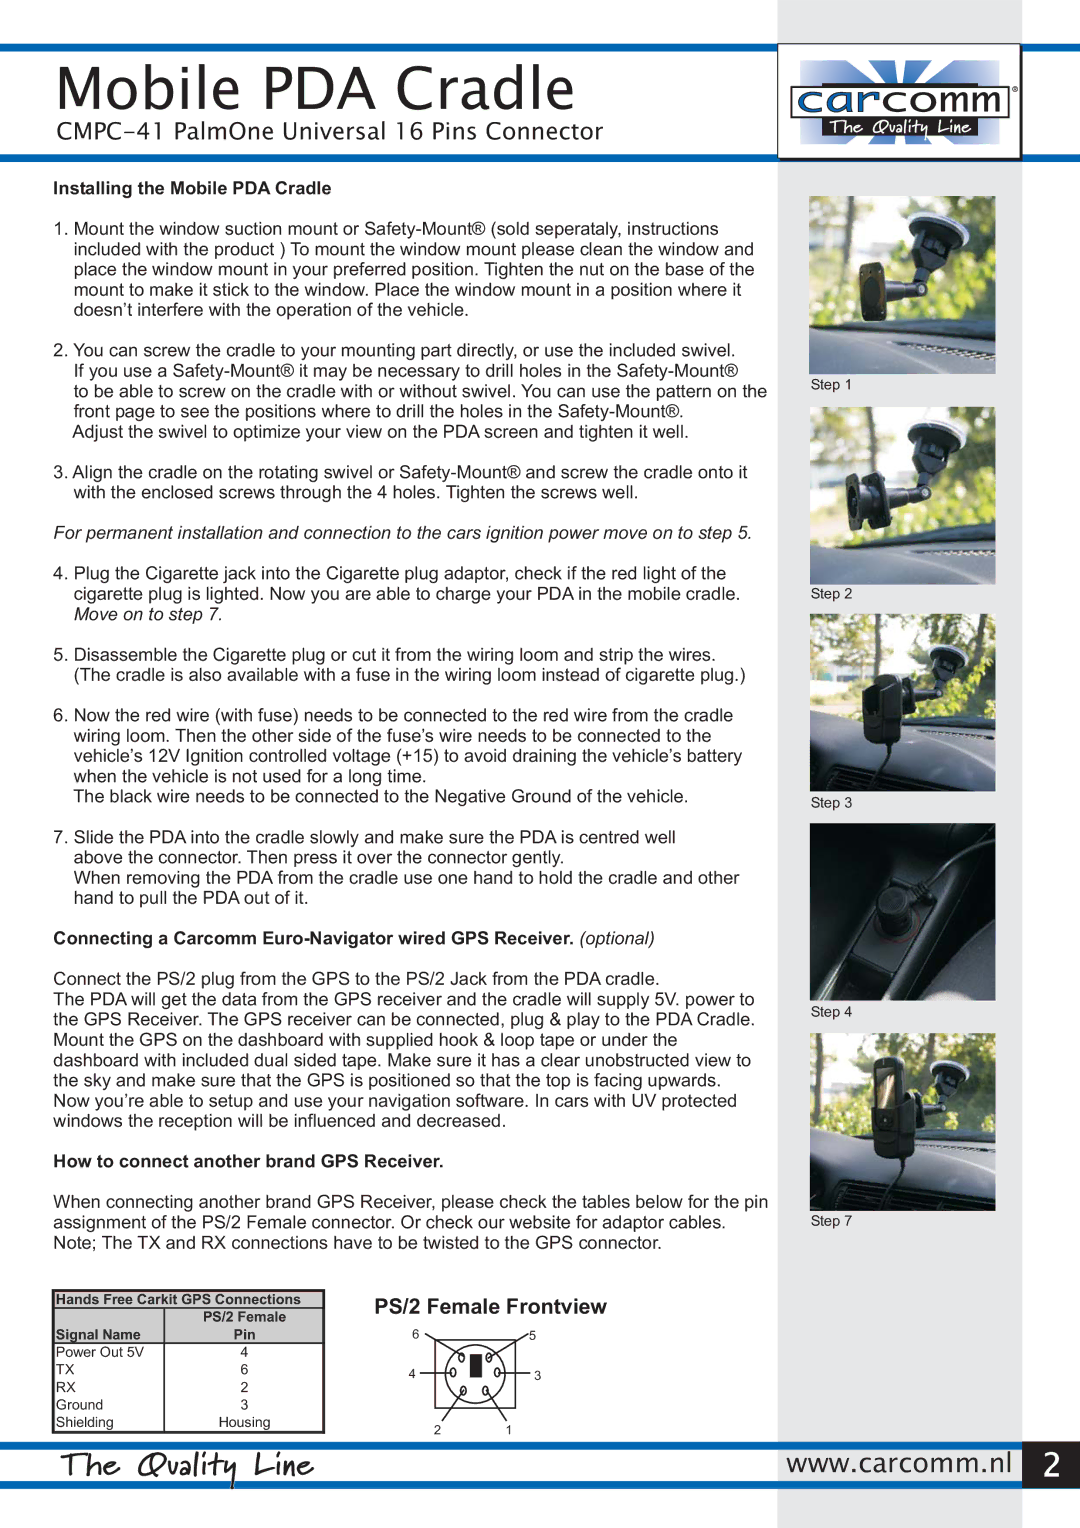
1.Mount the window suction mount or Safety-Mount® (sold seperataly, instructions included with the product ) To mount the window mount please clean the window and place the window mount in your preferred position. Tighten the nut on the base of the mount to make it stick to the window. Place the window mount in a position where it doesn’t interfere with the operation of the vehicle.

2.You can screw the cradle to your mounting part directly, or use the included swivel. If you use a Safety-Mount® it may be necessary to drill holes in the Safety-Mount®

to be able to screw on the cradle with or without swivel. You can use the pattern on the front page to see the positions where to drill the holes in the Safety-Mount®.

Adjust the swivel to optimize your view on the PDA screen and tighten it well.

3.Align the cradle on the rotating swivel or Safety-Mount® and screw the cradle onto it with the enclosed screws through the 4 holes. Tighten the screws well.

For permanent installation and connection to the cars ignition power move on to step 5.

4.Plug the Cigarette jack into the Cigarette plug adaptor, check if the red light of the cigarette plug is lighted. Now you are able to charge your PDA in the mobile cradle. Move on to step 7.

5.Disassemble the Cigarette plug or cut it from the wiring loom and strip the wires. (The cradle is also available with a fuse in the wiring loom instead of cigarette plug.)

6.Now the red wire (with fuse) needs to be connected to the red wire from the cradle wiring loom. Then the other side of the fuse’s wire needs to be connected to the vehicle’s 12V Ignition controlled voltage (+15) to avoid draining the vehicle’s battery when the vehicle is not used for a long time.

The black wire needs to be connected to the Negative Ground of the vehicle.

7.Slide the PDA into the cradle slowly and make sure the PDA is centred well above the connector. Then press it over the connector gently.

When removing the PDA from the cradle use one hand to hold the cradle and other hand to pull the PDA out of it.

Connecting a Carcomm Euro-Navigator wired GPS Receiver. (optional)

Connect the PS/2 plug from the GPS to the PS/2 Jack from the PDA cradle.

The PDA will get the data from the GPS receiver and the cradle will supply 5V. power to the GPS Receiver. The GPS receiver can be connected, plug & play to the PDA Cradle. Mount the GPS on the dashboard with supplied hook & loop tape or under the dashboard with included dual sided tape. Make sure it has a clear unobstructed view to the sky and make sure that the GPS is positioned so that the top is facing upwards. Now you’re able to setup and use your navigation software. In cars with UV protected windows the reception will be influenced and decreased.

Step 1

Step 2

Step 3

Step 4

How to connect another brand GPS Receiver.

When connecting another brand GPS Receiver, please check the tables below for the pin

assignment of the PS/2 Female connector. Or check our website for adaptor cables.Step 7 Note; The TX and RX connections have to be twisted to the GPS connector.

Hands Free Carkit GPS Connections


PS/2 Female

Signal Name

Pin

Power Out 5V

4

TX

6

RX

2

Ground

3

Shielding

Housing

PS/2 Female Frontview

65

4

3

21

www.carcomm.nl 2

Page 2
Image 2
Carcomm CMPC-41 manual Installing the Mobile PDA Cradle, How to connect another brand GPS Receiver, Step

CMPC-41 specifications

The Carcomm CMPC-41 is an innovative device designed to enhance the functionality of mobile phones and tablets in automotive environments. This versatile car kit is engineered to provide seamless integration with a variety of mobile devices, making it ideal for users who rely on their smartphones for navigation, communication, and entertainment while on the road.

One of the standout features of the Carcomm CMPC-41 is its universal compatibility. It supports a wide range of mobile devices, ensuring that users can easily connect their phones, regardless of the brand or model. This flexibility is further enhanced by its adaptable design, which allows it to fit into various vehicle dashboards, providing a neat and professional appearance.

The CMPC-41 boasts advanced technologies that streamline mobile connectivity. Its Bluetooth capabilities offer wireless pairing with smartphones, enabling hands-free calling and audio streaming. This feature not only enhances safety by allowing drivers to keep their hands on the wheel, but also ensures a distraction-free experience while driving. The device also includes USB and AUX connections, allowing for additional audio input options and quick charging capabilities.

Another key characteristic of the Carcomm CMPC-41 is its ergonomic design that prioritizes user convenience. The interface is intuitive, with easily accessible controls for volume adjustment, track navigation, and call management. This user-friendly approach minimizes the time spent fiddling with controls, allowing drivers to stay focused on the road.

The CMPC-41 also emphasizes sound quality, featuring built-in amplifiers that deliver clear and powerful audio for phone calls and music playback. This ensures that users can enjoy an immersive sound experience, whether they are listening to their favorite tunes or engaging in important conversations.

Moreover, the Carcomm CMPC-41 is designed with safety in mind. By integrating mobile devices into the vehicle’s system, it significantly reduces the temptation to handle phones while driving, thus promoting better road safety. The device also utilizes high-quality materials, ensuring durability and reliability for long-term use.

In summary, the Carcomm CMPC-41 is a sophisticated car kit that merges technology with practicality. Its universal compatibility, advanced Bluetooth connectivity, user-friendly interface, and focus on sound quality make it an essential accessory for anyone looking to enhance their mobile experience in the car. With safety as a core design principle, the CMPC-41 is a smart choice for modern drivers.