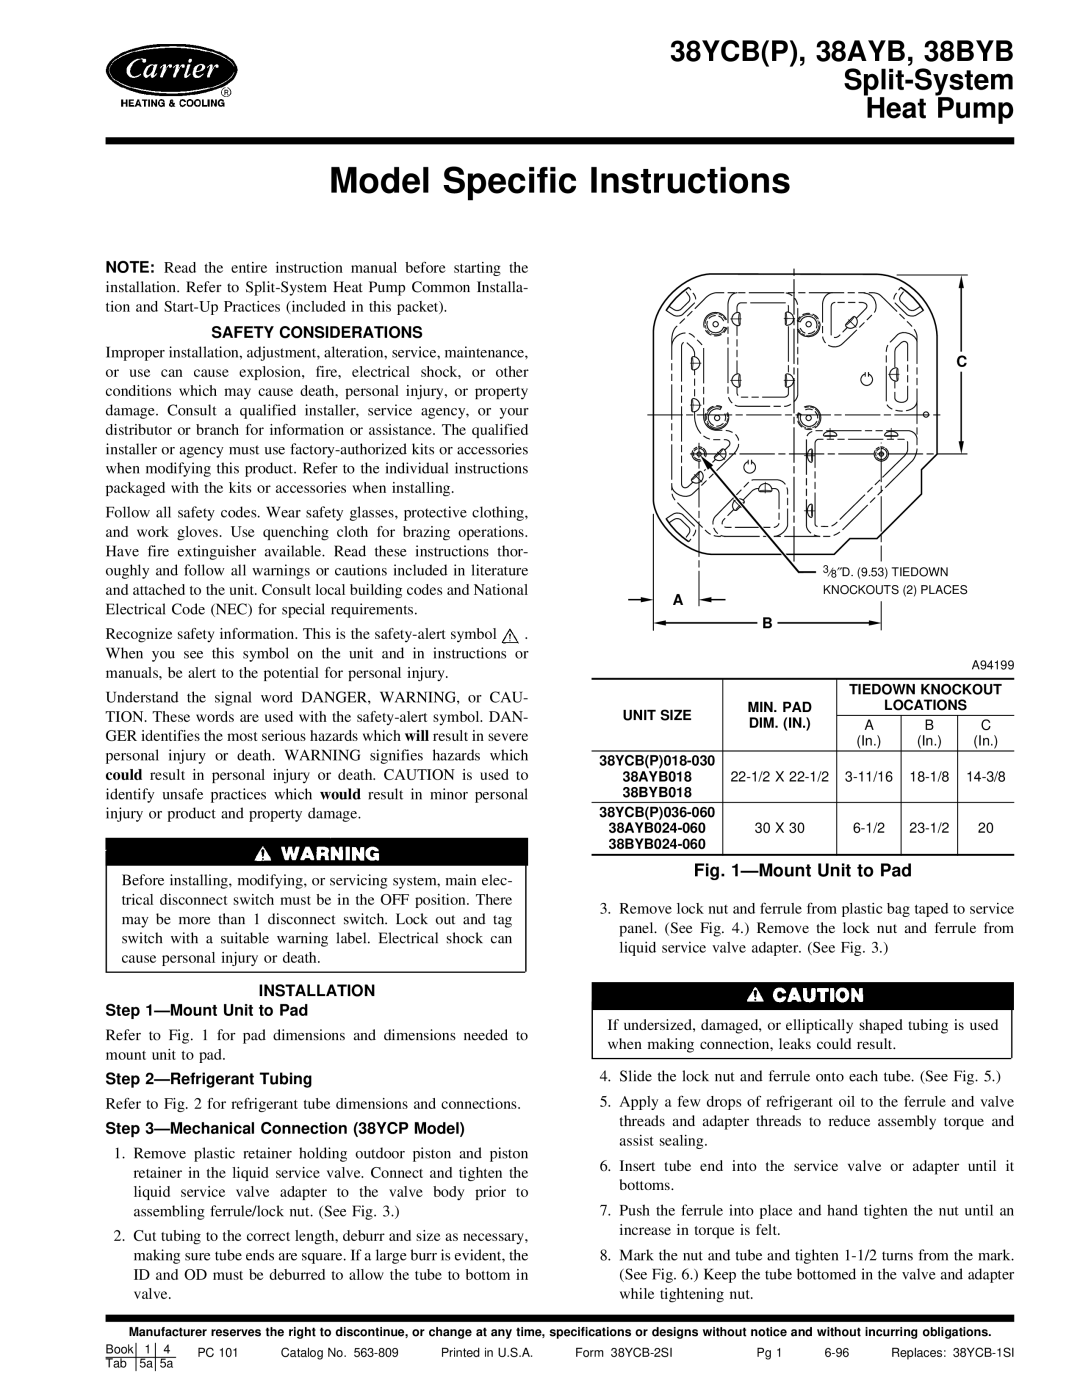
38AYB, 38BYB, 38YCB(P) specifications
Carrier, a leading name in HVAC solutions, presents its innovative line of chillers, specifically the Carrier 38YCB(P), 38AYB, and 38BYB models. These units exemplify advanced design and engineering efficiencies, making them ideal for commercial and industrial applications.The Carrier 38YCB(P) chiller is a water-cooled screw chiller that utilizes a rotary screw compressor. It is known for its high efficiency and reliability, suited for large-scale cooling needs. The unit incorporates advanced technology that enables it to operate at optimal performance levels across a wide range of conditions. It features a microprocessor-based control system that allows for precise temperature control and monitoring, enhancing energy efficiency and system reliability.
In contrast, the Carrier 38AYB chiller is an air-cooled model that is designed with energy-saving features and low noise operation. This model is equipped with high-efficiency scroll compressors and comes with environmentally friendly refrigerants, reducing the overall carbon footprint. Its compact design allows for easy installation in space-constrained environments while still delivering exceptional performance.
The Carrier 38BYB is also an air-cooled chiller, but it stands out with its innovative design and emphasis on quiet operation. This model utilizes variable-speed technology to optimize cooling output according to demand, resulting in significant energy savings. Additionally, its state-of-the-art heat exchangers enhance thermal efficiency, ensuring the system can deliver reliable cooling even in extreme conditions.
Each of these chiller models features robust construction aimed at longevity and durability. They come equipped with corrosion-resistant materials and components that ensure a longer lifespan, minimizing maintenance costs and downtime.
Furthermore, these chillers are designed with smart connectivity options, enabling integration with building management systems for enhanced monitoring and control capabilities. This feature supports energy management initiatives, as operators can analyze performance data to optimize cooling operations.
In conclusion, Carrier’s 38YCB(P), 38AYB, and 38BYB chillers offer advanced cooling solutions suitable for various commercial and industrial applications. Their combination of efficiency, reliability, and innovative technology positions them as optimal choices for those looking to invest in sustainable and effective cooling solutions.