
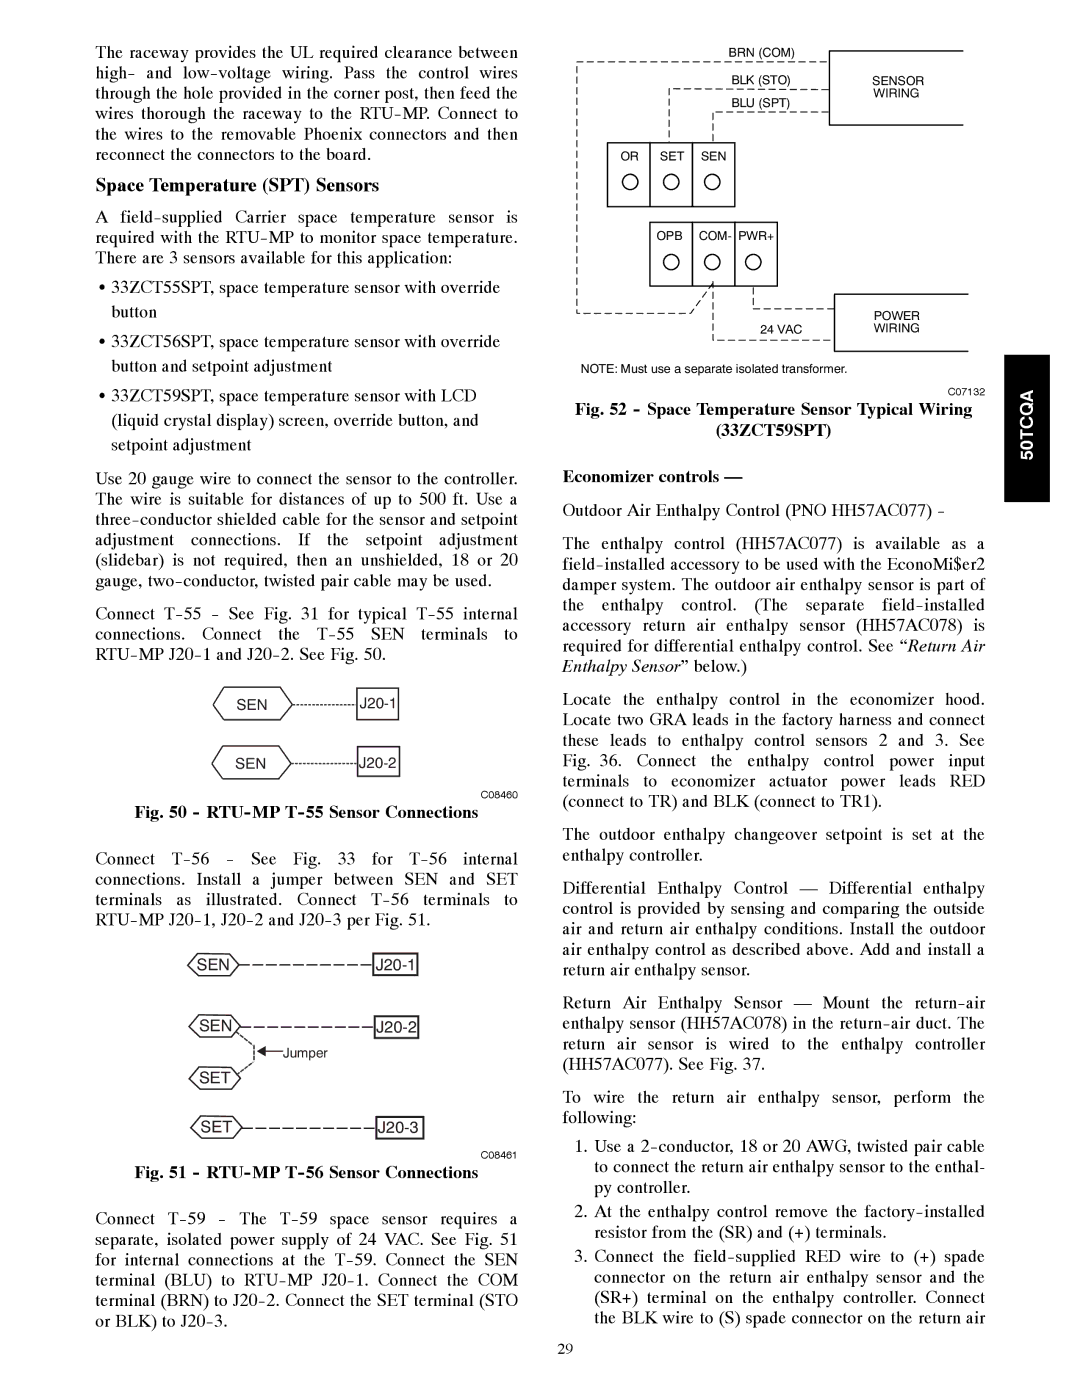
50TCQA specifications
The Carrier 50TCQA is a split system air conditioner known for its efficiency, reliability, and innovative technology. Designed for commercial and residential applications, this model provides a solution that combines comfort with cost-effectiveness, making it a popular choice for homeowners and businesses alike.One of the key features of the Carrier 50TCQA is its impressive SEER (Seasonal Energy Efficiency Ratio) rating, which ensures optimal energy efficiency. This means that users can enjoy lower utility bills while maintaining a comfortable indoor climate. The unit is engineered to perform well even in extreme temperatures, providing effective cooling and heating when needed.
This model employs a scroll compressor, which is known for its durability and quiet operation. The compressor's design allows for smoother operation and reduced noise levels, making it suitable for use in noise-sensitive environments. Additionally, the 50TCQA is equipped with a multi-speed fan, allowing for adjustable airflow to match the specific comfort requirements of different spaces.
The Carrier 50TCQA utilizes advanced refrigerant technology, specifically the environmentally friendly R-410A refrigerant. This refrigerant helps to reduce greenhouse gas emissions and provides efficient cooling without depleting the ozone layer. The unit's design is also focused on minimizing refrigerant leaks, ensuring environmental safety and reliability over the long term.
Ease of installation and maintenance is another significant characteristic of the Carrier 50TCQA. The unit features a compact and lightweight design, making it easier for technicians to install and service. Moreover, the system is equipped with diagnostic capabilities that allow for quick identification of issues, enhancing service efficiency and reducing downtime.
In terms of control, the Carrier 50TCQA offers a sophisticated thermostat option that includes programmable settings. Users can easily set desired temperatures, timers, and operating modes, ensuring optimal comfort throughout the day and night.
Overall, the Carrier 50TCQA presents a robust solution for climate control needs. With its energy-efficient performance, advanced technologies, and user-friendly features, it embodies Carrier's commitment to providing high-quality heating and cooling solutions that cater to modern lifestyle requirements. This model stands out as an excellent option for those looking to invest in a reliable HVAC system that enhances comfort while being mindful of energy consumption and environmental considerations.