Quick Start Guide
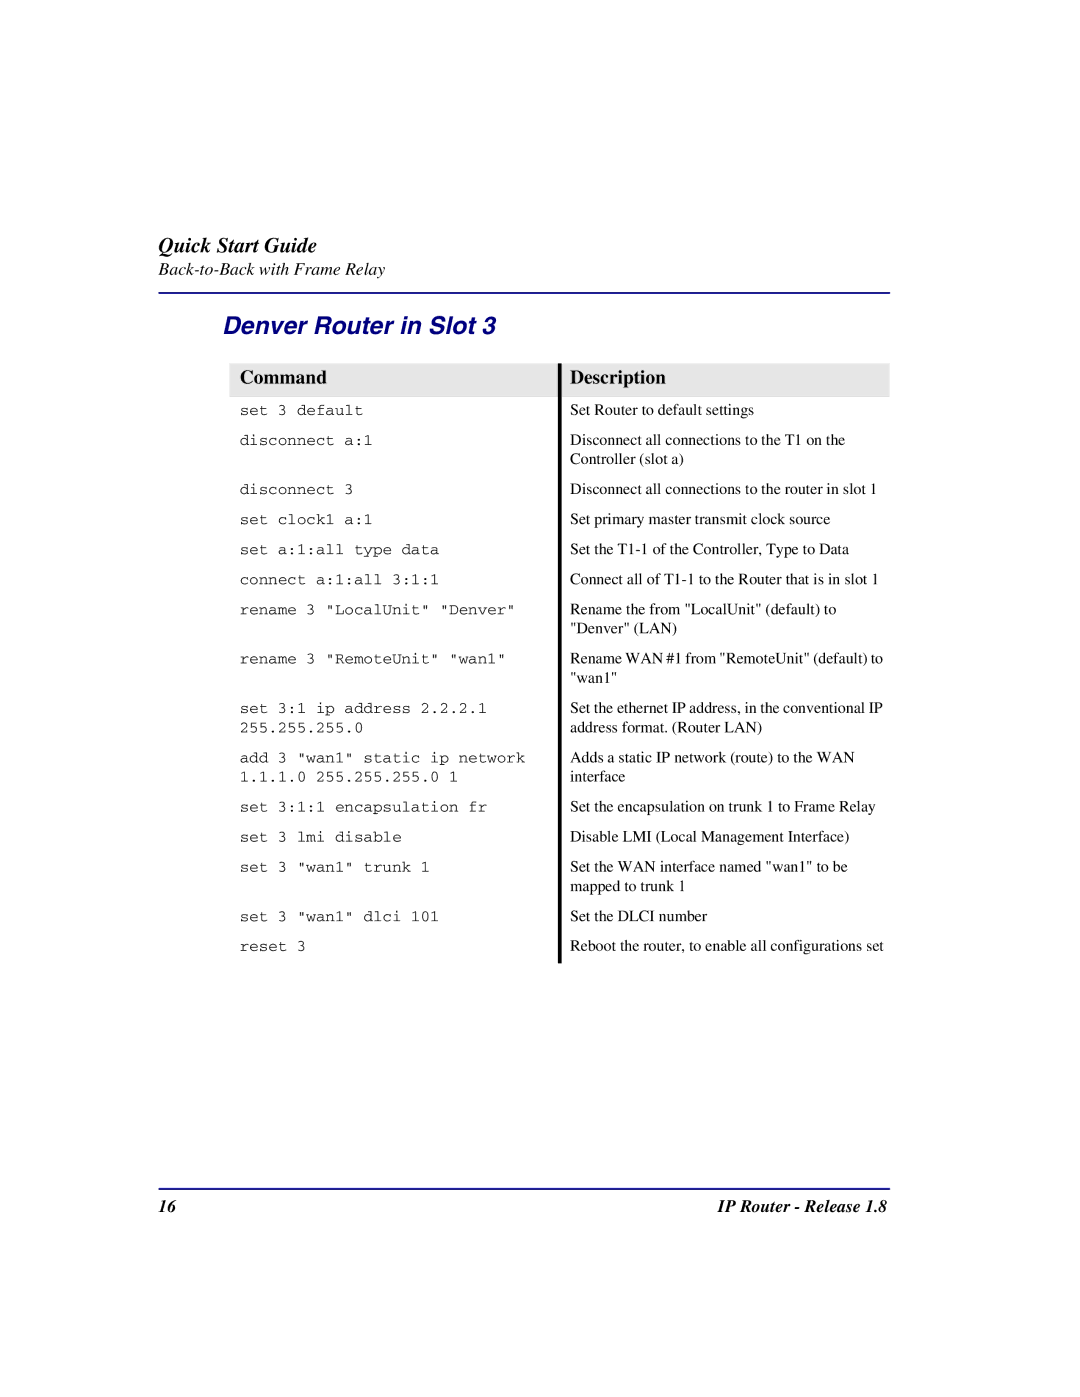
Denver Router in Slot 3
Command
set 3 default disconnect a:1
disconnect 3 set clock1 a:1
set a:1:all type data connect a:1:all 3:1:1 rename 3 "LocalUnit" "Denver"
rename 3 "RemoteUnit" "wan1"
set 3:1 ip address 2.2.2.1 255.255.255.0
add 3 "wan1" static ip network
1.1.1.0255.255.255.0 1 set 3:1:1 encapsulation fr set 3 lmi disable
set 3 "wan1" trunk 1
set 3 "wan1" dlci 101 reset 3
Description
Set Router to default settings
Disconnect all connections to the T1 on the Controller (slot a)
Disconnect all connections to the router in slot 1
Set primary master transmit clock source
Set the
Connect all of
Rename the from "LocalUnit" (default) to "Denver" (LAN)
Rename WAN #1 from "RemoteUnit" (default) to "wan1"
Set the ethernet IP address, in the conventional IP address format. (Router LAN)
Adds a static IP network (route) to the WAN interface
Set the encapsulation on trunk 1 to Frame Relay
Disable LMI (Local Management Interface)
Set the WAN interface named "wan1" to be mapped to trunk 1
Set the DLCI number
Reboot the router, to enable all configurations set
16 | IP Router - Release 1.8 |
