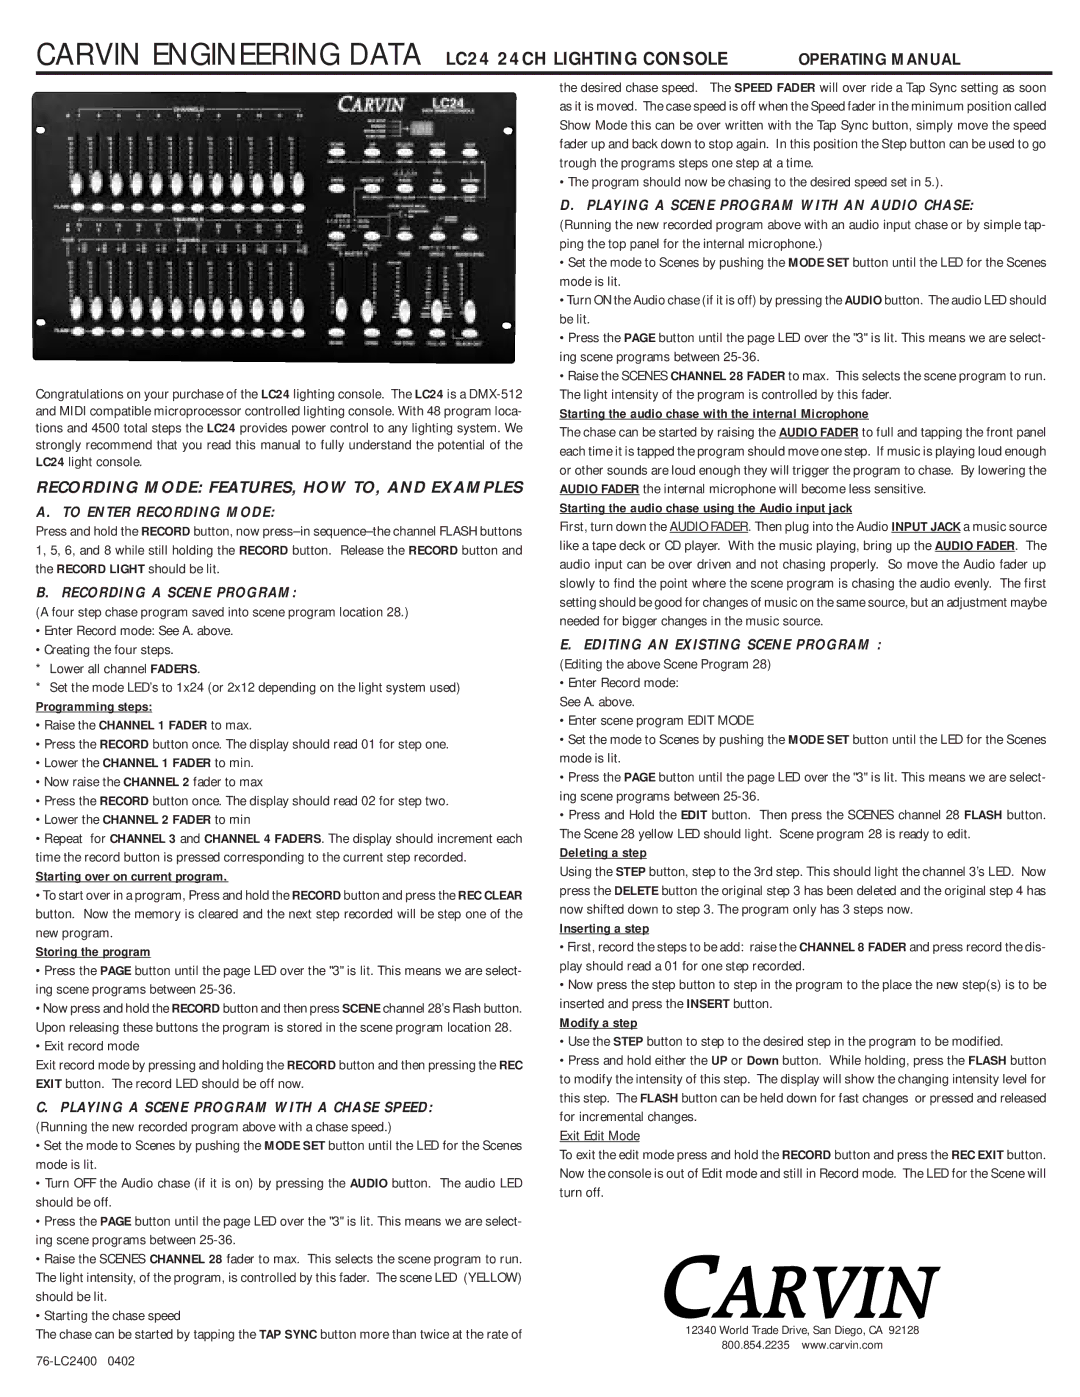
Congratulations on your purchase of the LC24 lighting console. The LC24 is a DMX-512 and MIDI compatible microprocessor controlled lighting console. With 48 program loca- tions and 4500 total steps the LC24 provides power control to any lighting system. We strongly recommend that you read this manual to fully understand the potential of the LC24 light console.
RECORDING MODE: FEATURES, HOW TO, AND EXAMPLES
A. TO ENTER RECORDING MODE:
Press and hold the RECORD button, now press–in sequence–the channel FLASH buttons 1, 5, 6, and 8 while still holding the RECORD button. Release the RECORD button and the RECORD LIGHT should be lit.
B. RECORDING A SCENE PROGRAM:
(A four step chase program saved into scene program location 28.)
•Enter Record mode: See A. above.
•Creating the four steps.
*Lower all channel FADERS.
*Set the mode LED’s to 1x24 (or 2x12 depending on the light system used)
Programming steps:
• Raise the CHANNEL 1 FADER to max.
• Press the RECORD button once. The display should read 01 for step one.
• Lower the CHANNEL 1 FADER to min.
• Now raise the CHANNEL 2 fader to max
• Press the RECORD button once. The display should read 02 for step two.
• Lower the CHANNEL 2 FADER to min
• Repeat for CHANNEL 3 and CHANNEL 4 FADERS. The display should increment each time the record button is pressed corresponding to the current step recorded.
Starting over on current program.
• To start over in a program, Press and hold the RECORD button and press the REC CLEAR button. Now the memory is cleared and the next step recorded will be step one of the new program.
Storing the program
• Press the PAGE button until the page LED over the "3" is lit. This means we are select- ing scene programs between 25-36.
• Now press and hold the RECORD button and then press SCENE channel 28’s Flash button. Upon releasing these buttons the program is stored in the scene program location 28.
• Exit record mode
Exit record mode by pressing and holding the RECORD button and then pressing the REC EXIT button. The record LED should be off now.
C.PLAYING A SCENE PROGRAM WITH A CHASE SPEED: (Running the new recorded program above with a chase speed.)
• Set the mode to Scenes by pushing the MODE SET button until the LED for the Scenes mode is lit.
• Turn OFF the Audio chase (if it is on) by pressing the AUDIO button. The audio LED should be off.
• Press the PAGE button until the page LED over the "3" is lit. This means we are select- ing scene programs between 25-36.
• Raise the SCENES CHANNEL 28 fader to max. This selects the scene program to run. The light intensity, of the program, is controlled by this fader. The scene LED (YELLOW) should be lit.
• Starting the chase speed
The chase can be started by tapping the TAP SYNC button more than twice at the rate of
76-LC2400 0402
the desired chase speed. The SPEED FADER will over ride a Tap Sync setting as soon as it is moved. The case speed is off when the Speed fader in the minimum position called Show Mode this can be over written with the Tap Sync button, simply move the speed fader up and back down to stop again. In this position the Step button can be used to go trough the programs steps one step at a time.
• The program should now be chasing to the desired speed set in 5.).
D. PLAYING A SCENE PROGRAM WITH AN AUDIO CHASE:
(Running the new recorded program above with an audio input chase or by simple tap- ping the top panel for the internal microphone.)
•Set the mode to Scenes by pushing the MODE SET button until the LED for the Scenes mode is lit.
•Turn ON the Audio chase (if it is off) by pressing the AUDIO button. The audio LED should be lit.
•Press the PAGE button until the page LED over the "3" is lit. This means we are select- ing scene programs between 25-36.
•Raise the SCENES CHANNEL 28 FADER to max. This selects the scene program to run. The light intensity of the program is controlled by this fader.
Starting the audio chase with the internal Microphone
The chase can be started by raising the AUDIO FADER to full and tapping the front panel each time it is tapped the program should move one step. If music is playing loud enough or other sounds are loud enough they will trigger the program to chase. By lowering the AUDIO FADER the internal microphone will become less sensitive.
Starting the audio chase using the Audio input jack
First, turn down the AUDIO FADER. Then plug into the Audio INPUT JACK a music source like a tape deck or CD player. With the music playing, bring up the AUDIO FADER. The audio input can be over driven and not chasing properly. So move the Audio fader up slowly to find the point where the scene program is chasing the audio evenly. The first setting should be good for changes of music on the same source, but an adjustment maybe needed for bigger changes in the music source.
E.EDITING AN EXISTING SCENE PROGRAM : (Editing the above Scene Program 28)
• Enter Record mode: See A. above.
• Enter scene program EDIT MODE
• Set the mode to Scenes by pushing the MODE SET button until the LED for the Scenes mode is lit.
• Press the PAGE button until the page LED over the "3" is lit. This means we are select- ing scene programs between 25-36.
• Press and Hold the EDIT button. Then press the SCENES channel 28 FLASH button. The Scene 28 yellow LED should light. Scene program 28 is ready to edit.
Deleting a step
Using the STEP button, step to the 3rd step. This should light the channel 3’s LED. Now press the DELETE button the original step 3 has been deleted and the original step 4 has now shifted down to step 3. The program only has 3 steps now.
Inserting a step
• First, record the steps to be add: raise the CHANNEL 8 FADER and press record the dis- play should read a 01 for one step recorded.
• Now press the step button to step in the program to the place the new step(s) is to be inserted and press the INSERT button.
Modify a step
• Use the STEP button to step to the desired step in the program to be modified.
• Press and hold either the UP or Down button. While holding, press the FLASH button to modify the intensity of this step. The display will show the changing intensity level for this step. The FLASH button can be held down for fast changes or pressed and released for incremental changes.
Exit Edit Mode
To exit the edit mode press and hold the RECORD button and press the REC EXIT button. Now the console is out of Edit mode and still in Record mode. The LED for the Scene will turn off.
12340 World Trade Drive, San Diego, CA 92128
800.854.2235 www.carvin.com