CANOPY HARDWARE
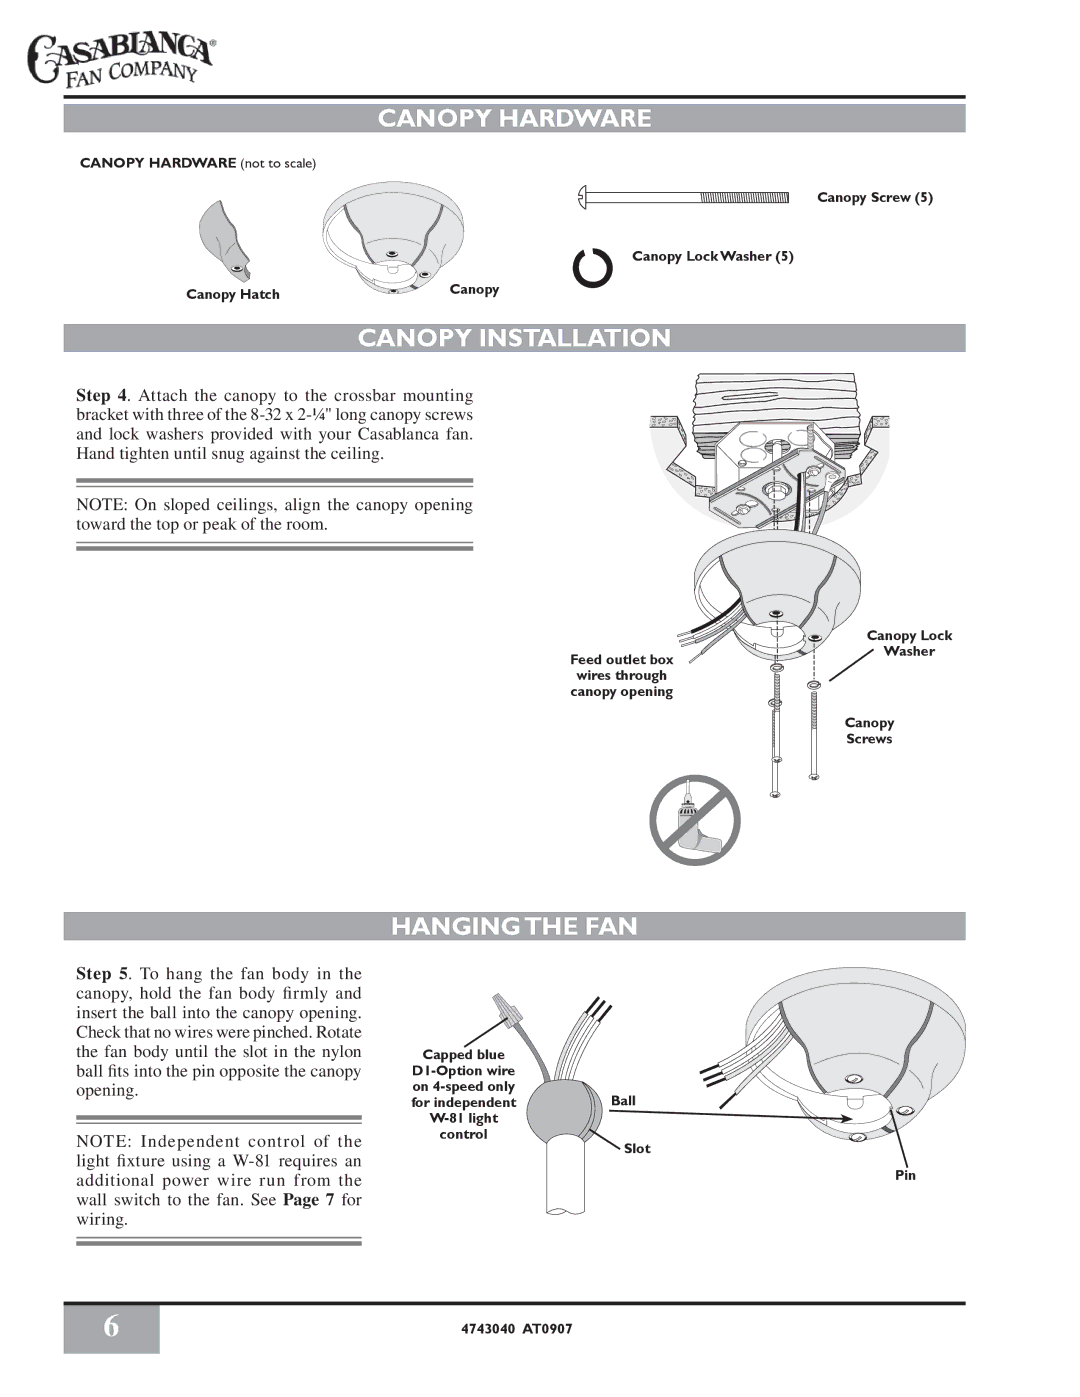
CANOPY HARDWARE (not to scale)
Canopy Screw (5)
| Canopy Lock Washer (5) |
Canopy Hatch | Canopy |
|
CANOPY INSTALLATION
Step 4. Attach the canopy to the crossbar mounting bracket with three of the
NOTE: On sloped ceilings, align the canopy opening toward the top or peak of the room.
Feed outlet box
wires through
canopy opening
Canopy Lock
Washer
Canopy
Screws
Step 5. To hang the fan body in the canopy, hold the fan body firmly and insert the ball into the canopy opening. Check that no wires were pinched. Rotate the fan body until the slot in the nylon ball fits into the pin opposite the canopy opening.
NOTE: Independent control of the light fixture using a
HANGING THE FAN
Capped blue
for independentBall
control
Slot
Pin
6 | 4743040 AT0907 |
|
|