ESTRADA™
LAG SCREW INSTALLATION (OPTIONAL)
NOTE: This step is required only under two conditions: If the fan weighs 36 lbs. or more (which does not pertain to this fan) or if the existing ceiling fixture outlet box needs to be modified for a ceiling fan application (for example, if the house is not new construction and you are replacing an existing light fixture). We recommend that the ceiling box be of sufficient capacity to support the weight of the fan and light fixture under any conditions. If in doubt whether you need to install the lag screw, consult a qualified electrician.
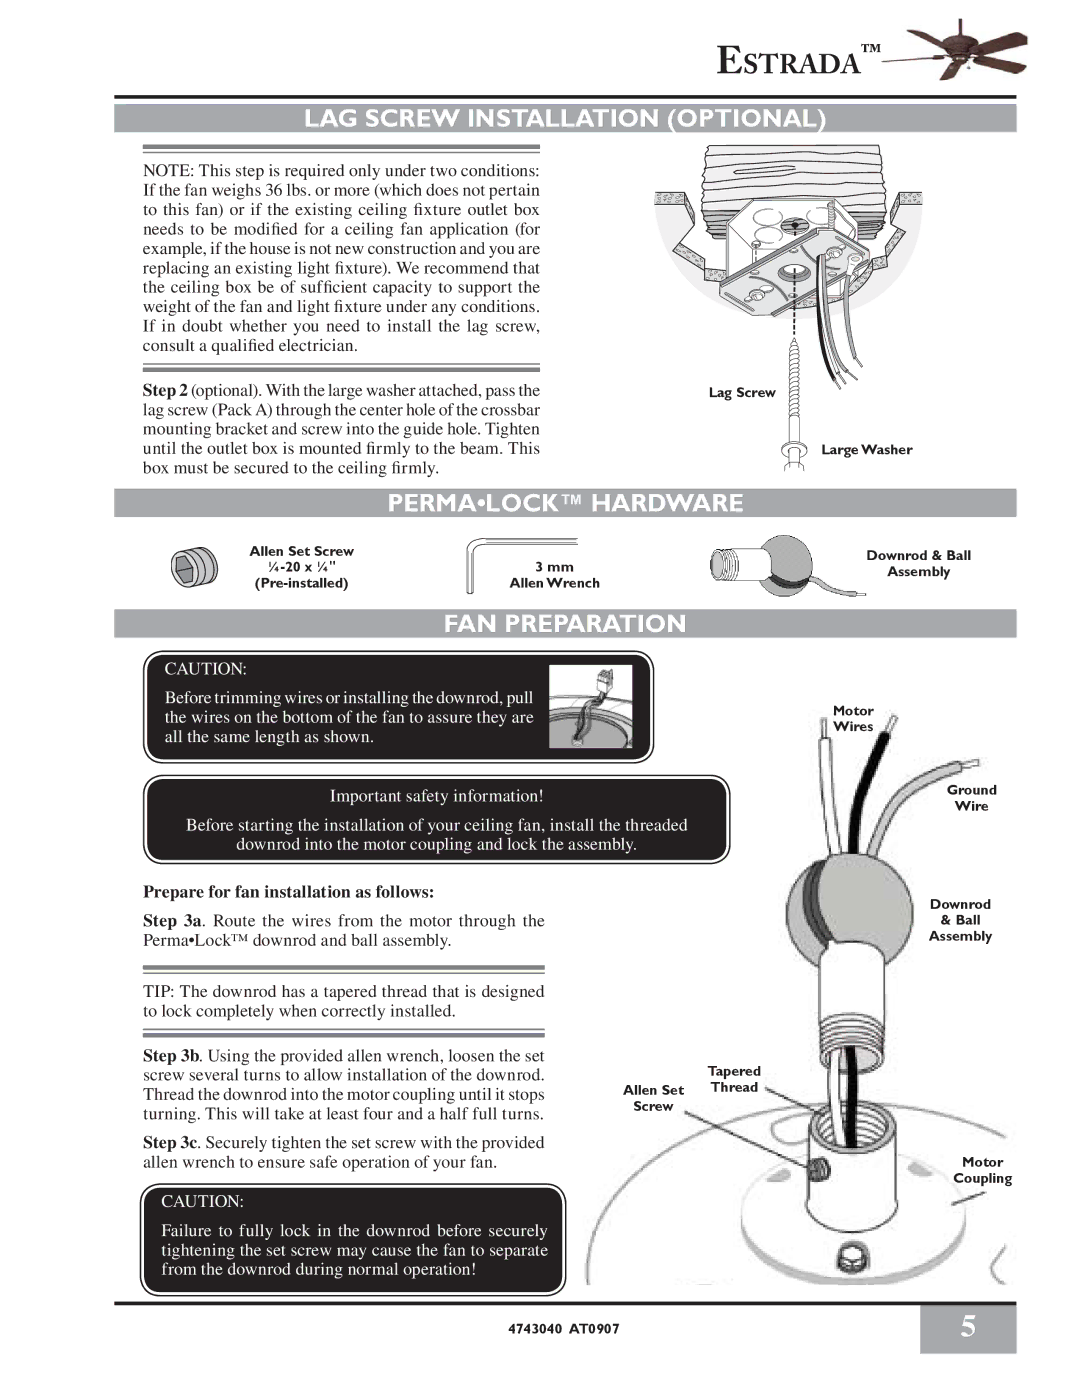
Step 2 (optional). With the large washer attached, pass the | Lag Screw |
lag screw (Pack A) through the center hole of the crossbar |
|
mounting bracket and screw into the guide hole. Tighten |
|
until the outlet box is mounted firmly to the beam. This |
|
box must be secured to the ceiling firmly. |
|
| PERMA•LOCK™ HARDWARE | |||
Allen Set Screw |
|
|
|
|
|
|
|
| |
|
|
|
| |
|
|
|
| |
|
| 3 mm | ||
|
| Allen Wrench | ||
FAN PREPARATION
CAUTION:
Before trimming wires or installing the downrod, pull the wires on the bottom of the fan to assure they are all the same length as shown.
Important safety information!
Before starting the installation of your ceiling fan, install the threaded
downrod into the motor coupling and lock the assembly.
Large Washer
Downrod & Ball
Assembly
Motor
Wires
Ground
Wire
Prepare for fan installation as follows:
Step 3a. Route the wires from the motor through the Perma•Lock™ downrod and ball assembly.
TIP: The downrod has a tapered thread that is designed to lock completely when correctly installed.
Step 3b. Using the provided allen wrench, loosen the set screw several turns to allow installation of the downrod. Thread the downrod into the motor coupling until it stops turning. This will take at least four and a half full turns.
Step 3c. Securely tighten the set screw with the provided allen wrench to ensure safe operation of your fan.
CAUTION:
Failure to fully lock in the downrod before securely tightening the set screw may cause the fan to separate from the downrod during normal operation!
Tapered
Allen Set Thread
Screw
Downrod
& Ball
Assembly
Motor
Coupling
4743040 AT0907 | 5 |
|
|