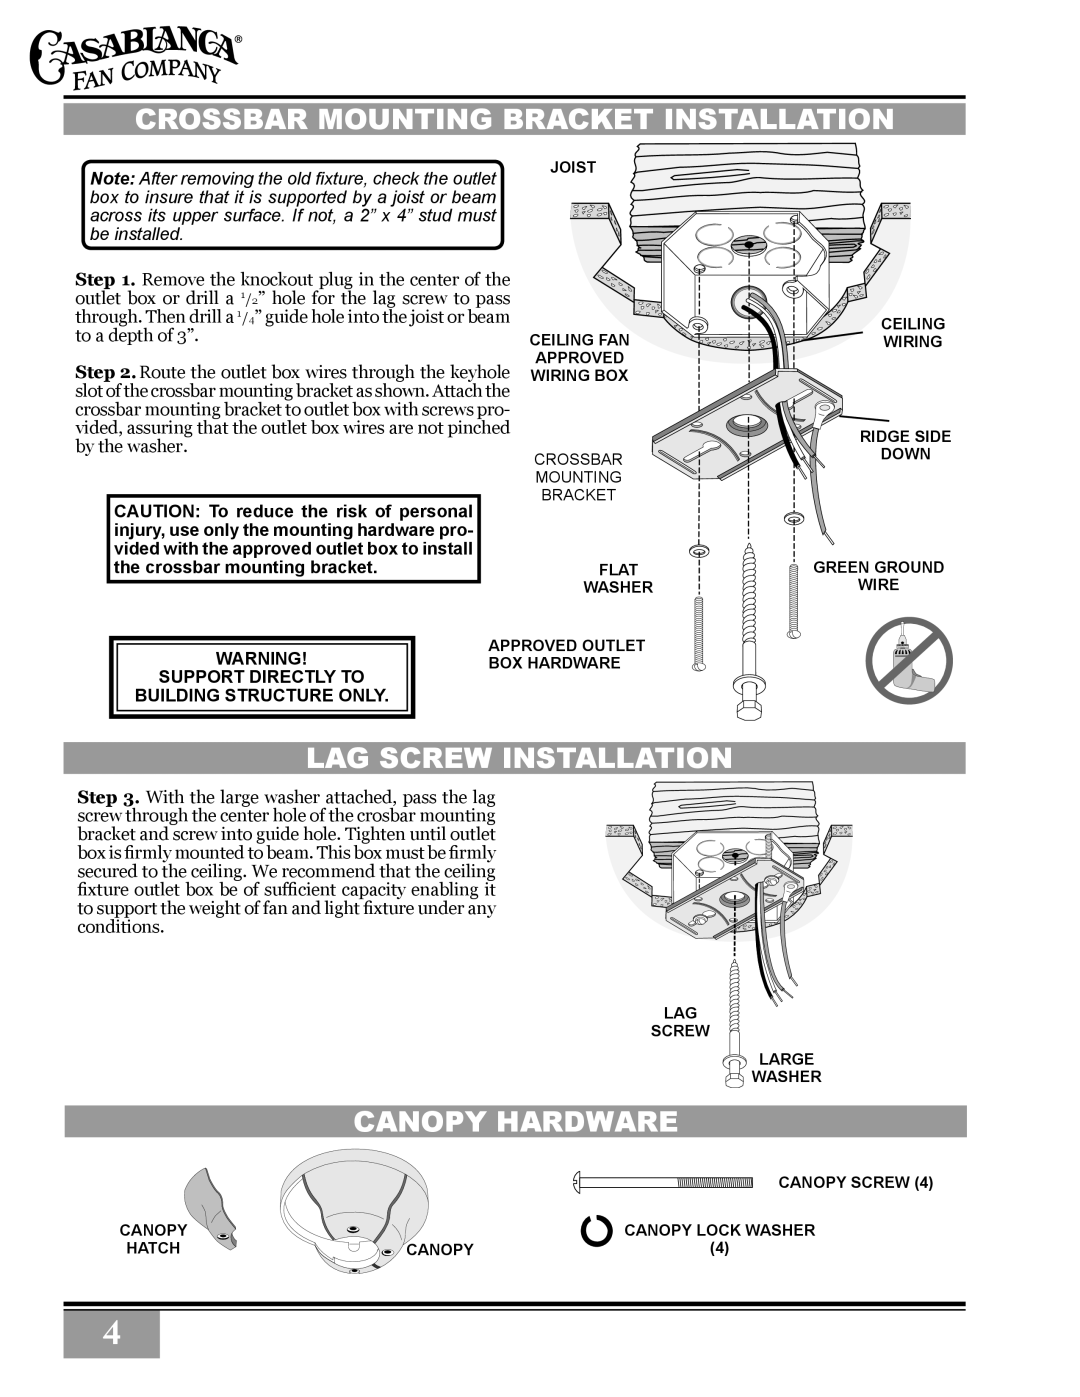
Crossbar Mounting Bracket INSTALLATION
Note: After removing the old fixture, check the outlet box to insure that it is supported by a joist or beam across its upper surface. If not, a 2” x 4” stud must be installed.
Step 1. Remove the knockout plug in the center of the outlet box or drill a 1/2” hole for the lag screw to pass through. Then drill a 1/4” guide hole into the joist or beam to a depth of 3”.
Step 2.Route the outlet box wires through the keyhole slot of the crossbar mounting bracket as shown. Attach the crossbar mounting bracket to outlet box with screws pro- vided, assuring that the outlet box wires are not pinched by the washer.
CAUTION: To reduce the risk of personal injury, use only the mounting hardware pro- vided with the approved outlet box to install the crossbar mounting bracket.
JOIST
ceiling fan
approved wiring box
crossbar mounting bracket
flat
washer
ceiling wiring
ridge side
down
green ground
wire
|
|
| approved outlet |
|
|
| |
| WARNING! |
| |
|
| box hardware | |
| SUPPORT DIRECTLY TO |
|
|
| BUILDING STRUCTURE ONLY. |
|
|
|
|
|
|
LAG SCREW INSTALLATION
Step 3. With the large washer attached, pass the lag screw through the center hole of the crosbar mounting bracket and screw into guide hole. Tighten until outlet box is firmly mounted to beam. This box must be firmly secured to the ceiling. We recommend that the ceiling fixture outlet box be of sufficient capacity enabling it to support the weight of fan and light fixture under any conditions.
lag screw
![]() LARGE
LARGE ![]() WASHER
WASHER
CANOPY HARDWARE
CANOPY SCREW (4)
CANOPY |
| CANOPY LOCK WASHER |
HATCH | CANOPY | (4) |
4