C25G624FPOMONA specifications
The Casablanca Fan Company C25G624FPOMONA is a striking example of modern ceiling fan design, combining aesthetics with advanced functionality. This fan is expertly crafted for those who seek to enhance their indoor spaces with both elegance and effective airflow management. With its sleek lines and robust construction, the Pomona model serves as a beautiful centerpiece in any room while providing superior performance.One of the standout features of the C25G624FPOMONA is its powerful motor. Casablanca equips this fan with a high-performance motor that ensures effective air circulation even in larger spaces. The whisper-quiet operation of the motor allows for comfortable air movement without the disruptive noise often associated with fans. Whether you’re relaxing in your living room, cooking in the kitchen, or winding down in the bedroom, the Pomona fan maintains a serene environment.
The fan comes with a range of blade options, allowing users to choose finishes that best match their home decor. The blades are crafted from high-quality materials that not only enhance durability but also contribute to the fan’s overall efficiency. The aerodynamic design of the blades ensures that air is distributed evenly throughout the room, providing a consistent and comfortable climate.
In addition to its aesthetic appeal and performance, the Pomona fan also incorporates energy-efficient technologies. It is compatible with various smart home systems, allowing users to control the fan remotely through mobile apps or voice commands. This feature enhances convenience, enabling you to adjust settings from anywhere in your home.
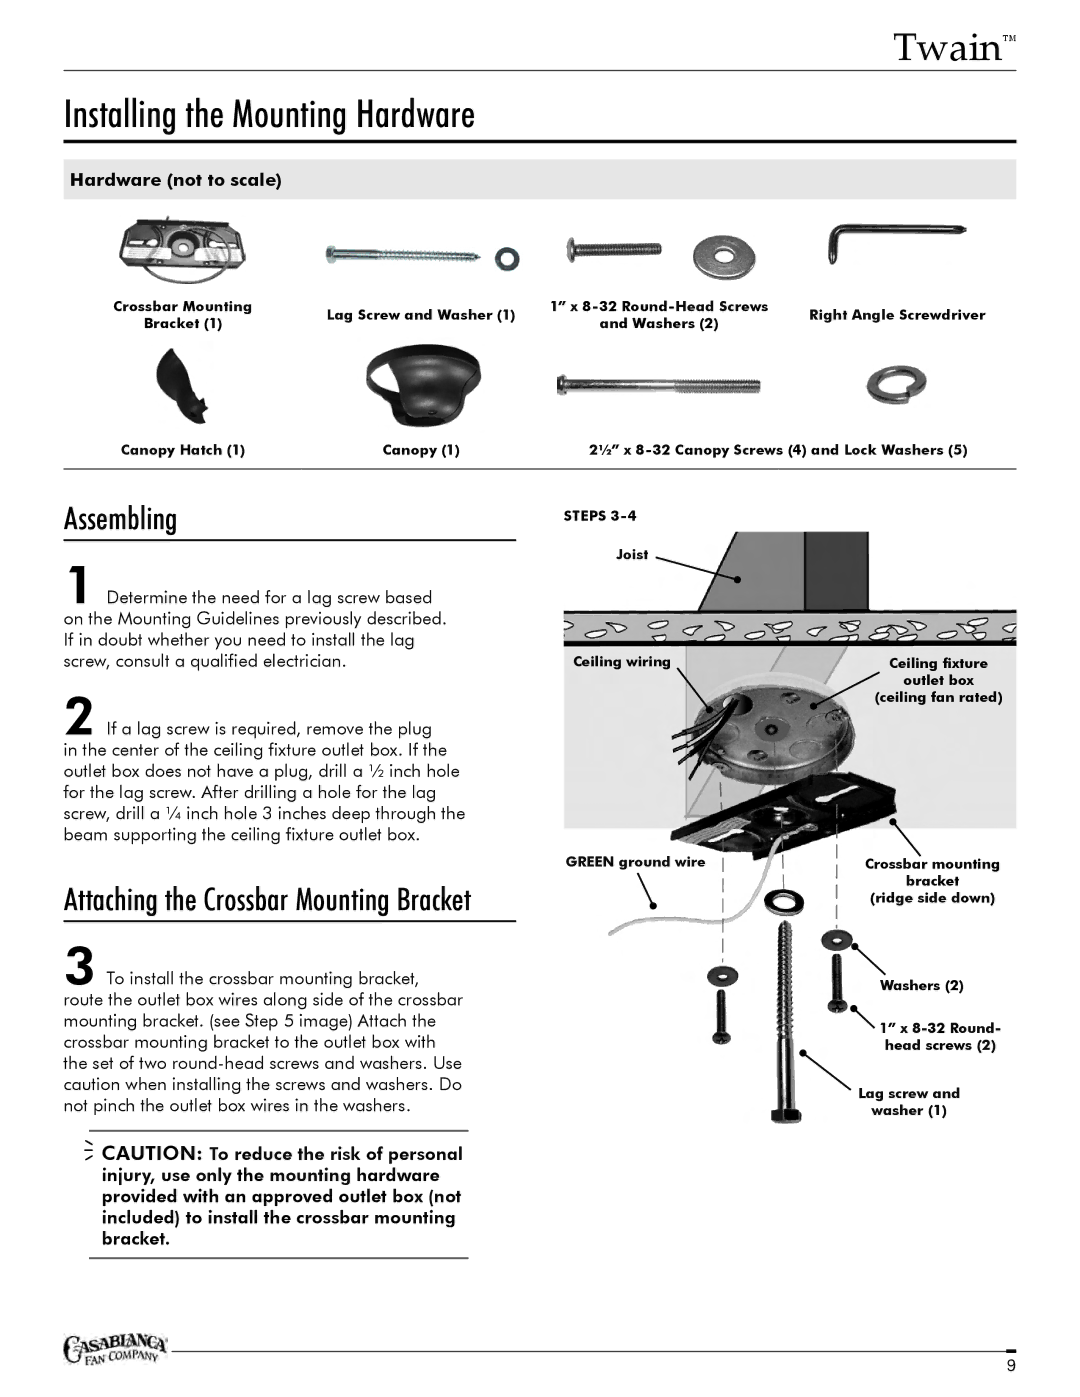
Installation of the Casablanca Fan Company C25G624FPOMONA is straightforward, thanks to its user-friendly design and detailed instructions. It can be mounted on ceilings of varying heights, and with its versatile style, it suits both contemporary and traditional interiors.
The C25G624FPOMONA model reflects Casablanca’s commitment to quality and innovation in home comfort solutions. This fan not only provides the necessary airflow but also elevates the aesthetic of any room it occupies. With its combination of style, performance, and advanced technology, the Casablanca Fan Company C25G624FPOMONA is an ideal choice for anyone looking to enhance their living space while enjoying comfort and style.

