
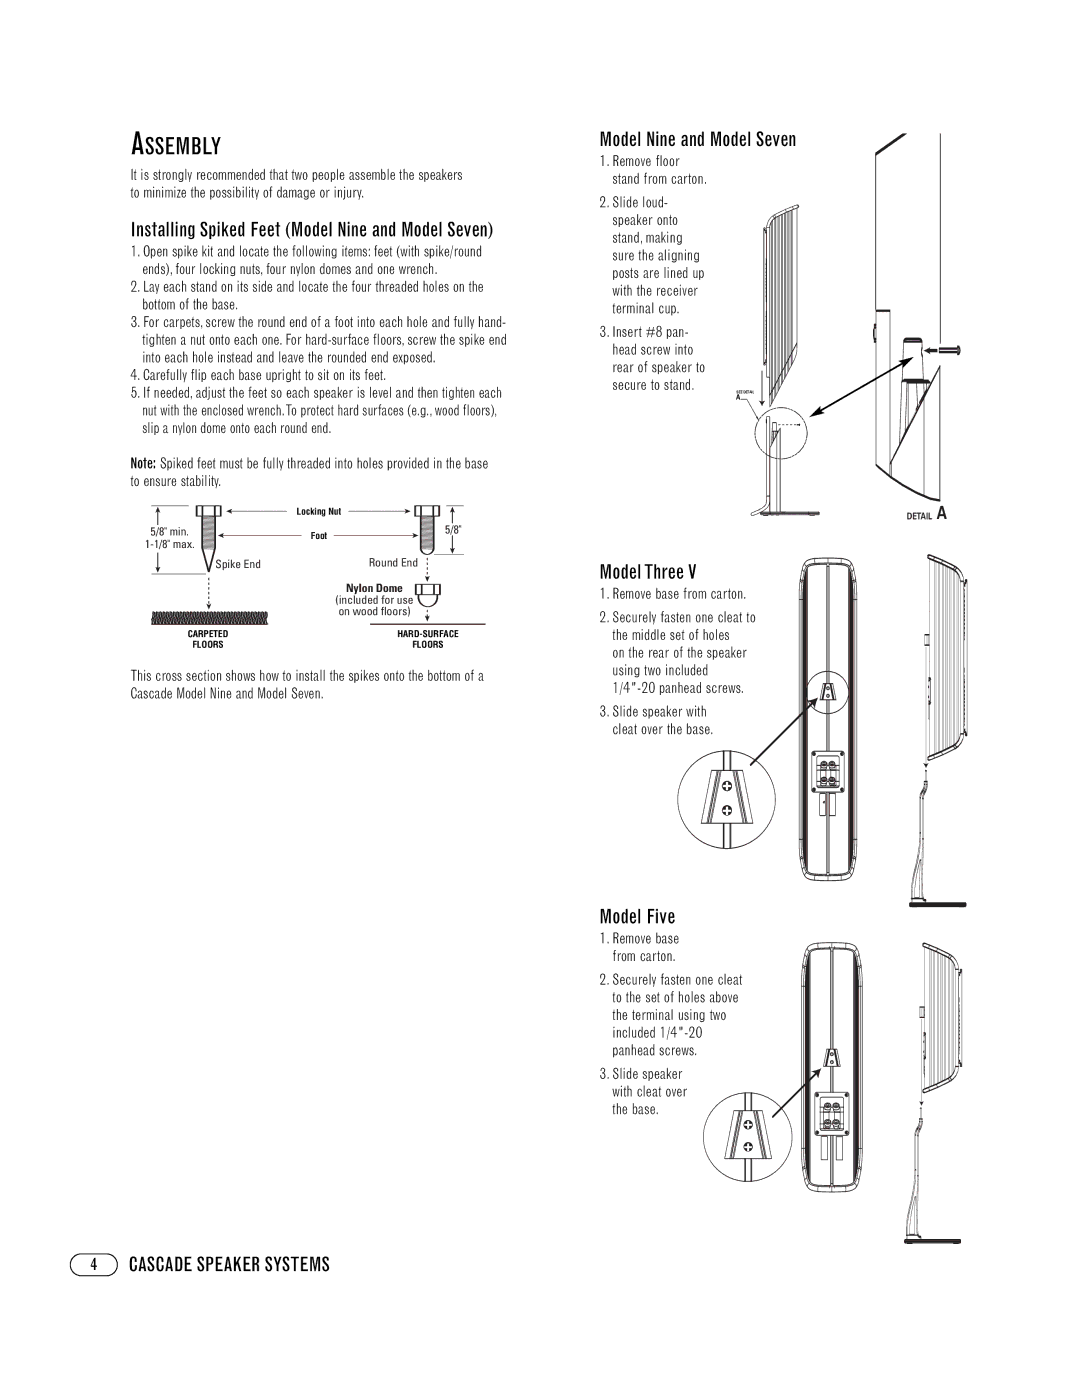
7, 3V, 3C, 9 specifications
Cascade 9,3C,3V,7 is a groundbreaking system that combines cutting-edge technology with robust features aimed at enhancing operational efficiency and user experience. Designed for diverse applications, this model is particularly valuable in industries such as telecommunications, data management, and large-scale computing environments.One of the defining characteristics of Cascade 9,3C,3V,7 is its modular architecture. This allows for easy customization and scalability according to specific business needs. Organizations can adapt the system to accommodate growth by simply adding or upgrading individual components without overhauling the entire setup. This modular approach not only reduces downtime but also lowers operational costs, providing significant long-term savings.
The system is powered by advanced processing capabilities. Equipped with a high-performance multi-core processor, it ensures that tasks are executed swiftly and efficiently. This design supports parallel processing, enabling the handling of multiple workflows simultaneously, thereby boosting productivity and reducing processing time.
In terms of connectivity, Cascade 9,3C,3V,7 incorporates state-of-the-art networking technologies. It offers support for both wired and wireless connections, allowing seamless integration into existing infrastructure. Additionally, the system is endowed with smart data management tools that optimize data flow and enhance security protocols, ensuring compliance with industry standards while safeguarding sensitive information.
Another key feature is its user-friendly interface. The system is built with intuitive controls and clear displays, minimizing the learning curve for new users. Enhanced user experience is further supported by comprehensive customer service options, including remote monitoring and diagnostics, which facilitate prompt issue resolution.
Energy efficiency is a critical aspect of Cascade 9,3C,3V,7. The system is designed to operate with minimal power consumption while maintaining high levels of performance. This focus on sustainability not only contributes to reduced energy bills but also aligns with global initiatives to decrease carbon footprints.
In conclusion, Cascade 9,3C,3V,7 stands out in the technological landscape with its modular architecture, high-performance processing, advanced connectivity options, user-centric design, and commitment to energy efficiency. It represents a solid investment for organizations looking to leverage technology for enhanced operational capabilities. With its comprehensive features and capabilities, the Cascade 9,3C,3V,7 is poised to set new standards in its field.