Assembling Your Telescope

1)Your Firstscope telescope should include all of the following:

a.Tripod with center support bracket

b.Telescope tube with tube ring attached

c.Equatorial mount head

d.Two 1 ¼" eyepieces

e.90˚ star diagonal

f.StarPointer Finderscope

g.2# Counterweight (Firstscope 70)

h.5# Counterweight (Firstscope 90)

i.Counterweight bar

j.Two slow motion cables

k.Eyepiece accessory tray

l.The Sky CD rom

2)To set up the tripod, spread the legs outward until they are fully extended. Extend the center portion of each of the three tripod legs down 6-8". Use the three tightening screws located at the bottom of each leg to secure the extended legs in place.

3)Place the accessory tray on top of tripod's center leg brace. Thread the tray's threaded post into the threaded hole in the center of the leg brace.

4)Locate the equatorial mount and place the base of the mount through the hole in the center of the tripod mounting platform. From underneath the tripod mounting platform, thread the mounting bolt with washer into the threaded hole on the bottom of the equatorial mount.

5)Thread the latitude adjustment screws into the equatorial mount until both screws are touching the inside of the mount and the mount can no longer pivot up and down.

6)Locate the counterweight bar and counterweight. Thread the threaded end of the counterweight bar into the Dec axis of the equatorial mount. Remove the safety screw and washer from the other end of the counterweight bar. Loosen the counterweight locking bolt so that the screw is no longer obstructing the center hole of the counterweight. Slide the counterweight half way up the counterweight bar and tighten the locking screw to secure the counterweight in place. Thread the safety screw and washer on to the end of the counterweight bar.

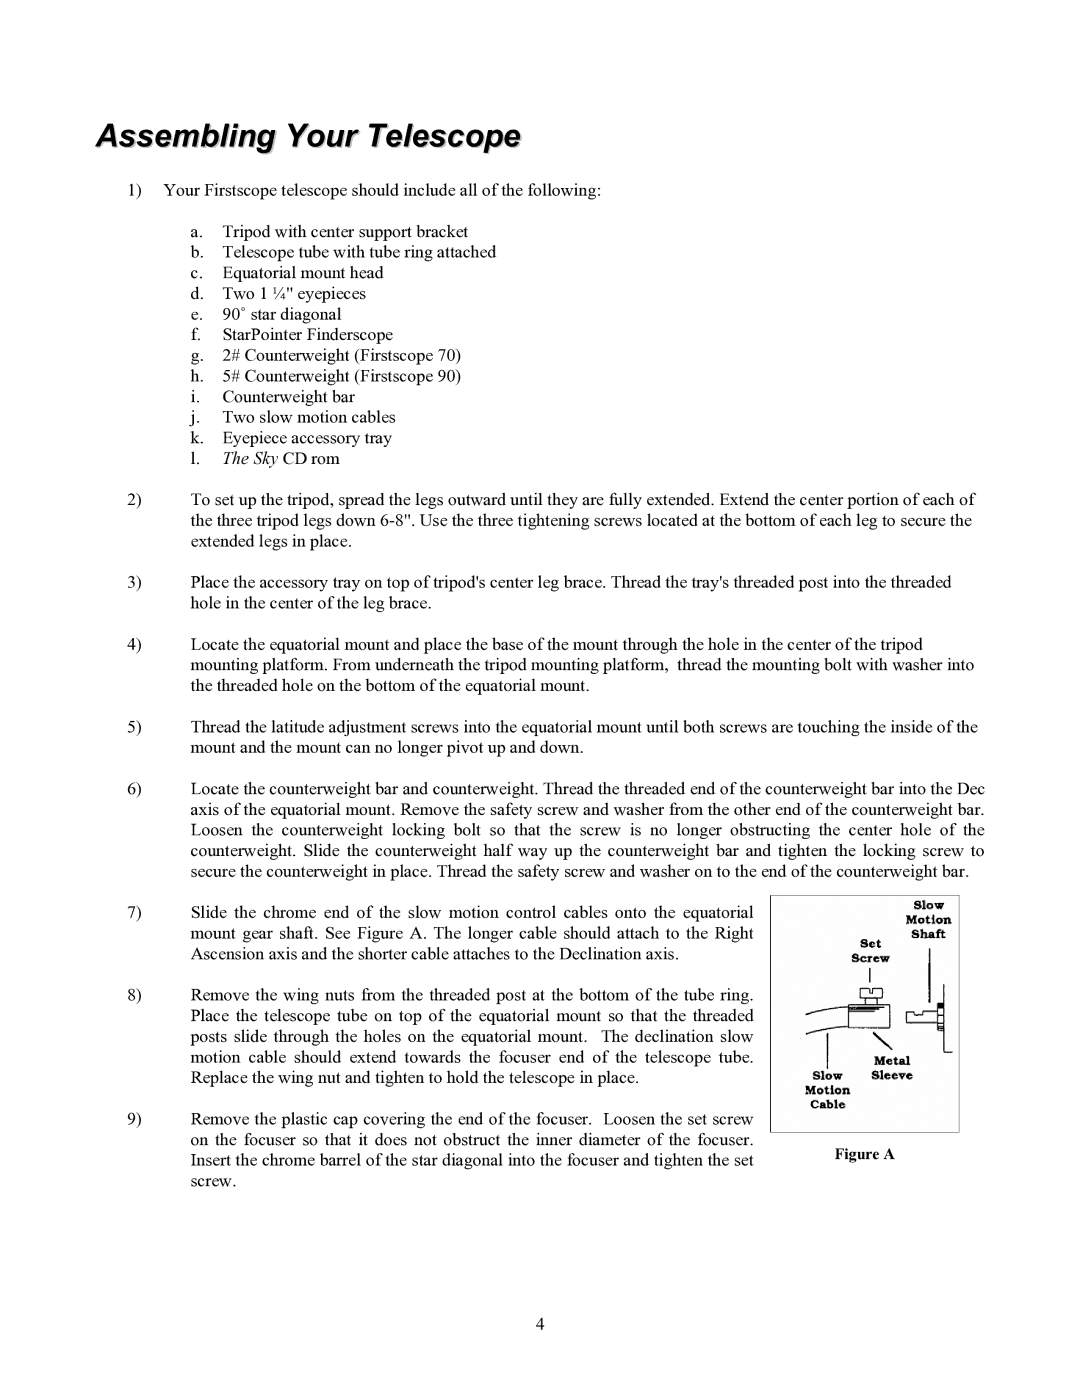
7)Slide the chrome end of the slow motion control cables onto the equatorial mount gear shaft. See Figure A. The longer cable should attach to the Right Ascension axis and the shorter cable attaches to the Declination axis.

8)Remove the wing nuts from the threaded post at the bottom of the tube ring. Place the telescope tube on top of the equatorial mount so that the threaded posts slide through the holes on the equatorial mount. The declination slow motion cable should extend towards the focuser end of the telescope tube. Replace the wing nut and tighten to hold the telescope in place.

9)Remove the plastic cap covering the end of the focuser. Loosen the set screw on the focuser so that it does not obstruct the inner diameter of the focuser.

Insert the chrome barrel of the star diagonal into the focuser and tighten the set

Figure A

screw.


4

Page 4
Image 4
Celestron 70 manual Assembling Your Telescope

70 specifications

The Celestron 70 telescope, specifically the Celestron Astromaster 70, is a popular choice among amateur astronomers and casual stargazers. This telescope is known for its user-friendly design and impressive optical performance, making it suitable for both beginners and those with some experience in astronomy.

One of the most notable features of the Celestron 70 is its 70mm aperture. This size provides ample light-gathering capability, allowing for the observation of celestial objects such as planets, star clusters, and even some of the brighter deep-sky objects. The optical system consists of a refractor design with fully coated glass optics, ensuring bright and clear images.

The Celestron 70 also incorporates a sturdy mount. The manual Altazimuth mount is intuitive and easy to use, making it simple for users to locate and track astronomical objects in the night sky. It is often equipped with slow-motion controls that help with precision tracking. The lightweight design of the telescope allows for easy portability, making it ideal for viewing sessions in various locations, whether in your backyard or at a remote dark-sky site.

Another key technology in the Celestron 70 is its erect image optics, which produce images that are oriented correctly, making it suitable for both astronomical and terrestrial viewing. Users can easily switch between observing the craters of the Moon, the rings of Saturn, or scenic landscapes during the day.

In addition, the Celestron 70 comes with several useful accessories. It typically includes a finderscope that assists users in locating celestial objects, as well as a collection of interchangeable eyepieces to enhance the viewing experience. The included software often provides a great introduction to astronomy, helping users learn about the various constellations and celestial bodies they can observe.

Overall, the Celestron 70 telescope combines affordability with quality, making it an excellent choice for newcomers to astronomy or anyone looking for a reliable scope for casual observation. With its impressive features, robust design, and user-friendly functionality, it caters to the growing interest in stargazing, inviting users of all ages to explore the wonders of the universe. Whether a clear night brings a chance to observe the intricacies of the Moon's surface or distant stars, the Celestron 70 is poised to provide an enjoyable viewing experience.