spheric distortion. Turn your telescope drive on so that you won’t have to manually track the star. Or, if your are not using the clock drive, use Polaris. Its position relative to the celestial pole means that it moves very little thus eliminating the need to manually track it.
Before you begin the collimation process, be sure that your telescope is in thermal equilibrium with the surroundings. Allow 45 minutes for the telescope to reach equilibrium if you move it between large temperature extremes.
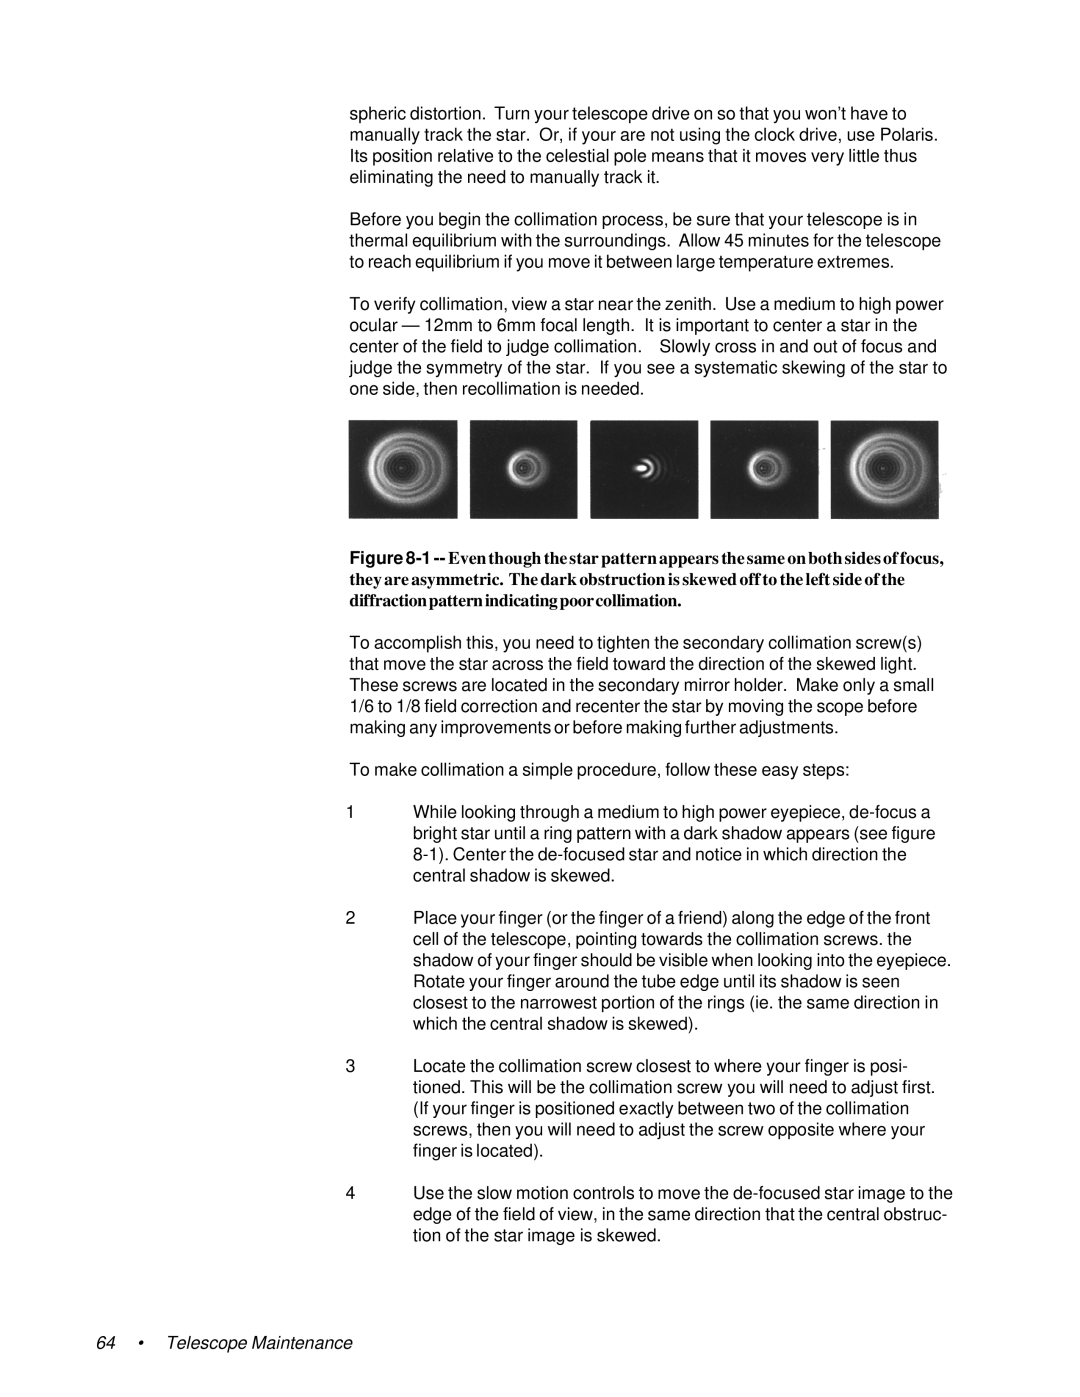
To verify collimation, view a star near the zenith. Use a medium to high power ocular — 12mm to 6mm focal length. It is important to center a star in the center of the field to judge collimation. Slowly cross in and out of focus and judge the symmetry of the star. If you see a systematic skewing of the star to one side, then recollimation is needed.
Figure 8-1 -- Even though the star pattern appears the same on both sides of focus, they are asymmetric. The dark obstruction is skewed off to the left side of the diffraction pattern indicating poor collimation.
To accomplish this, you need to tighten the secondary collimation screw(s) that move the star across the field toward the direction of the skewed light. These screws are located in the secondary mirror holder. Make only a small 1/6 to 1/8 field correction and recenter the star by moving the scope before making any improvements or before making further adjustments.
To make collimation a simple procedure, follow these easy steps:
1While looking through a medium to high power eyepiece,
2Place your finger (or the finger of a friend) along the edge of the front cell of the telescope, pointing towards the collimation screws. the shadow of your finger should be visible when looking into the eyepiece. Rotate your finger around the tube edge until its shadow is seen closest to the narrowest portion of the rings (ie. the same direction in which the central shadow is skewed).
3Locate the collimation screw closest to where your finger is posi- tioned. This will be the collimation screw you will need to adjust first. (If your finger is positioned exactly between two of the collimation screws, then you will need to adjust the screw opposite where your finger is located).
4Use the slow motion controls to move the