3.Apply a thin bead of stove cement in the newly- cleaned groove.
4.Lay the gasket into the groove. Wait until you are a couple inches from the end before you cut it.
5.Test the gasket by closing the door on a slip of paper as described above. Adjust the gasket in any areas where an inadequate seal is evident.
All
Repair Missing Cement in Seams
The cement in the stove seams may deteriorate over time and fall out in places. Just as with the stove doors, it is necessary to keep the seam seals in good condi- tion.
Avoid Damaging the Glass Door Panel
Do not abuse the glass by slamming the door or strik- ing the glass with a log. Never operate your stove if it has damaged or broken glass. If you need to replace the glass, use only replacement glass provided by your local Dutchwest dealer.
Damper Adjustment
With time, you may need to adjust the damper link- age to ensure that the damper plate seals tightly when closed. Test the damper when the stove is cold. When turned into the closed position, the damper should be feel “snug” but not too tight. It will become a little tighter as the stove heats up. Use a 7/16” socket wrench with socket extension to adjust the linkage:
1. | In an alternating pattern, first loosen and then re- |
| move the four bolts that secure the top plate to the |
| sides of the stove. |
2. | Open the damper. |
Dutchwest
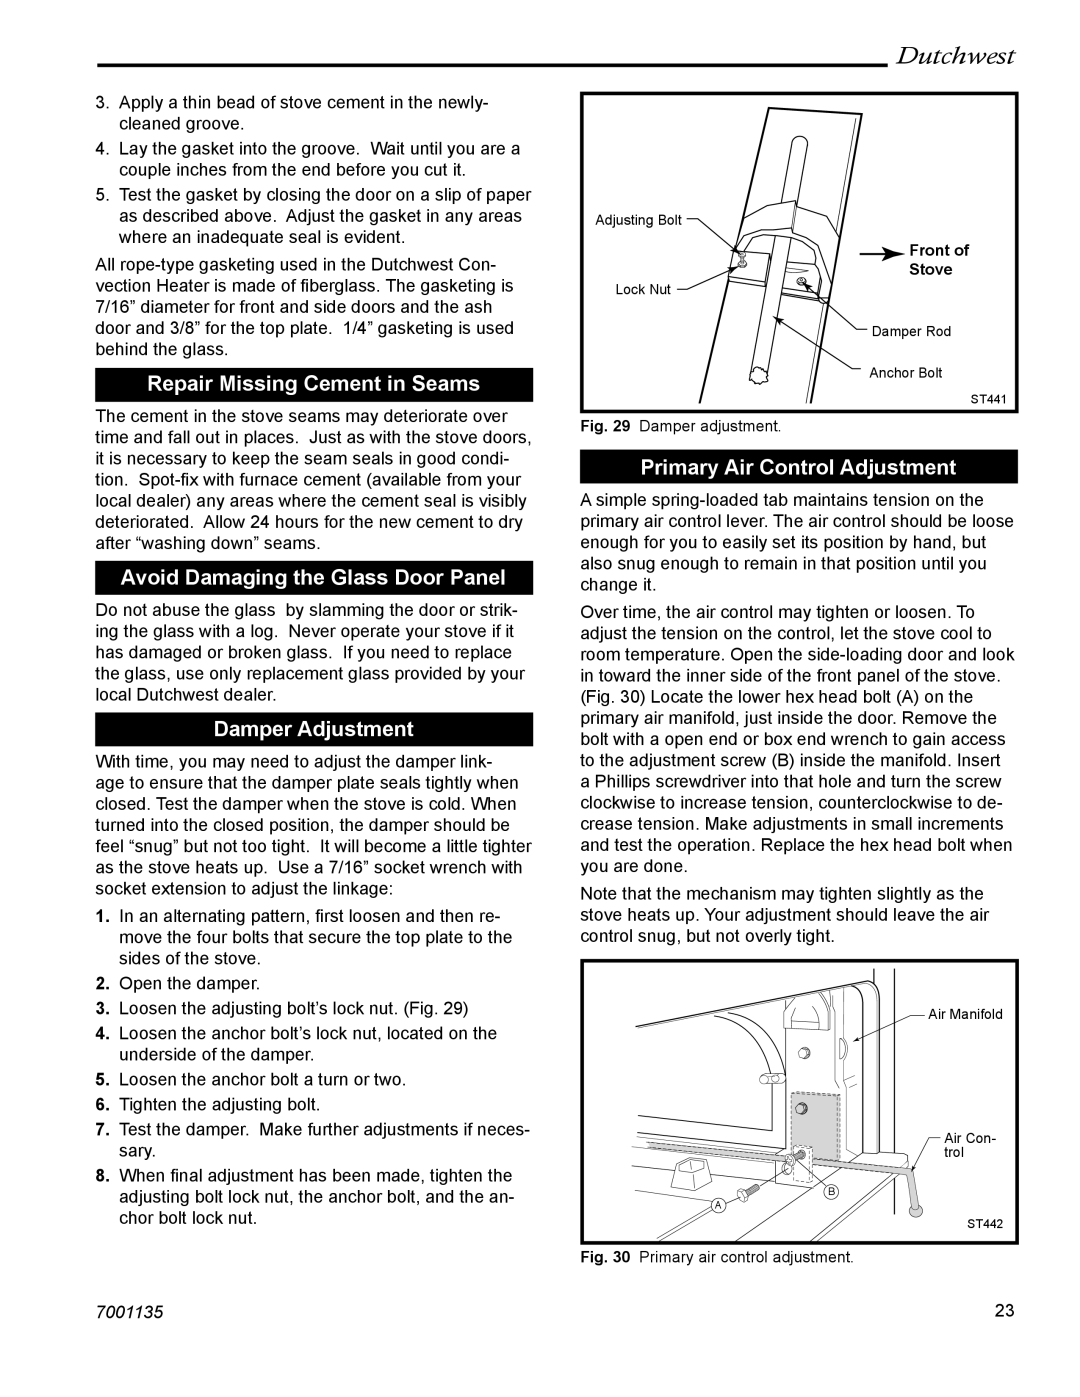
Adjusting Bolt
Front of
Stove
Lock Nut ![]()
Damper Rod
Anchor Bolt
ST441
Fig. 29 Damper adjustment.
Primary Air Control Adjustment
A simple
Over time, the air control may tighten or loosen. To adjust the tension on the control, let the stove cool to room temperature. Open the
Note that the mechanism may tighten slightly as the stove heats up. Your adjustment should leave the air control snug, but not overly tight.
3. | Loosen the adjusting bolt’s lock nut. (Fig. 29) |
4. | Loosen the anchor bolt’s lock nut, located on the |
| underside of the damper. |
5. | Loosen the anchor bolt a turn or two. |
6. | Tighten the adjusting bolt. |
7. | Test the damper. Make further adjustments if neces- |
| sary. |
8. | When final adjustment has been made, tighten the |
| adjusting bolt lock nut, the anchor bolt, and the an- |
| chor bolt lock nut. |
![]()
![]()
![]()
![]() B A
B A ![]()
Air Manifold
Air Con- trol
ST442
Fig. 30 Primary air control adjustment.
7001135 | 23 |