
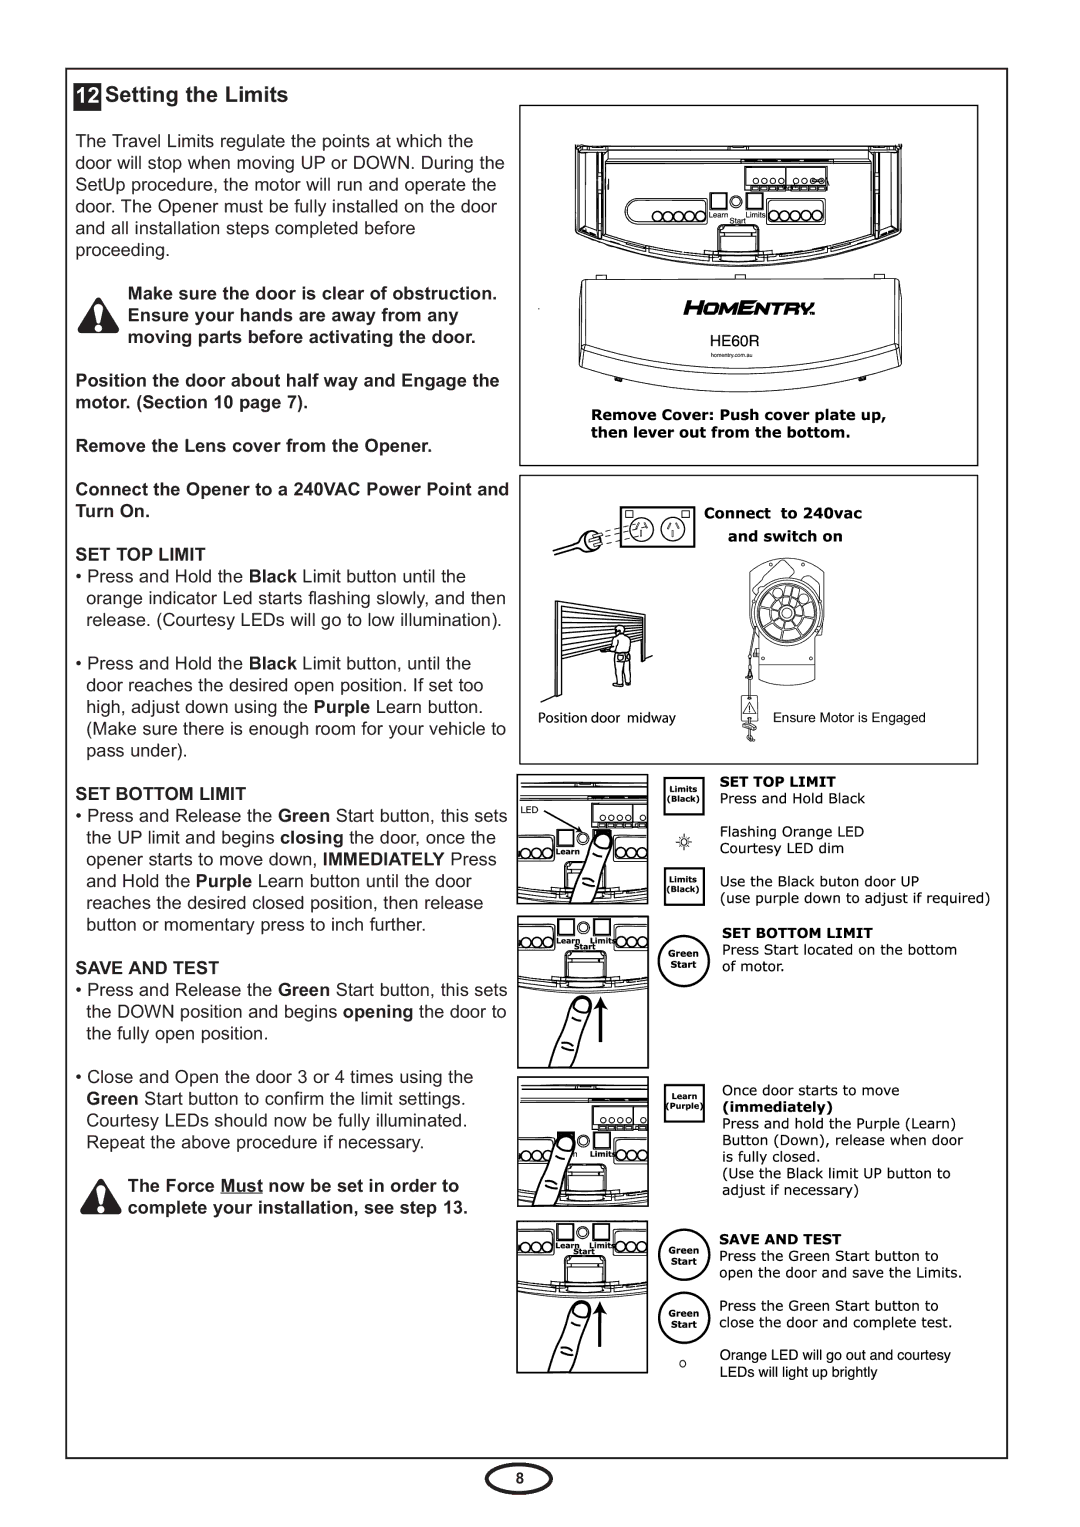
HE60R specifications
The Chamberlain HE60R is a state-of-the-art garage door opener that stands out for its combination of advanced technology, performance, and user-centric features. Designed to enhance convenience, security, and efficiency, this model is perfect for homeowners looking to upgrade their garage door system.One of the HE60R's main features is its powerful motor, capable of lifting heavy garage doors with ease. This robust motor ensures reliable operation, making it suitable for both standard and heavy-duty doors. The opener also boasts a smooth and quiet performance, allowing you to operate your garage door without disturbing your household or neighbors.
The HE60R is equipped with Chamberlain's innovative MyQ technology, which enables users to control their garage door remotely via a smartphone app. This feature provides the ultimate convenience, as you can open or close your garage door from anywhere, ensuring peace of mind whether you're at work or on vacation. The app also allows you to monitor door activity, track usage, and receive real-time alerts if the door is opened or closed.
Safety is a priority with the HE60R, which includes safety sensors that detect obstacles in the door's path. These sensors ensure that the garage door will reverse its motion if anything obstructs its closing, providing an essential layer of protection for children and pets. Additionally, the HE60R features a secure encryption system to prevent unauthorized access, ensuring that only you can operate your garage door.
Installation is made simple with the HE60R, thanks to its user-friendly design and included step-by-step instructions. Compatible with most types of garage doors, this opener is versatile and can accommodate various configurations. Moreover, its low-maintenance design means homeowners can enjoy long-term reliability without the need for frequent upkeep.
In summary, the Chamberlain HE60R garage door opener combines power, security, and advanced technology in an easy-to-use package. The inclusion of MyQ remote access, safety sensors, and quiet operation makes it an excellent choice for homeowners seeking an upgrade to their garage door system. With its impressive features and reliability, the HE60R stands as a top contender in the current market, ensuring that your garage door operates effectively and safely for years to come.