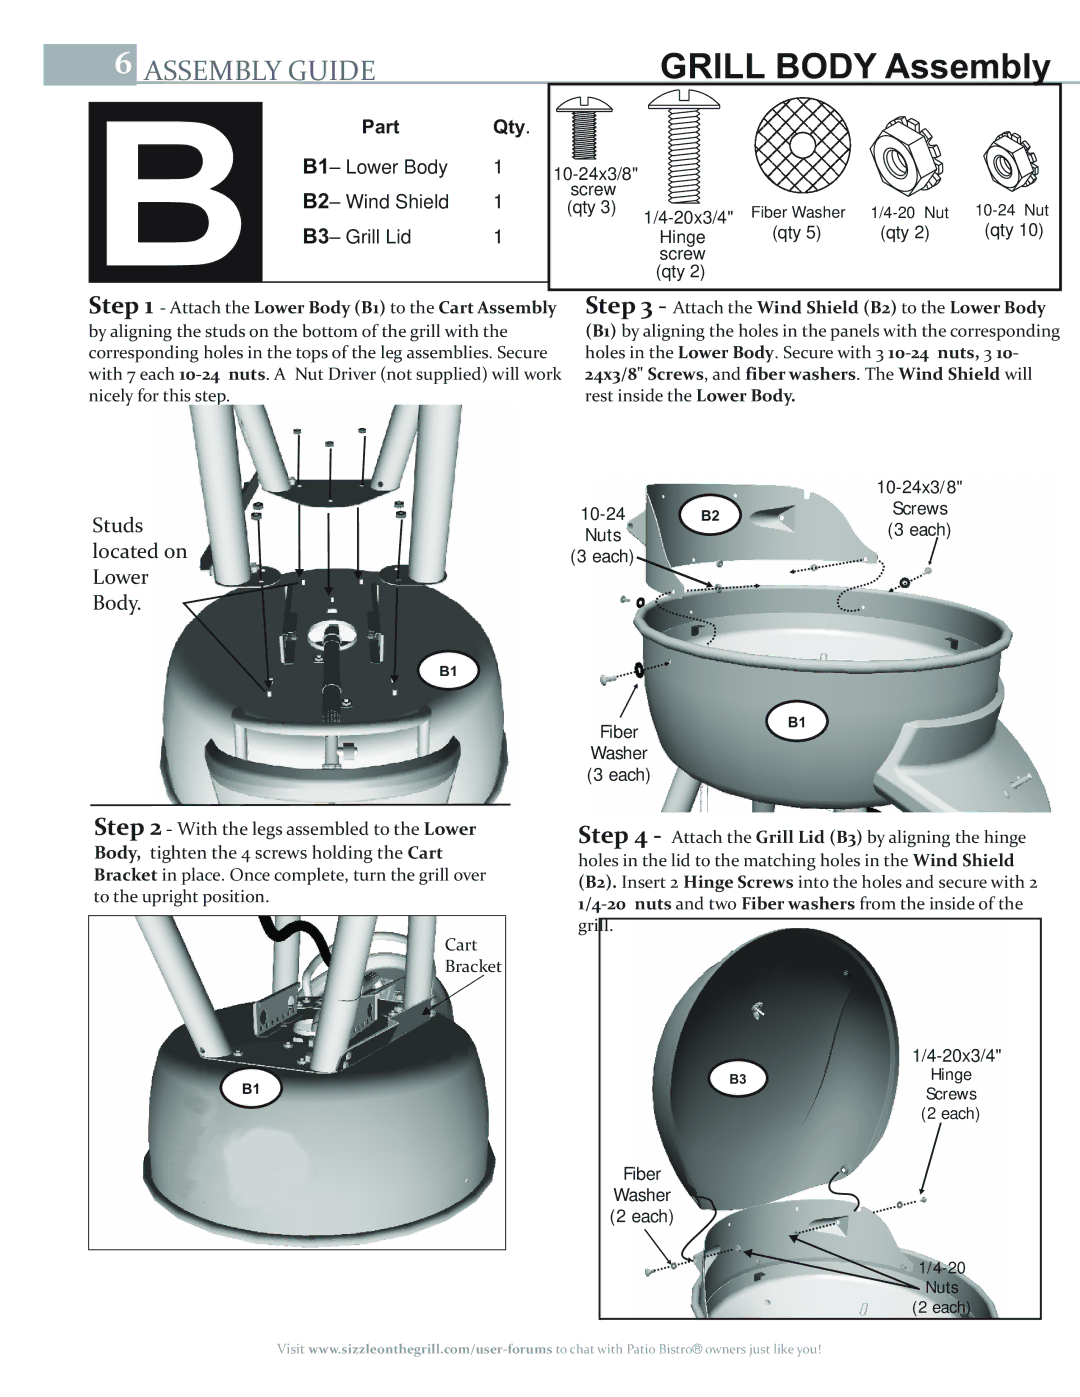
6 ASSEMBLY GUIDE | GRILL BODY Assembly |
Part | Qty. |
|
|
|
|
| |
B1– Lower Body | 1 |
|
|
|
| ||
B2– Wind Shield | 1 | screw |
|
|
|
| |
(qty 3) | Fiber Washer | ||||||
B3– Grill Lid | 1 | ||||||
| Hinge | (qty 5) | (qty 2) | (qty 10) | |||
|
|
| screw |
|
|
| |
|
|
| (qty 2) |
|
|
|
- Attach the Lower Body (B1) to the Cart Assembly by aligning the studs on the bottom of the grill with the corresponding holes in the tops of the leg assemblies. Secure with 7 each
Attach the Wind Shield (B2) to the Lower Body (B1) by aligning the holes in the panels with the corresponding holes in the Lower Body. Secure with 3
rest inside the Lower Body.
|
|
| |
Studs | B2 | Screws | |
Nuts |
| (3 each) | |
located on |
| ||
(3 each) |
|
|
Lower
Body.
B1
Fiber
B1
Washer
(3 each)
Step 2 - With the legs assembled to the Lower
Body, tighten the 4 screws holding the Cart
Bracket in place. Once complete, turn the grill over
to the upright position.
Cart
Bracket
B1
Step 4 - Attach the Grill Lid (B3) by aligning the hinge holes in the lid to the matching holes in the Wind Shield (B2). Insert 2 Hinge Screws into the holes and secure with 2
grill.
B3 | Hinge | |
Screws | ||
| ||
| (2 each) |
Fiber
Washer
(2 each)
Nuts
(2 each)
Visit