Assembly (Con’t.)
5
-Before assembly, inspect Regulator (J) for damage, dirt or debris accumulation. Clean out if present.
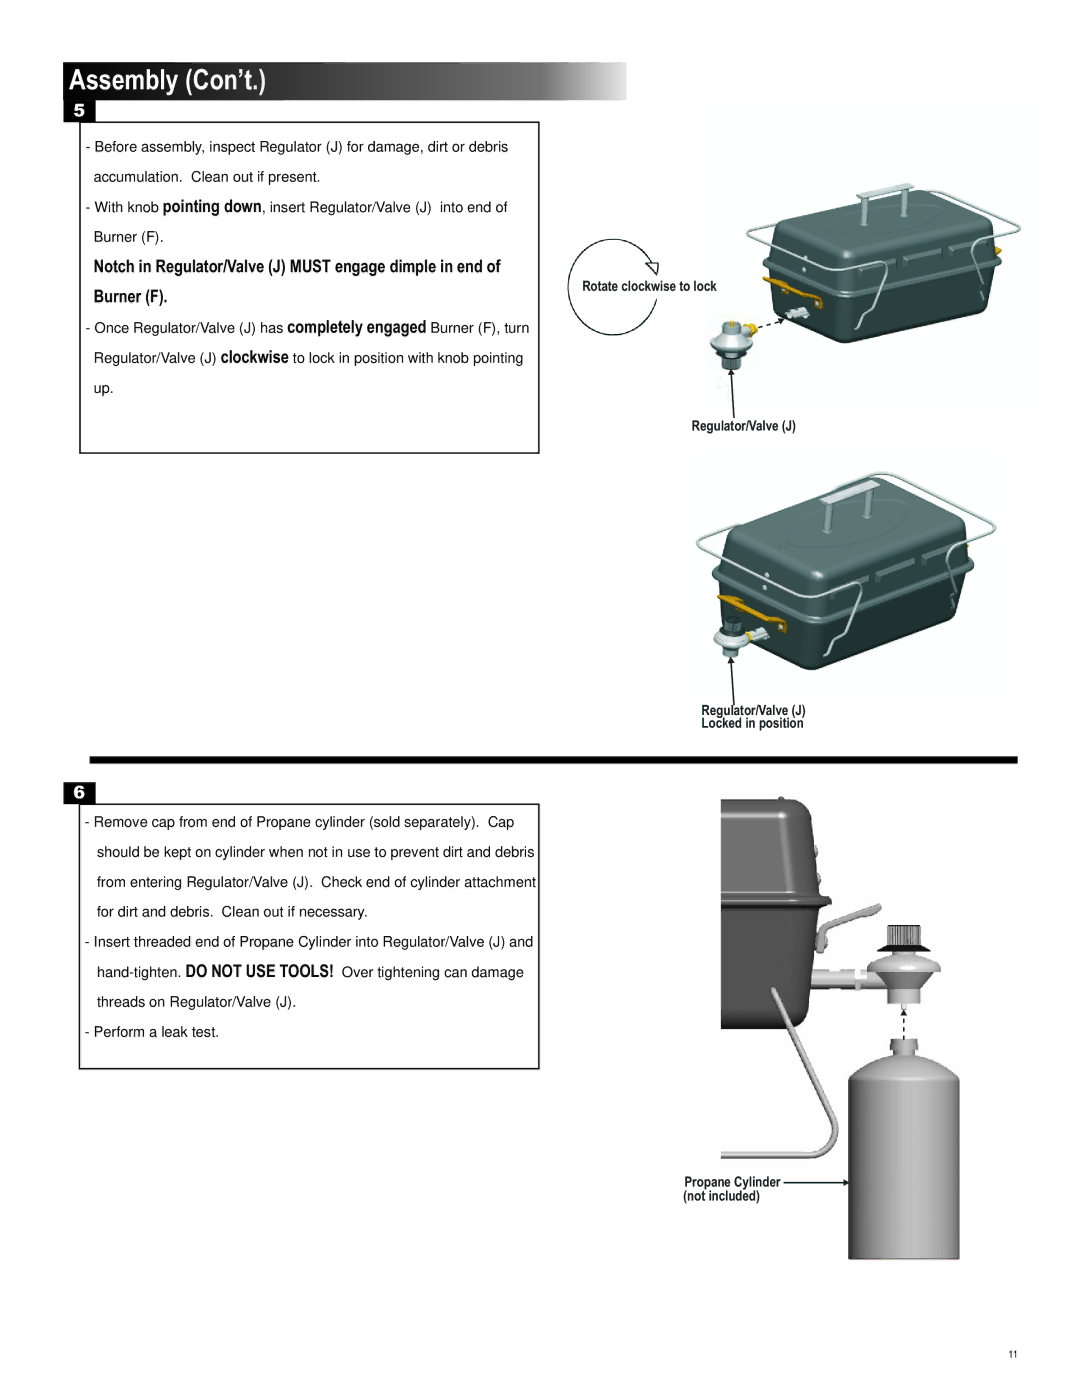
-With knob pointing down, insert Regulator/Valve (J) into end of Burner (F).
Notch in Regulator/Valve (J) MUST engage dimple in end of Burner (F).
-Once Regulator/Valve (J) has completely engaged Burner (F), turn Regulator/Valve (J) clockwise to lock in position with knob pointing up.
Rotate clockwise to lock
Regulator/Valve (J)
Regulator/Valve (J)
Locked in position
6
-Remove cap from end of Propane cylinder (sold separately). Cap should be kept on cylinder when not in use to prevent dirt and debris from entering Regulator/Valve (J). Check end of cylinder attachment for dirt and debris. Clean out if necessary.
-Insert threaded end of Propane Cylinder into Regulator/Valve (J) and
-Perform a leak test.
Propane Cylinder  (not included)
11
