4 ASSEMBLY GUIDE |
|
|
| GRILL CART Assembly | |||||
|
| Part | Qty |
|
|
| Fasteners |
|
|
|
|
|
|
|
|
| |||
|
| A1– Cart Base | 1 | . |
|
|
|
| |
|
| A2– Front Leg Set | 1 |
|
|
|
|
|
|
|
| A3– Rear Leg Set | 1 |
|
|
|
|
|
|
|
| A4– Wheels | 2 |
|
| Wheel Retaining |
| ||
|
| A5– Hubcap | 2 |
|
|
| |||
|
|
|
| screw | Clip | (qty 2) |
| ||
|
|
|
|
|
| (qty 4) | (qty 2) |
|
|
|
|
|
|
|
|
|
| ||
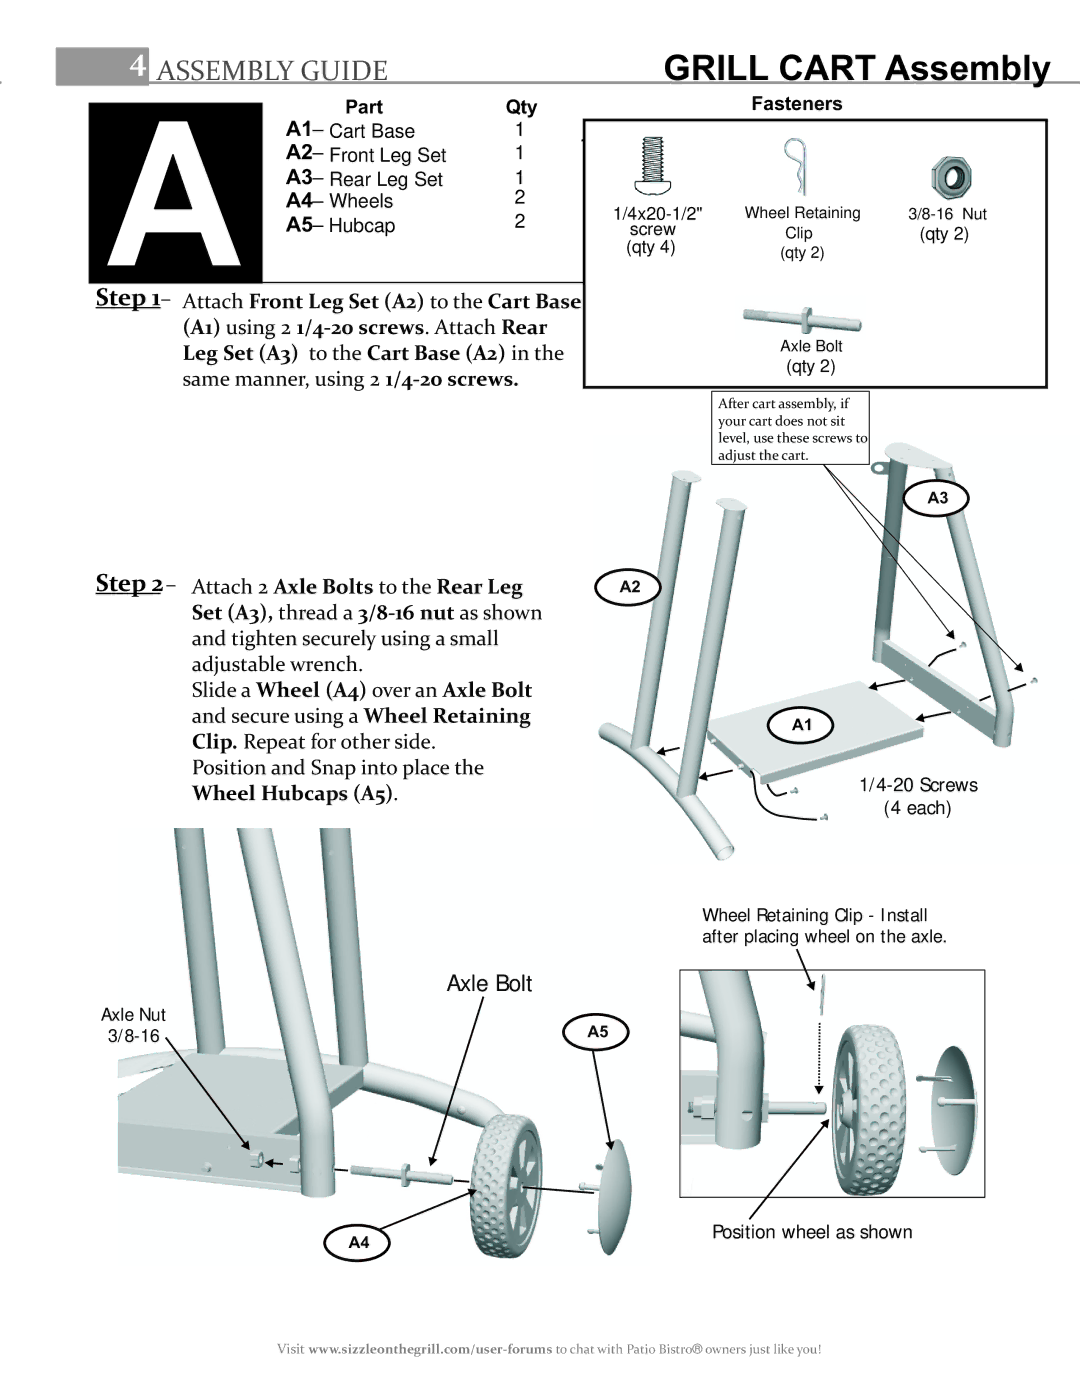
Step 1– Attach Front Leg Set (A2) to the Cart Base |
|
|
|
|
|
| |||
| (A1) using 2 |
|
|
| Axle Bolt |
|
| ||
| Leg Set (A3) to the Cart Base (A2) in the |
|
|
|
|
| |||
| same manner, using 2 |
|
|
| (qty 2) |
|
| ||
|
|
|
|
|
|
| |||
|
|
|
|
|
|
|
|
|
|
|
|
|
|
|
|
| After cart assembly, if |
|
|
|
|
|
|
|
|
| your cart does not sit |
|
|
|
|
|
|
|
|
| level, use these screws to |
|
|
|
|
|
|
|
|
| adjust the cart. |
|
|
|
|
|
|
|
|
|
| A3 | |
Step 2– Attach 2 Axle Bolts to the Rear Leg | A2 |
Set (A3), thread a
Slide a Wheel (A4) over an Axle Bolt
and secure using a Wheel Retaining
Clip. Repeat for other side.
Position and Snap into place the Wheel Hubcaps (A5).
A1
(4 each)
Wheel Retaining Clip - Install after placing wheel on the axle.
| Axle Bolt |
Axle Nut | A5 |
Position wheel as shown
A4
Visit
