5 ASSEMBLY GUIDE |
|
| GRILL CART Assembly | |||||
|
| Part |
|
|
| Fasteners |
|
|
|
| Qty . |
|
|
|
| ||
|
| A6– Cart Bracket | 1 |
|
|
|
|
|
|
| A7– Wire Shelf | 1 |
|
|
|
|
|
|
| A8– Leg End Cap | 2 |
|
|
|
|
|
|
|
|
|
| #10x3/8" |
| ||
|
|
|
|
| screw | (qty 2) | screw |
|
|
|
|
|
| (qty 2) | (qty 2) |
| |
|
|
|
|
|
|
|
|
|
A7
A6
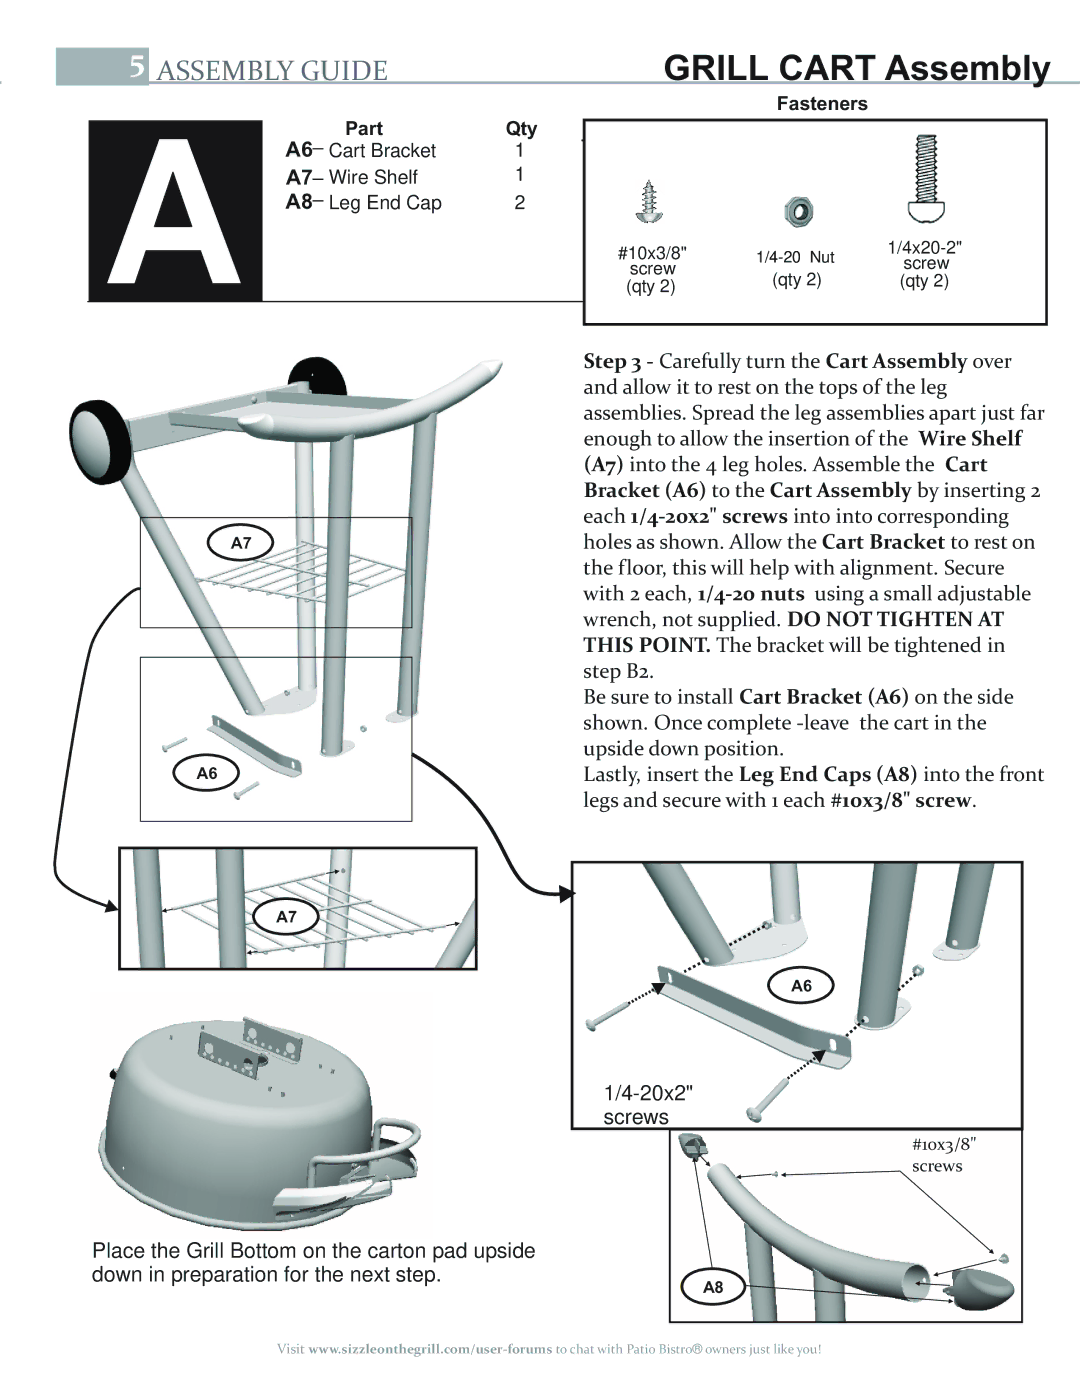
Step 3 - Carefully turn the Cart Assembly over and allow it to rest on the tops of the leg assemblies. Spread the leg assemblies apart just far enough to allow the insertion of the Wire Shelf (A7) into the 4 leg holes. Assemble the Cart Bracket (A6) to the Cart Assembly by inserting 2 each
Be sure to install Cart Bracket (A6) on the side shown. Once complete
Lastly, insert the Leg End Caps (A8) into the front legs and secure with 1 each #10x3/8" screw.
A7
Place the Grill Bottom on the carton pad upside down in preparation for the next step.
A6 |
screws |
#10x3/8" |
screws |
A8 |
Visit
