7 ASSEMBLY GUIDE |
| GRILL FINAL Assembly | ||||
|
|
| Part | Qty. | NOTE: The Cooking Grate may | |
|
|
| ||||
|
| C1 | – Cooking Grate | 1 | have sharp edges. Be very careful | |
|
| when handling the Cooking Grate. | ||||
|
| C2 | – Warming Rack | 1 | ||
|
| You should wear gloves when | ||||
|
| C3 | – Grease tray | 1 | ||
|
| handling the Cooking Grate. | ||||
|
|
|
|
| ||
|
|
|
|
|
|
|
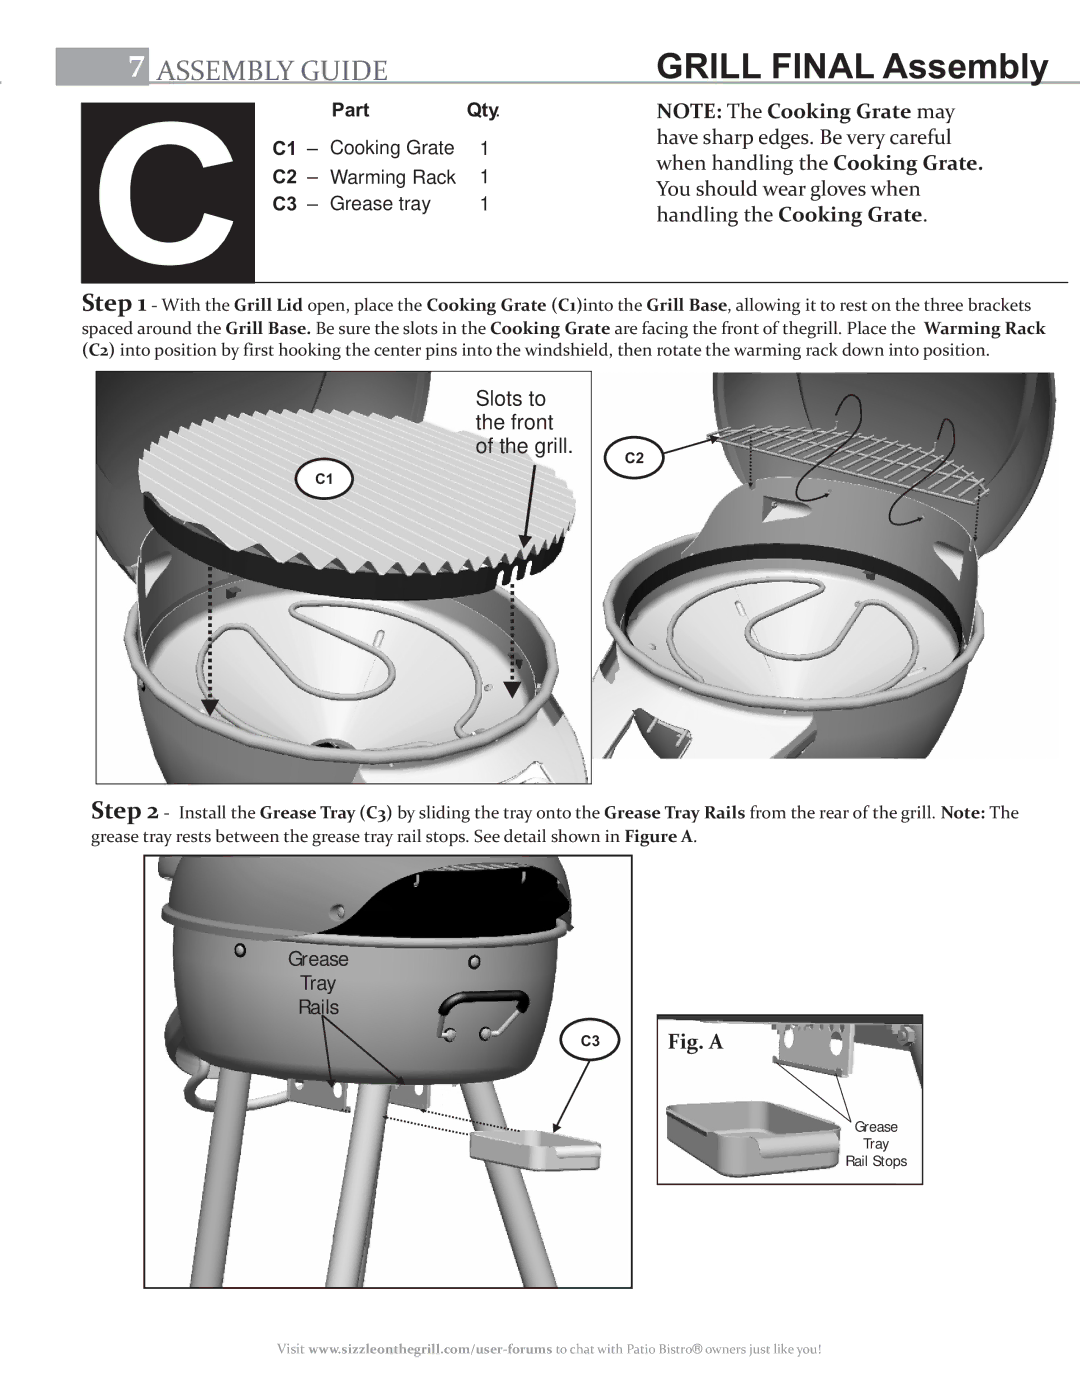
Step 1 - With the Grill Lid open, place the Cooking Grate (C1)into the Grill Base, allowing it to rest on the three brackets spaced around the Grill Base. Be sure the slots in the Cooking Grate are facing the front of thegrill. Place the Warming Rack (C2) into position by first hooking the center pins into the windshield, then rotate the warming rack down into position.
Slots to
the front of the grill.
C1
C2
Step 2 - Install the Grease Tray (C3) by sliding the tray onto the Grease Tray Rails from the rear of the grill. Note: The grease tray rests between the grease tray rail stops. See detail shown in Figure A.
Grease
Tray
Rails
C3
Fig. A
Grease
Tray
Rail Stops
Visit