Note: If your dropouts don’t appear parallel, this is normal when the wheel is not inserted and tightened, especially on two child strollers. First ensure that both handlebar height adjustment levers are oriented in the same direction (see page 12) and the locking tension bar is correctly seated. It may be possible to slightly correct minor twisting. Use moderate, gradual movements with hands only (no tools, feet or force) to tweak in the desired direction. The bolted aluminum construction allows for slight corrections.
Rear wheel.
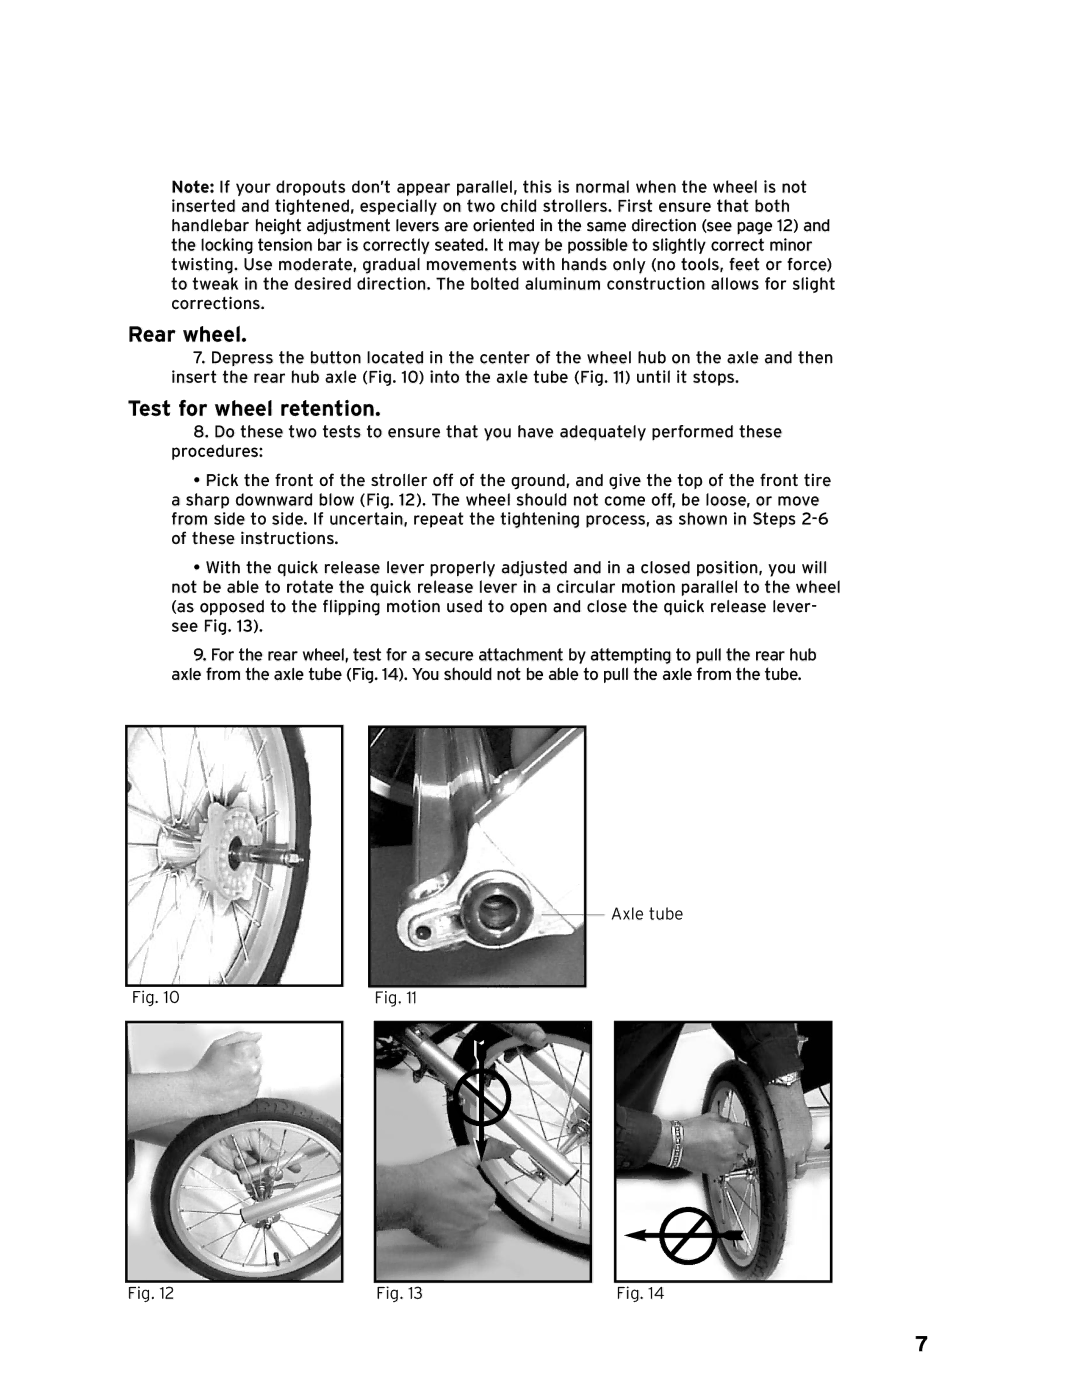
7.Depress the button located in the center of the wheel hub on the axle and then insert the rear hub axle (Fig. 10) into the axle tube (Fig. 11) until it stops.
Test for wheel retention.
8.Do these two tests to ensure that you have adequately performed these procedures:
•Pick the front of the stroller off of the ground, and give the top of the front tire a sharp downward blow (Fig. 12). The wheel should not come off, be loose, or move from side to side. If uncertain, repeat the tightening process, as shown in Steps
•With the quick release lever properly adjusted and in a closed position, you will not be able to rotate the quick release lever in a circular motion parallel to the wheel (as opposed to the flipping motion used to open and close the quick release lever- see Fig. 13).
9.For the rear wheel, test for a secure attachment by attempting to pull the rear hub axle from the axle tube (Fig. 14). You should not be able to pull the axle from the tube.
Axle tube
Fig. 10 | Fig. 11 | |
|
|
|
|
|
|
Fig. 12 | Fig. 13 | Fig. 14 |
7
