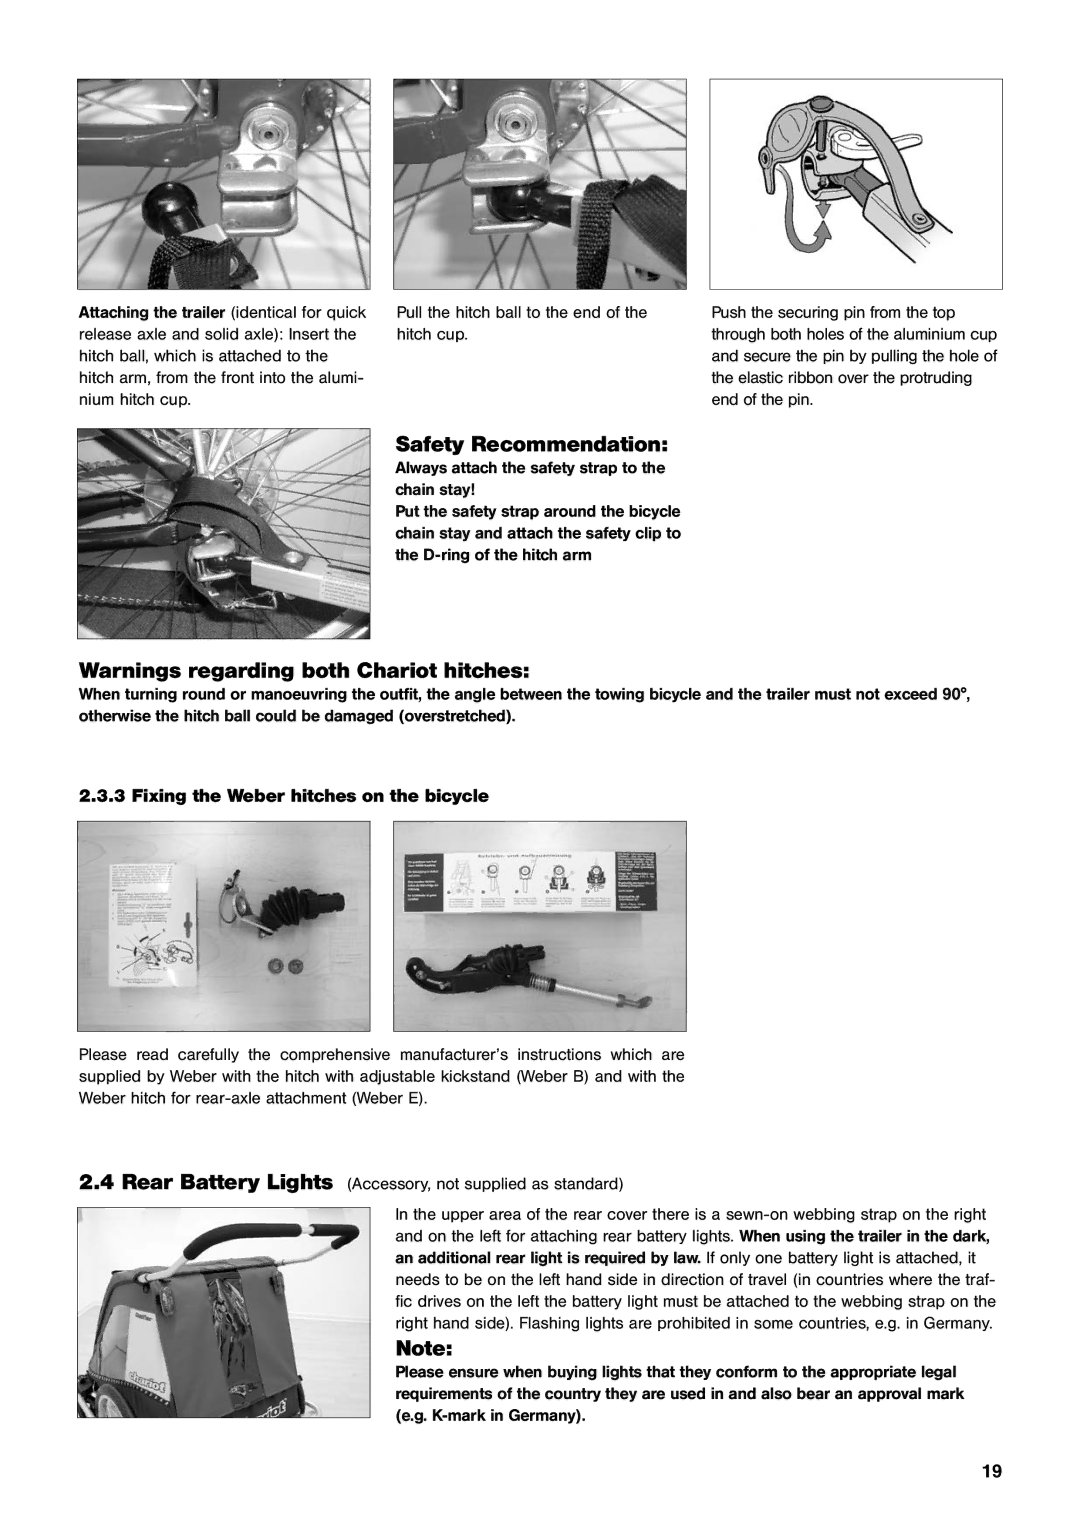
Attaching the trailer (identical for quick | Pull the hitch ball to the end of the | Push the securing pin from the top |
release axle and solid axle): Insert the | hitch cup. | through both holes of the aluminium cup |
hitch ball, which is attached to the |
| and secure the pin by pulling the hole of |
hitch arm, from the front into the alumi- |
| the elastic ribbon over the protruding |
nium hitch cup. |
| end of the pin. |
Safety Recommendation:
Always attach the safety strap to the chain stay!
Put the safety strap around the bicycle chain stay and attach the safety clip to the
Warnings regarding both Chariot hitches:
When turning round or manoeuvring the outfit, the angle between the towing bicycle and the trailer must not exceed 90°, otherwise the hitch ball could be damaged (overstretched).
2.3.3 Fixing the Weber hitches on the bicycle
Please read carefully the comprehensive manufacturer’s instructions which are supplied by Weber with the hitch with adjustable kickstand (Weber B) and with the Weber hitch for
2.4Rear Battery Lights (Accessory, not supplied as standard)
In the upper area of the rear cover there is a
Note:
Please ensure when buying lights that they conform to the appropriate legal requirements of the country they are used in and also bear an approval mark (e.g.
19
