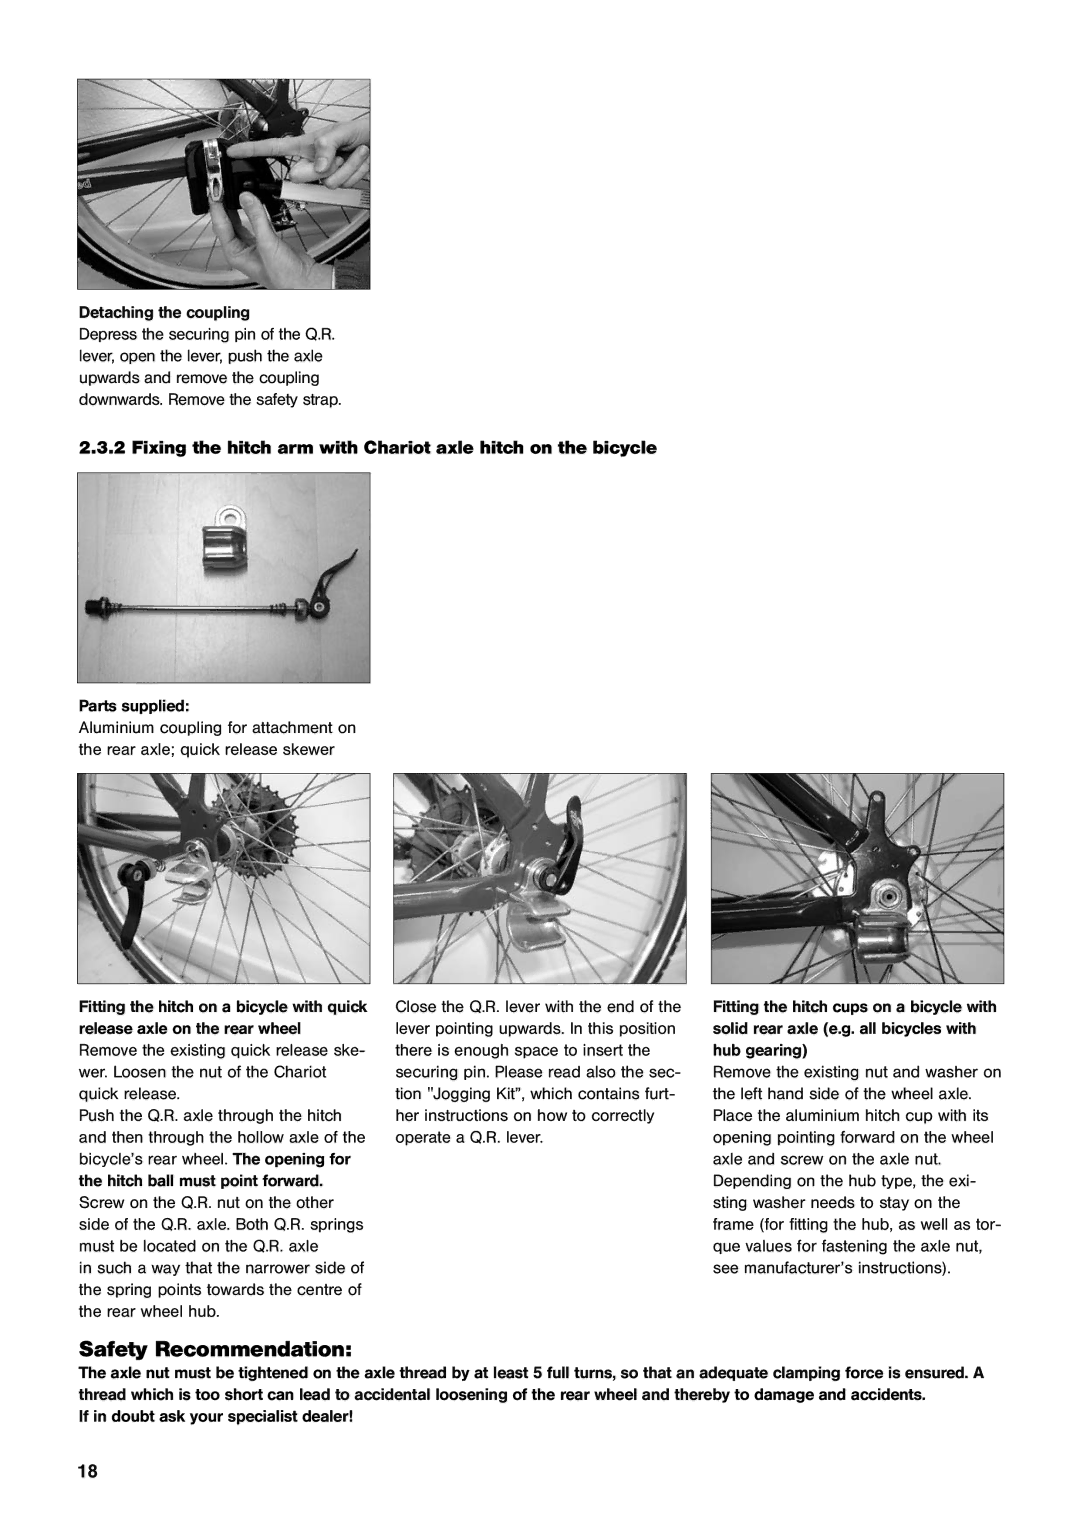
Detaching the coupling
Depress the securing pin of the Q.R. lever, open the lever, push the axle upwards and remove the coupling downwards. Remove the safety strap.
2.3.2 Fixing the hitch arm with Chariot axle hitch on the bicycle
Parts supplied:
Aluminium coupling for attachment on the rear axle; quick release skewer
Fitting the hitch on a bicycle with quick release axle on the rear wheel Remove the existing quick release ske- wer. Loosen the nut of the Chariot quick release.
Push the Q.R. axle through the hitch and then through the hollow axle of the bicycle’s rear wheel. The opening for the hitch ball must point forward. Screw on the Q.R. nut on the other side of the Q.R. axle. Both Q.R. springs must be located on the Q.R. axle
in such a way that the narrower side of the spring points towards the centre of the rear wheel hub.
Close the Q.R. lever with the end of the lever pointing upwards. In this position there is enough space to insert the securing pin. Please read also the sec- tion "Jogging Kit”, which contains furt- her instructions on how to correctly operate a Q.R. lever.
Fitting the hitch cups on a bicycle with solid rear axle (e.g. all bicycles with hub gearing)
Remove the existing nut and washer on the left hand side of the wheel axle. Place the aluminium hitch cup with its opening pointing forward on the wheel axle and screw on the axle nut. Depending on the hub type, the exi- sting washer needs to stay on the frame (for fitting the hub, as well as tor- que values for fastening the axle nut, see manufacturer’s instructions).
Safety Recommendation:
The axle nut must be tightened on the axle thread by at least 5 full turns, so that an adequate clamping force is ensured. A thread which is too short can lead to accidental loosening of the rear wheel and thereby to damage and accidents.
If in doubt ask your specialist dealer!
18
