
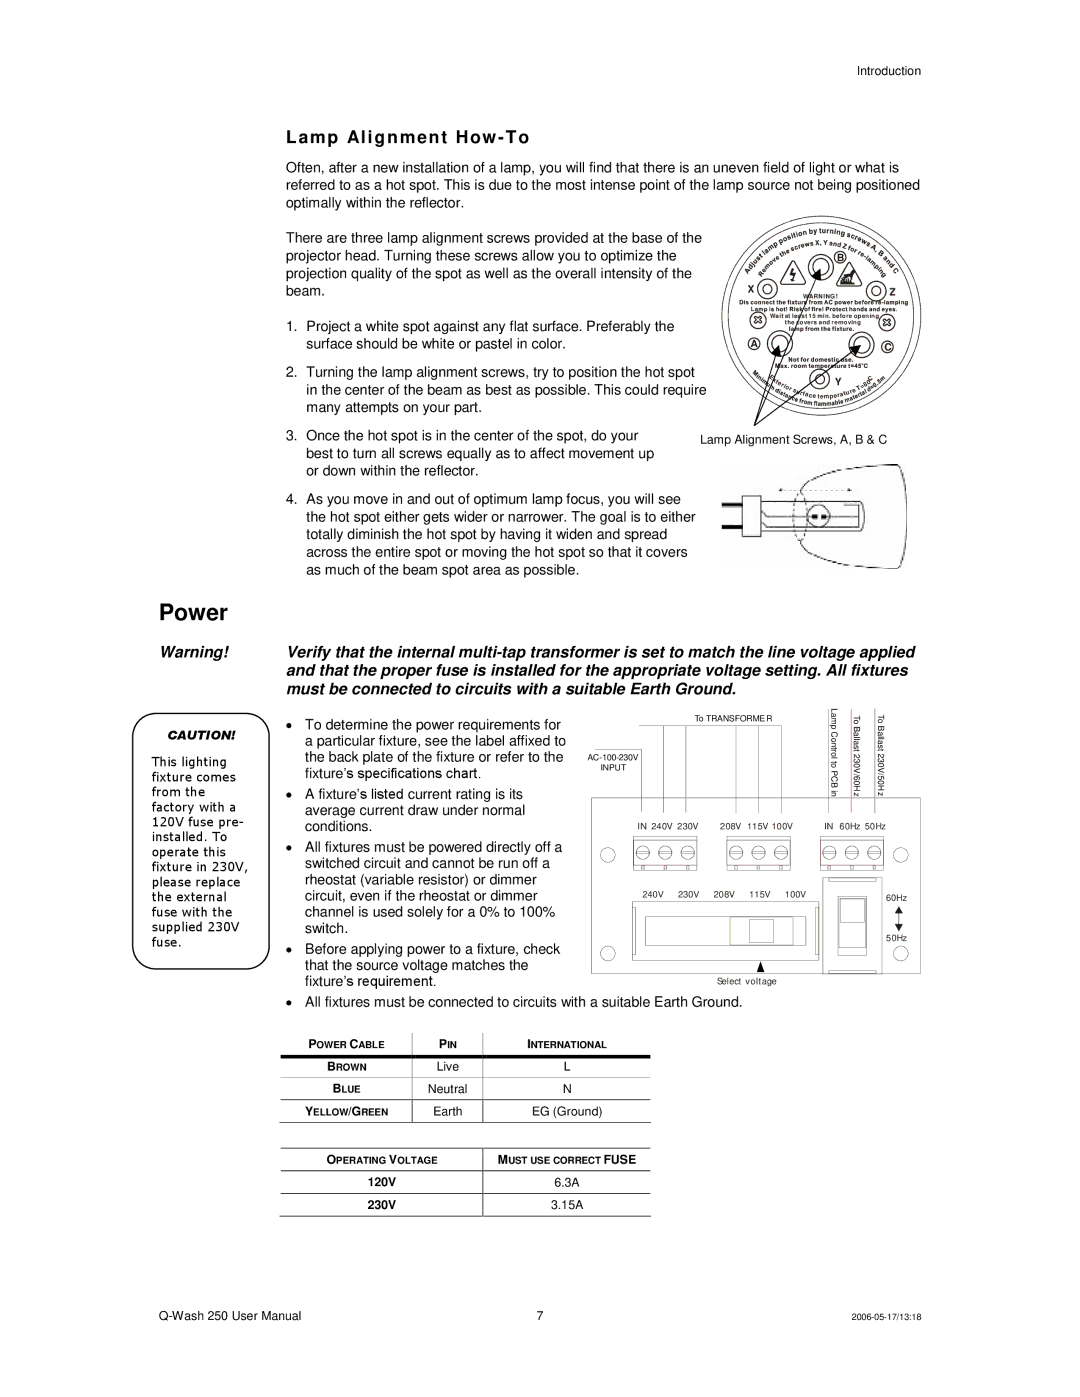
250 specifications
The Chauvet 250 is a powerful and versatile lighting fixture designed for both professional and amateur lighting applications. Known for its impressive performance and innovative features, the Chauvet 250 has gained popularity in the entertainment industry, particularly in theatrical, concert, and event settings.One of the standout features of the Chauvet 250 is its high output, which allows it to produce bright and vivid colors that can illuminate even the largest venues. Equipped with a 250-watt bulb, the fixture delivers an exceptional level of brightness, making it ideal for stages, clubs, and outdoor events. Additionally, it offers a range of color mixing options, including a brilliant RGB color system that enables users to create a wide spectrum of colors for dynamic visual effects.
The Chauvet 250 is designed with advanced technologies that enhance its performance and usability. One such technology is its DMX compatibility, which allows for seamless integration into lighting control systems. Users can control multiple fixtures simultaneously, enabling intricate programming for synchronized light shows. This makes it an excellent choice for professionals who require precision and technical control over their lighting setups.
Another notable characteristic is its impressive selection of built-in effects. The Chauvet 250 features strobe effects, dimming capabilities, and a variety of gobos that can be projected onto surfaces to create engaging visual textures. The fixture also includes a pan and tilt feature, which provides flexibility in positioning and can be adjusted remotely for dynamic movement during performances.
User-friendly controls are another highlight of the Chauvet 250. It comes equipped with an intuitive interface that simplifies programming and allows for quick adjustments on the fly. With its lightweight and portable design, the fixture is easy to transport and set up, making it a practical choice for mobile entertainers and production companies.
Overall, the Chauvet 250 stands out for its combination of high output, versatile color mixing, advanced DMX compatibility, and user-friendly features. Whether for professional productions or personal events, this fixture provides exceptional performance and reliability, meeting the diverse needs of lighting designers and technicians alike. Its robust design and array of features make the Chauvet 250 a valuable addition to any lighting arsenal, capable of transforming any space into a captivating visual experience.