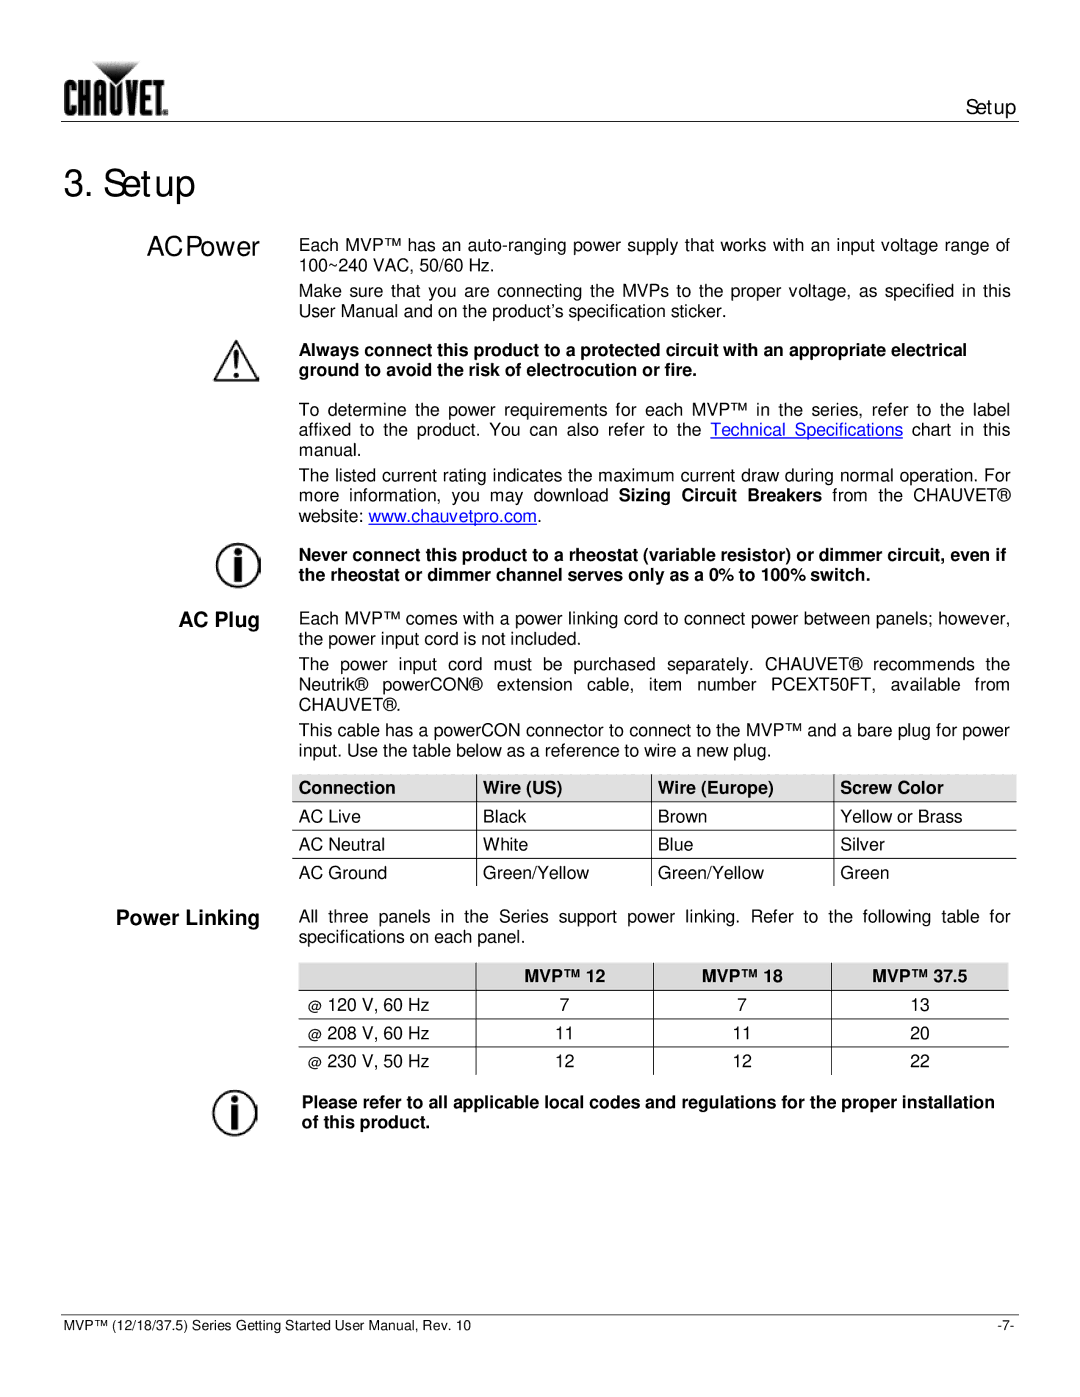
37.5, 12, 18 specifications
Chauvet Professional has made significant strides in the world of lighting technology, and the Chauvet 18,12,37.5 is a testament to their innovation and commitment to excellence. This fixture stands out in the realm of stage and event lighting, offering a blend of versatility, power, and advanced features that cater to a wide range of applications, from concert venues to theatrical performances.At the heart of the Chauvet 18,12,37.5 is its impressive output capability. With 18 12W RGBW LEDs, it delivers a brilliant color spectrum that can easily fill large spaces with vibrant hues and sharp gobo projections. This fixture is designed to produce a wide range of colors, thanks to its RGBW technology that includes red, green, blue, and white LEDs, allowing for enhanced color mixing and a more extensive palette than traditional RGB fixtures.
One of the key characteristics of the Chauvet 18,12,37.5 is its remarkable brightness. The fixture is engineered to provide high luminous efficacy, ensuring that it can illuminate vast areas without compromising on color quality or vibrancy. This makes it an ideal choice for outdoor events, large-scale installations, and anywhere bright, impactful lighting is required.
Additionally, the Chauvet 18,12,37.5 features advanced control options, allowing for seamless integration into various lighting systems. With support for DMX control, users can customize their lighting setups, programming complex sequences and effects to match the mood of the event or performance. The fixture also supports standalone operation, making it versatile for setups where DMX control is not feasible.
Moreover, the connectivity options are designed to enhance its usability, including both power linking and data linking capabilities, making it easy to set up multiple fixtures in series without dealing with messy cabling.
In terms of durability, the Chauvet 18,12,37.5 is built to withstand the rigors of the road. Its rugged housing ensures that it can endure the inevitable bumps and bruises associated with touring and mobile installations. Additionally, efficient thermal management systems are in place, which prevent overheating during extended use, thereby enhancing the longevity of the LEDs.
Overall, the Chauvet 18,12,37.5 is a powerful, feature-rich lighting fixture suitable for a variety of applications. With its robust output, advanced control options, and durability, it sets a new standard in the world of professional lighting, making it an invaluable tool for lighting designers and event professionals alike.

