Mounting
Orientation
Rigging
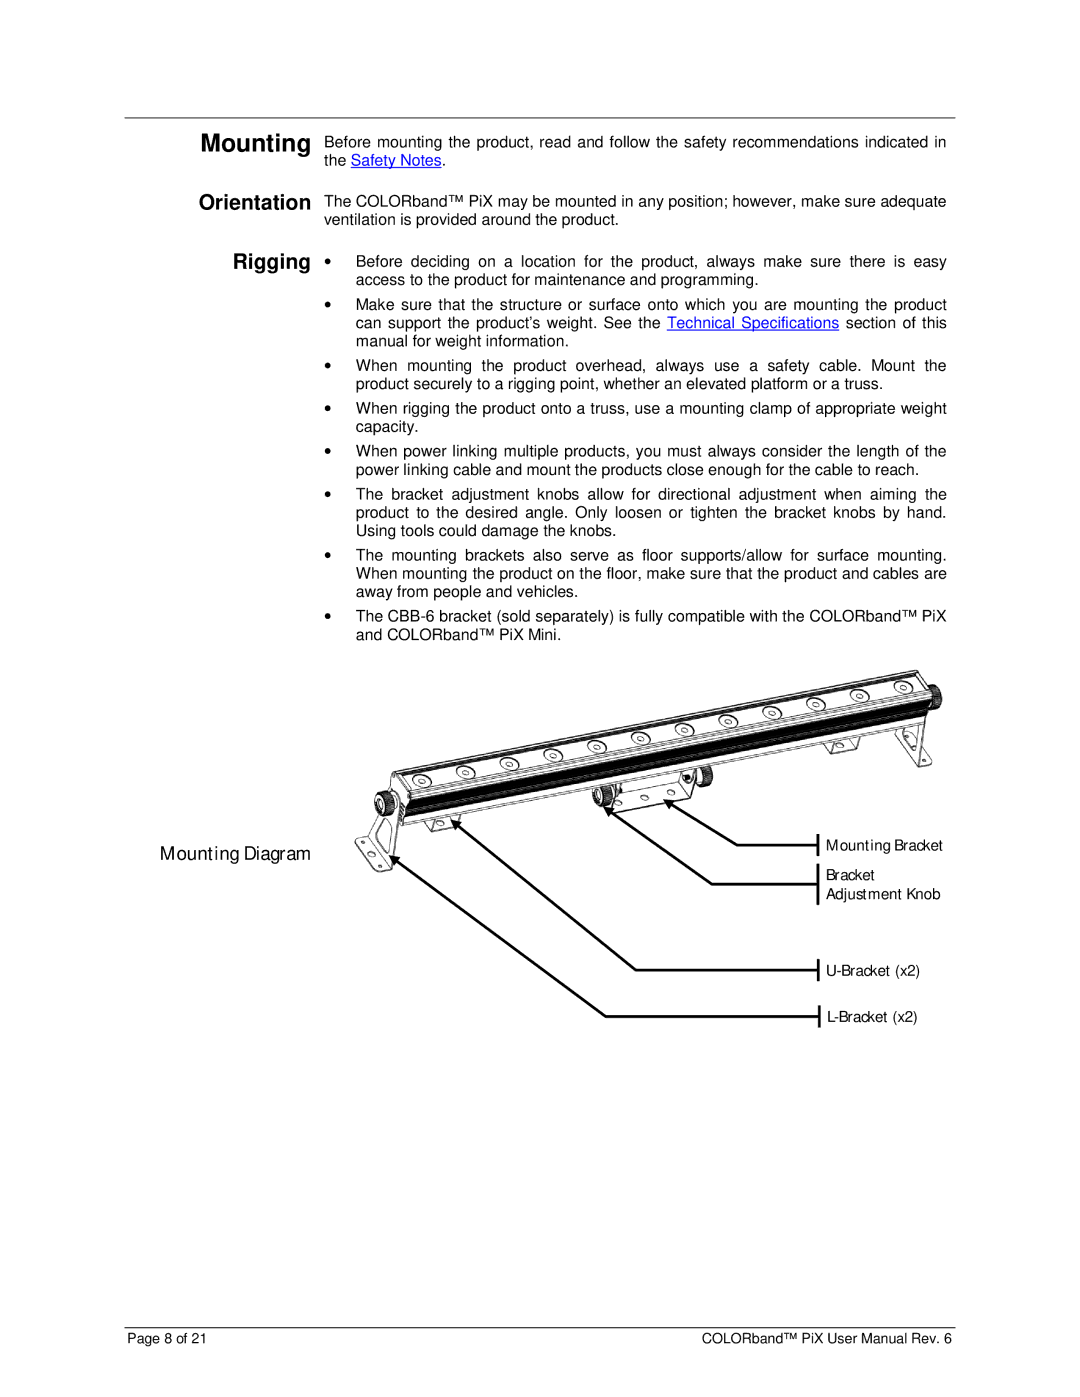
Mounting Diagram
Before mounting the product, read and follow the safety recommendations indicated in the Safety Notes.
The COLORband™ PiX may be mounted in any position; however, make sure adequate ventilation is provided around the product.
∙Before deciding on a location for the product, always make sure there is easy access to the product for maintenance and programming.
∙Make sure that the structure or surface onto which you are mounting the product can support the product’s weight. See the Technical Specifications section of this manual for weight information.
∙When mounting the product overhead, always use a safety cable. Mount the product securely to a rigging point, whether an elevated platform or a truss.
∙When rigging the product onto a truss, use a mounting clamp of appropriate weight capacity.
∙When power linking multiple products, you must always consider the length of the power linking cable and mount the products close enough for the cable to reach.
∙The bracket adjustment knobs allow for directional adjustment when aiming the product to the desired angle. Only loosen or tighten the bracket knobs by hand. Using tools could damage the knobs.
∙The mounting brackets also serve as floor supports/allow for surface mounting. When mounting the product on the floor, make sure that the product and cables are away from people and vehicles.
∙The
![]() Mounting Bracket
Mounting Bracket
Bracket
Adjustment Knob
Page 8 of 21 | COLORband™ PiX User Manual Rev. 6 |