3.SETUP
AC Power
Power Supply
This product includes an external power supply which is
To determine the power requirements for a particular product, see the label affixed to the back plate of the product or refer to the product’s specifications chart. A product’s listed current rating indicates its average current draw under normal conditions.
Always connect the product to a switched circuit. Never connect the product to a rheostat (variable resistor) or dimmer circuit, even if the rheostat or dimmer channel is used only as a 0 to 100% switch.
Mounting
Orientation
The MiN™ Laser FX 2.0/RGX 2.0 may be mounted in any position provided there is adequate room for ventilation.
Rigging
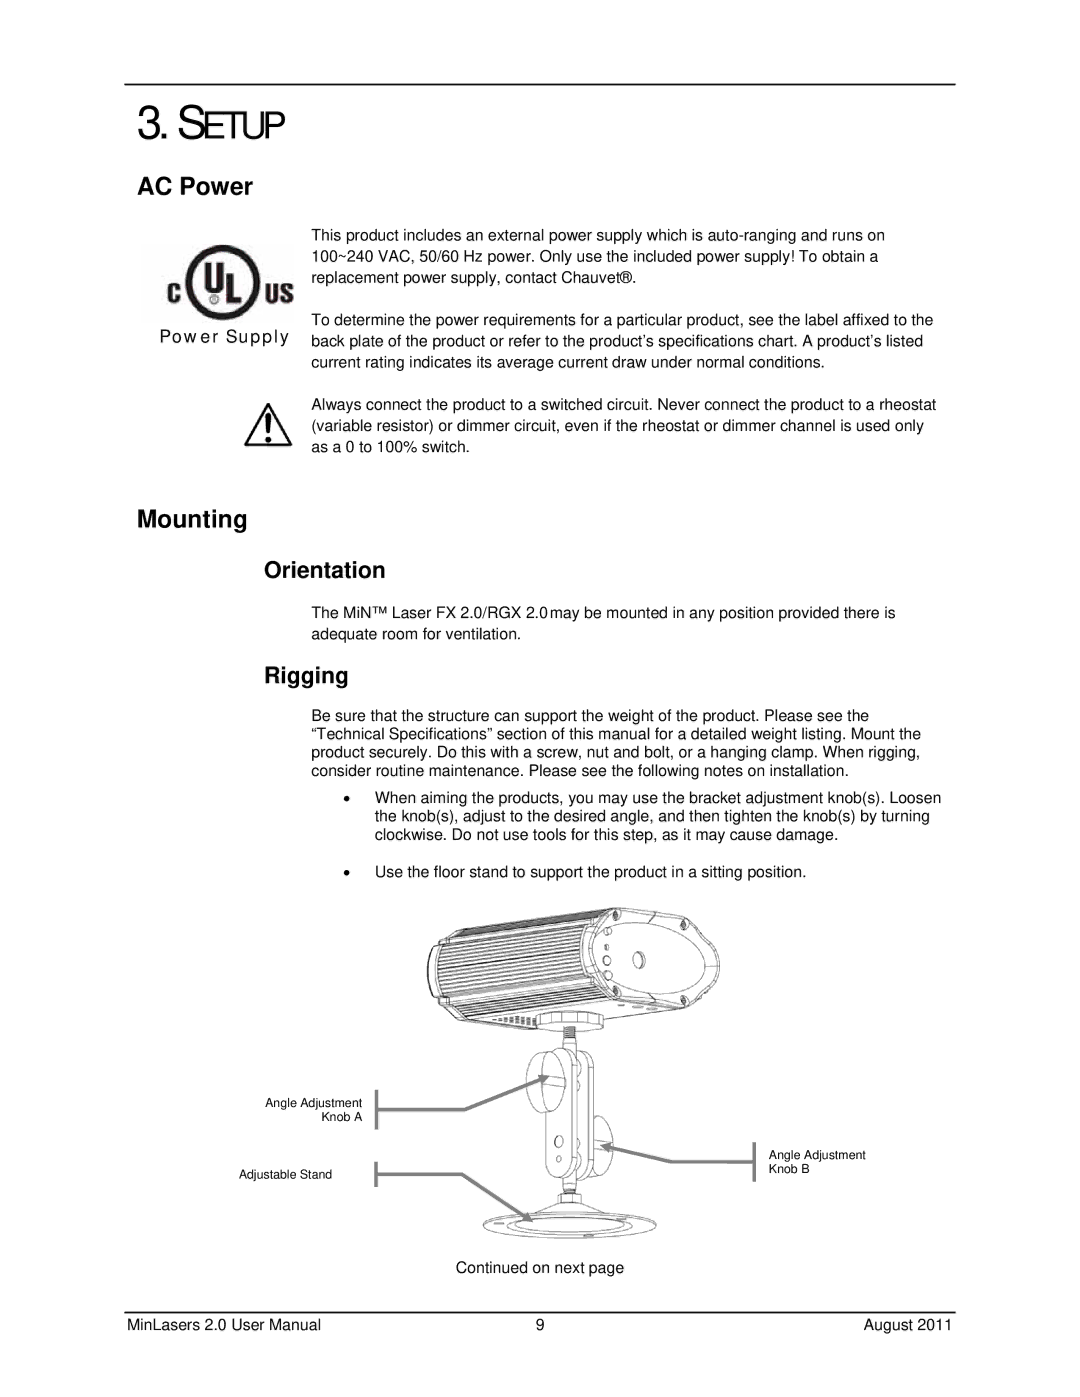
Be sure that the structure can support the weight of the product. Please see the “Technical Specifications” section of this manual for a detailed weight listing. Mount the product securely. Do this with a screw, nut and bolt, or a hanging clamp. When rigging, consider routine maintenance. Please see the following notes on installation.
When aiming the products, you may use the bracket adjustment knob(s). Loosen the knob(s), adjust to the desired angle, and then tighten the knob(s) by turning clockwise. Do not use tools for this step, as it may cause damage.
Use the floor stand to support the product in a sitting position.
Angle Adjustment Knob A
Adjustable Stand
Angle Adjustment Knob B
Continued on next page
MinLasers 2.0 User Manual | 9 | August 2011 |