Setting up a DMX Serial Data Link
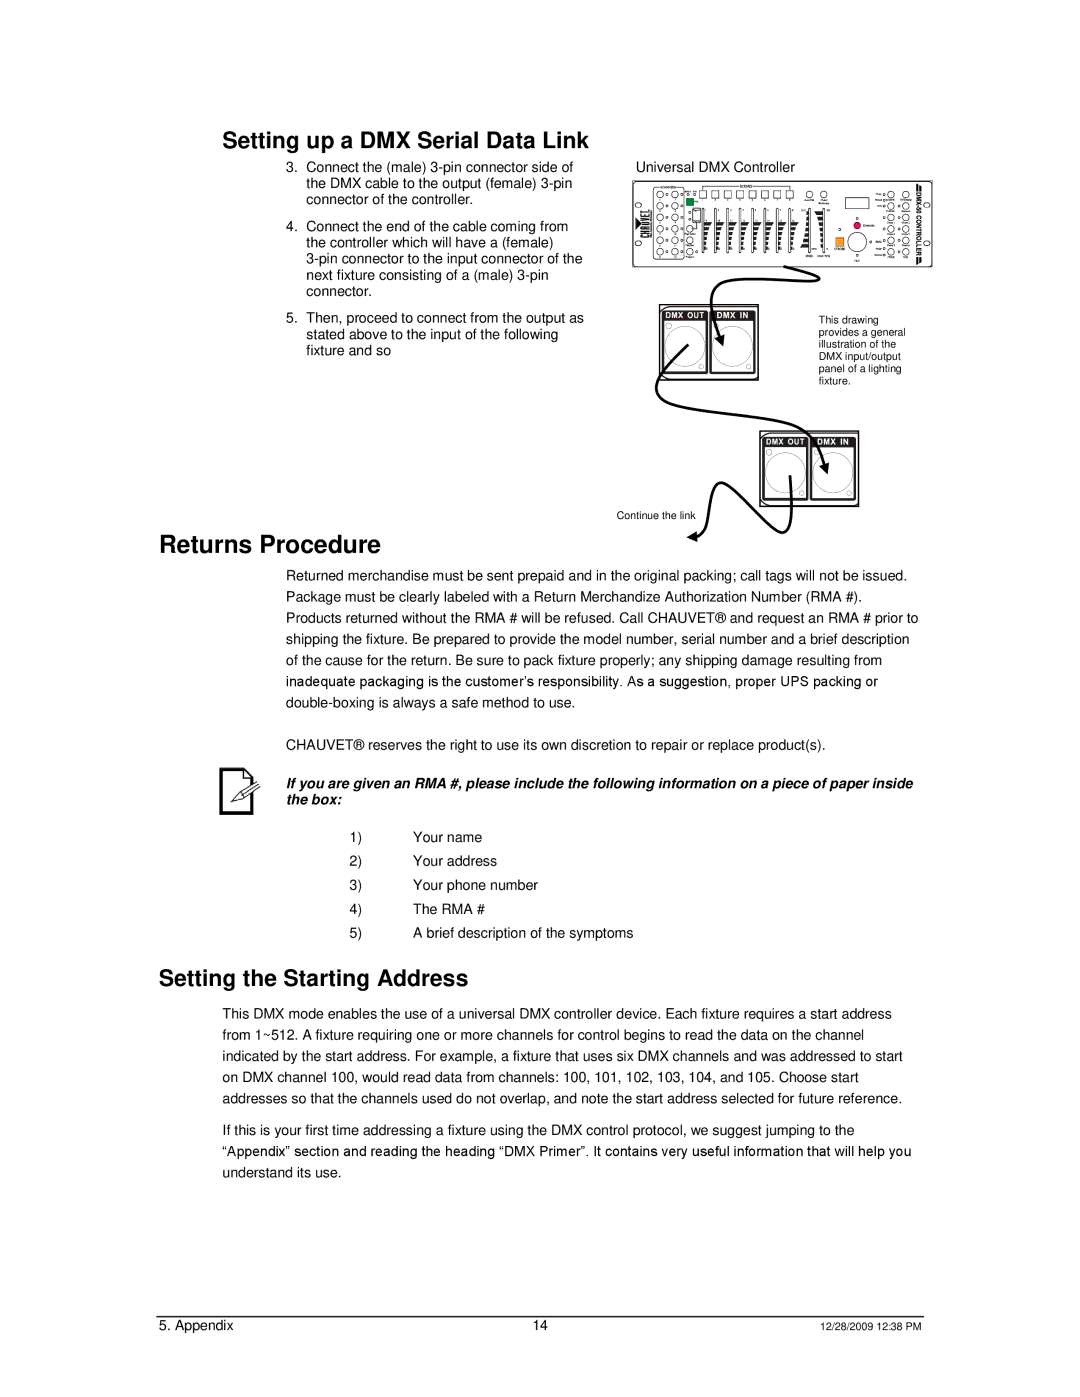
3.Connect the (male)
4.Connect the end of the cable coming from the controller which will have a (female)
5.Then, proceed to connect from the output as stated above to the input of the following fixture and so
Universal DMX Controller
This drawing provides a general illustration of the DMX input/output panel of a lighting fixture.
Continue the link
Returns Procedure
Returned merchandise must be sent prepaid and in the original packing; call tags will not be issued. Package must be clearly labeled with a Return Merchandize Authorization Number (RMA #). Products returned without the RMA # will be refused. Call CHAUVET® and request an RMA # prior to shipping the fixture. Be prepared to provide the model number, serial number and a brief description of the cause for the return. Be sure to pack fixture properly; any shipping damage resulting from
inadequate packaging is the customer’s responsibility. As a suggestion, proper UPS packing or
CHAUVET® reserves the right to use its own discretion to repair or replace product(s).
If you are given an RMA #, please include the following information on a piece of paper inside the box:
1)Your name
2)Your address
3)Your phone number
4)The RMA #
5)A brief description of the symptoms
Setting the Starting Address
This DMX mode enables the use of a universal DMX controller device. Each fixture requires a start address from 1~512. A fixture requiring one or more channels for control begins to read the data on the channel indicated by the start address. For example, a fixture that uses six DMX channels and was addressed to start on DMX channel 100, would read data from channels: 100, 101, 102, 103, 104, and 105. Choose start addresses so that the channels used do not overlap, and note the start address selected for future reference.
If this is your first time addressing a fixture using the DMX control protocol, we suggest jumping to the “Appendix” section and reading the heading “DMX Primer”. It contains very useful information that will help you understand its use.
5. Appendix | 14 | 12/28/2009 12:38 PM |