Using the TV’s menu
3Press the 6 button to choose VIDEO, then press the 5 button to choose one of video inputs,
4Set the picture effect.
Press the 6 button to choose an item listed in the following table and press the 5 button to choose one of options.
•As explained in the table, if PICTURE EFFECT is set to OFF, the dedicated picture effect for the video inputs is not used. In this case, normal picture effect is used.
Item | Options |
PICTURE MODE | BRIGHT*, STANDARD, |
| SOFT |
DIGITAL VNR | AUTO (LOW), AUTO |
| (HIGH), MIN*, MAX |
WHITE | COOL, MID*, WARM |
BALANCE |
|
Super DigiPure | AUTO, MAX*, OFF, MIN |
PICTURE | ON*: |
EFFECT | Above picture effect |
| applies to the chosen |
| video input. |
| OFF: |
| No picture effect applies. |
*: When shipped
•For details of each item, see “PICTURE MODE” on page 20, “DIGITAL VNR” on page 21, “WHITE BALANCE” on page 21, “Super DigiPure” on page 22.
•When the signal is 625p or 525p:
-In “DIGITAL VNR”, AUTO
(LOW and HIGH) cannot be selected.
-In “Super DigiPure”, AUTO cannot be selected.
•Pressing the blue button will return the picture effect to the factory set value.
5Press the OK button to complete the setting.
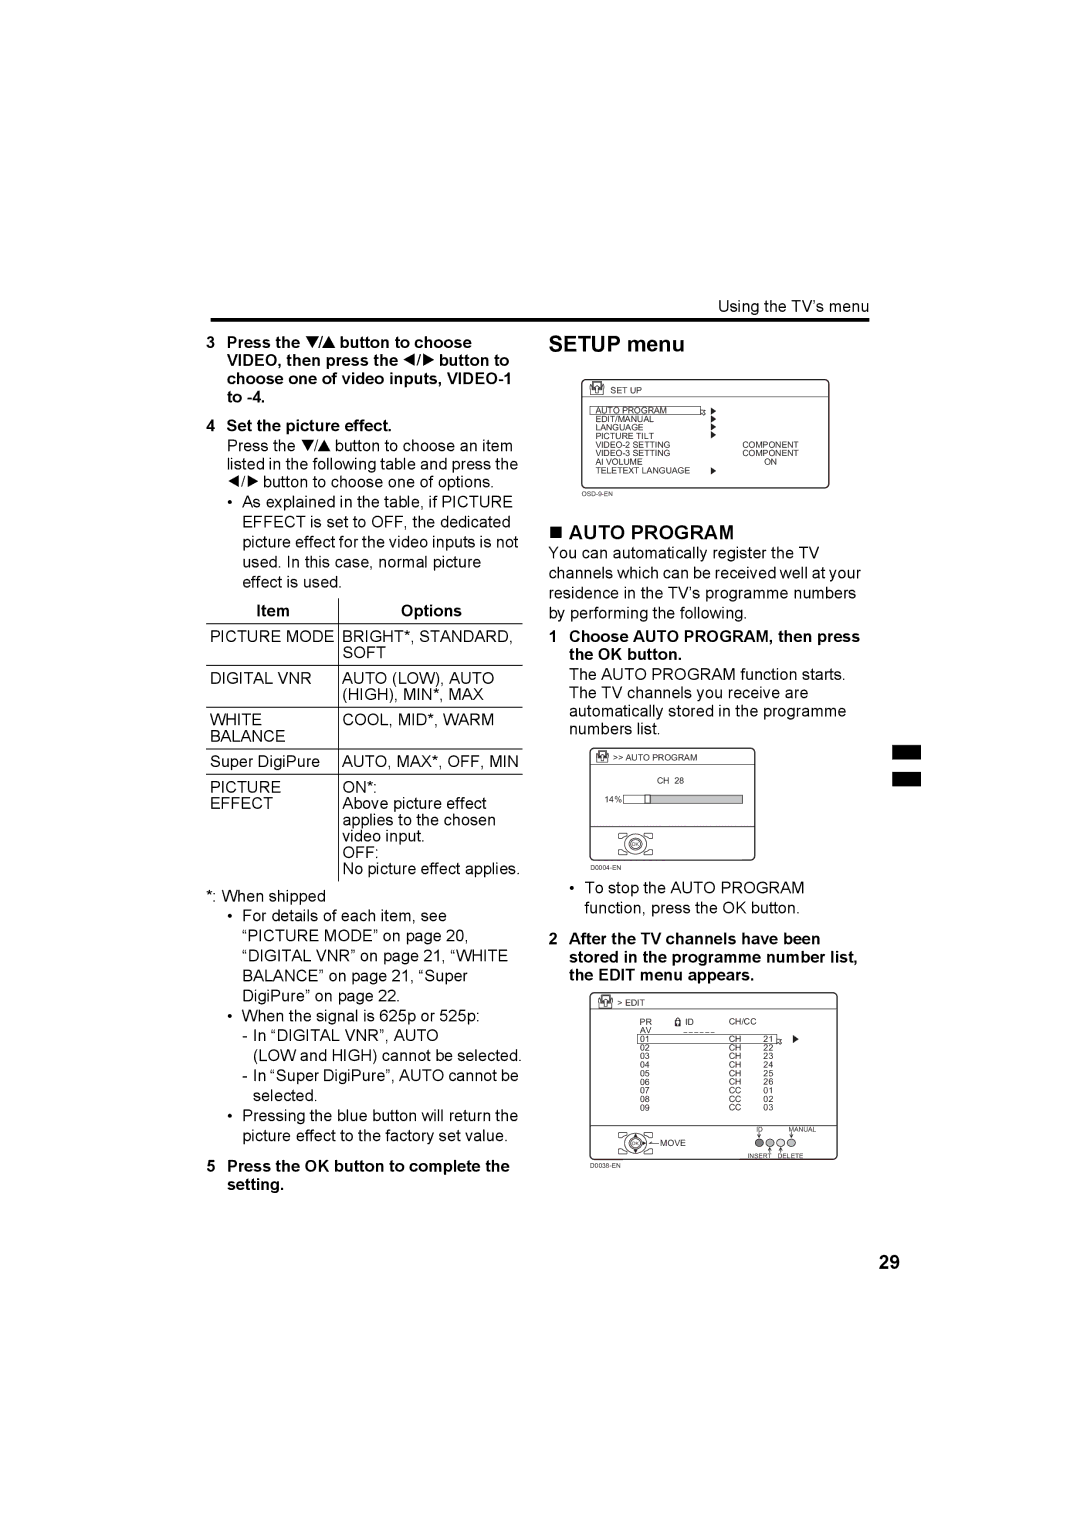
SETUP menu
SET UP
| AUTO PROGRAM |
|
| EDIT/MANUAL |
|
| LANGUAGE |
|
| PICTURE TILT |
|
| COMPONENT | |
| COMPONENT | |
| AI VOLUME | ON |
| TELETEXT LANGUAGE |
|
| ||
AUTO PROGRAM
You can automatically register the TV channels which can be received well at your residence in the TV’s programme numbers by performing the following.
1Choose AUTO PROGRAM, then press the OK button.
The AUTO PROGRAM function starts. The TV channels you receive are automatically stored in the programme numbers list.
![]() >> AUTO PROGRAM
>> AUTO PROGRAM
CH 28
14%
OK
•To stop the AUTO PROGRAM function, press the OK button.
2After the TV channels have been stored in the programme number list, the EDIT menu appears.
![]() > EDIT
> EDIT
PR | ID | CH/CC |
|
AV |
|
|
|
01 |
| CH | 21 |
02 |
| CH | 22 |
03 |
| CH | 23 |
04 |
| CH | 24 |
05 |
| CH | 25 |
06 |
| CH | 26 |
07 |
| CC | 01 |
08 |
| CC | 02 |
09 |
| CC | 03 |
ID MANUAL
OK ![]() MOVE
MOVE
INSERT DELETE
29
