6405/4410 Install
Page 5
2.The next step is to run the main harness. Pop off both ends of the boot located between the door and cab. The main wiring harness has black and red wires attached. Remove the rubber band to uncoil the harness. One end of the main harness has a 12 pin and a 6 pin connector – this end stays inside the driver’s door. To run the main harness, start by fishing the passenger's side end of the harness (the one with just a 6 pin connector) through the driver's door and out on the door side of the boot. To fish wire through the boot, tape it to a long screwdriver (or use a fish wire) and push the screwdriver through the boot. Next, fish the wire through the opening through the cab and run the harness up under the dash. (Be careful when running the harness as to not interfere with the emergency brake.) To run the harness into the passenger side door, repeat the process above. When complete, the ends of the boot can be put back into their original position.
3.On both the driver and passenger side, snap the 6 pin connector from the main harness onto the 6 pin connector that comes from the Power Vision mirrors into the door.
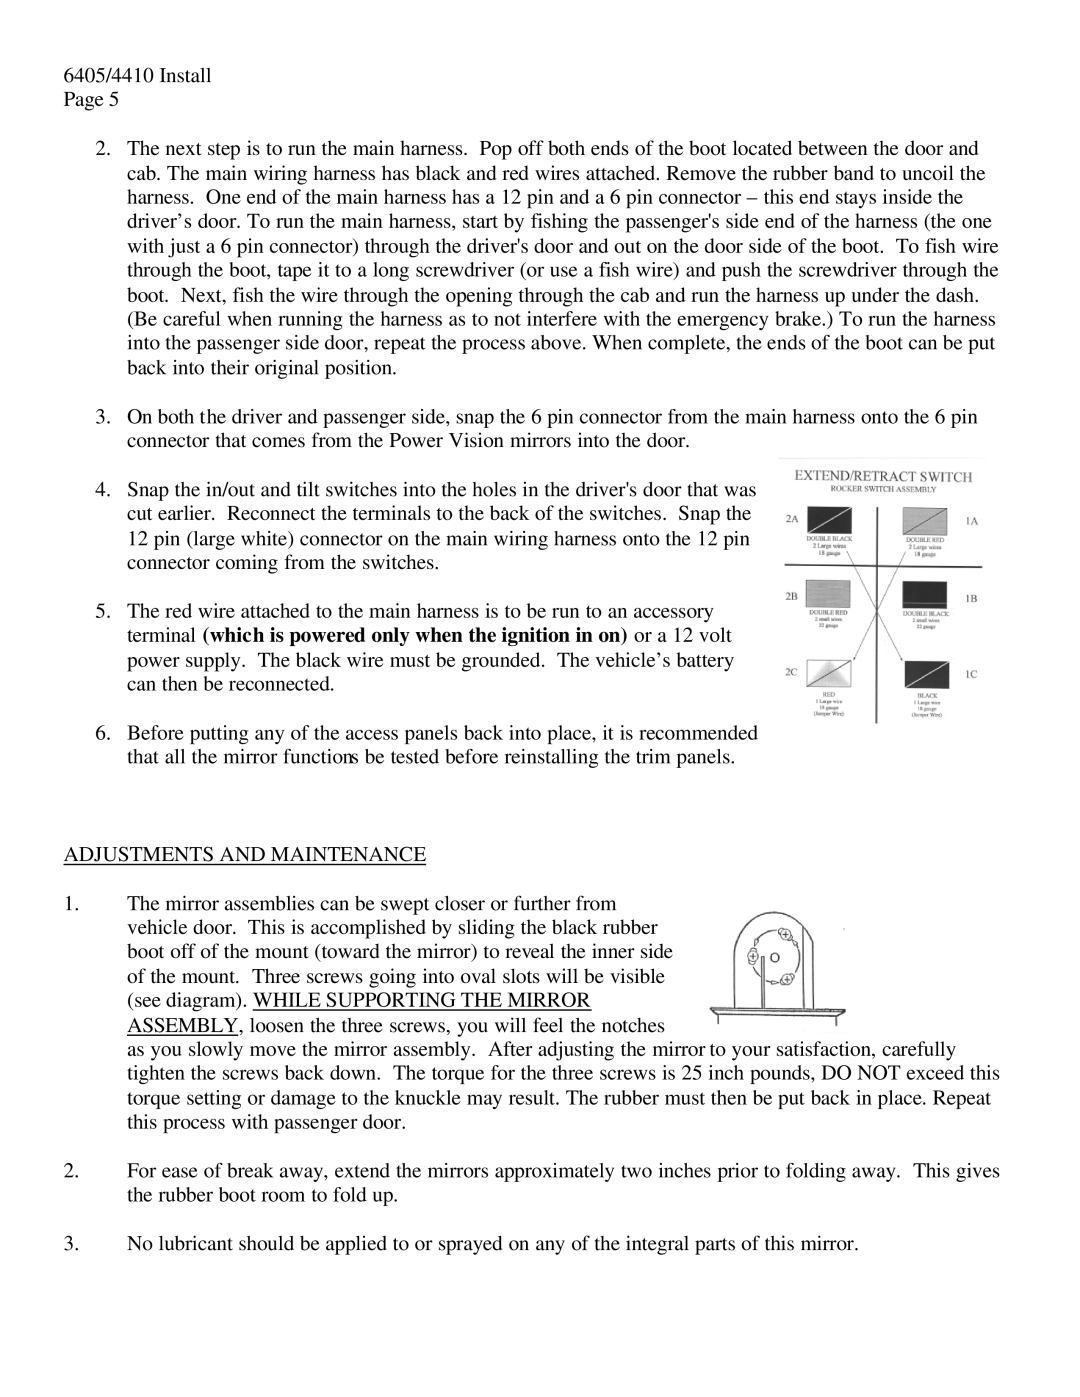
4.Snap the in/out and tilt switches into the holes in the driver's door that was cut earlier. Reconnect the terminals to the back of the switches. Snap the 12 pin (large white) connector on the main wiring harness onto the 12 pin connector coming from the switches.
5.The red wire attached to the main harness is to be run to an accessory terminal (which is powered only when the ignition in on) or a 12 volt power supply. The black wire must be grounded. The vehicle’s battery can then be reconnected.
6.Before putting any of the access panels back into place, it is recommended that all the mirror functions be tested before reinstalling the trim panels.
ADJUSTMENTS AND MAINTENANCE
1.The mirror assemblies can be swept closer or further from vehicle door. This is accomplished by sliding the black rubber boot off of the mount (toward the mirror) to reveal the inner side of the mount. Three screws going into oval slots will be visible (see diagram). WHILE SUPPORTING THE MIRROR ASSEMBLY, loosen the three screws, you will feel the notches
as you slowly move the mirror assembly. After adjusting the mirror to your satisfaction, carefully tighten the screws back down. The torque for the three screws is 25 inch pounds, DO NOT exceed this torque setting or damage to the knuckle may result. The rubber must then be put back in place. Repeat this process with passenger door.
2.For ease of break away, extend the mirrors approximately two inches prior to folding away. This gives the rubber boot room to fold up.
3.No lubricant should be applied to or sprayed on any of the integral parts of this mirror.