3.Avoid eye and body damage. Arc rays and infrared radiation can injure eyes and burn skin. Wear ANSI approved eye and body protection. Do not allow viewing by visitors without proper eye and body protection. Use the provided Face Shield with arc shaded filter plate.
4.Know proper arc welding practices. Read and understand the manufacturer’s instructions, as well as your employer’s safety practices for arc welding.
5.Connect only to a code approved power source. Connect only to a grounding power source conforming to the National Electrical Code and Local Codes.
6.Avoid fire and explosion. Remove flammable and explosive material from at least 35 feet from the welding arc to prevent welding sparks or molten metal from starting a fire. Keep a type ABC fire extinguisher within easy reach. Thoroughly clean the object being welded of any paint, grease, or other foreign material.
7.Avoid being burned. Always wear ANSI approved welding gear: leather gloves, leather apron, and shoes.
Unpacking
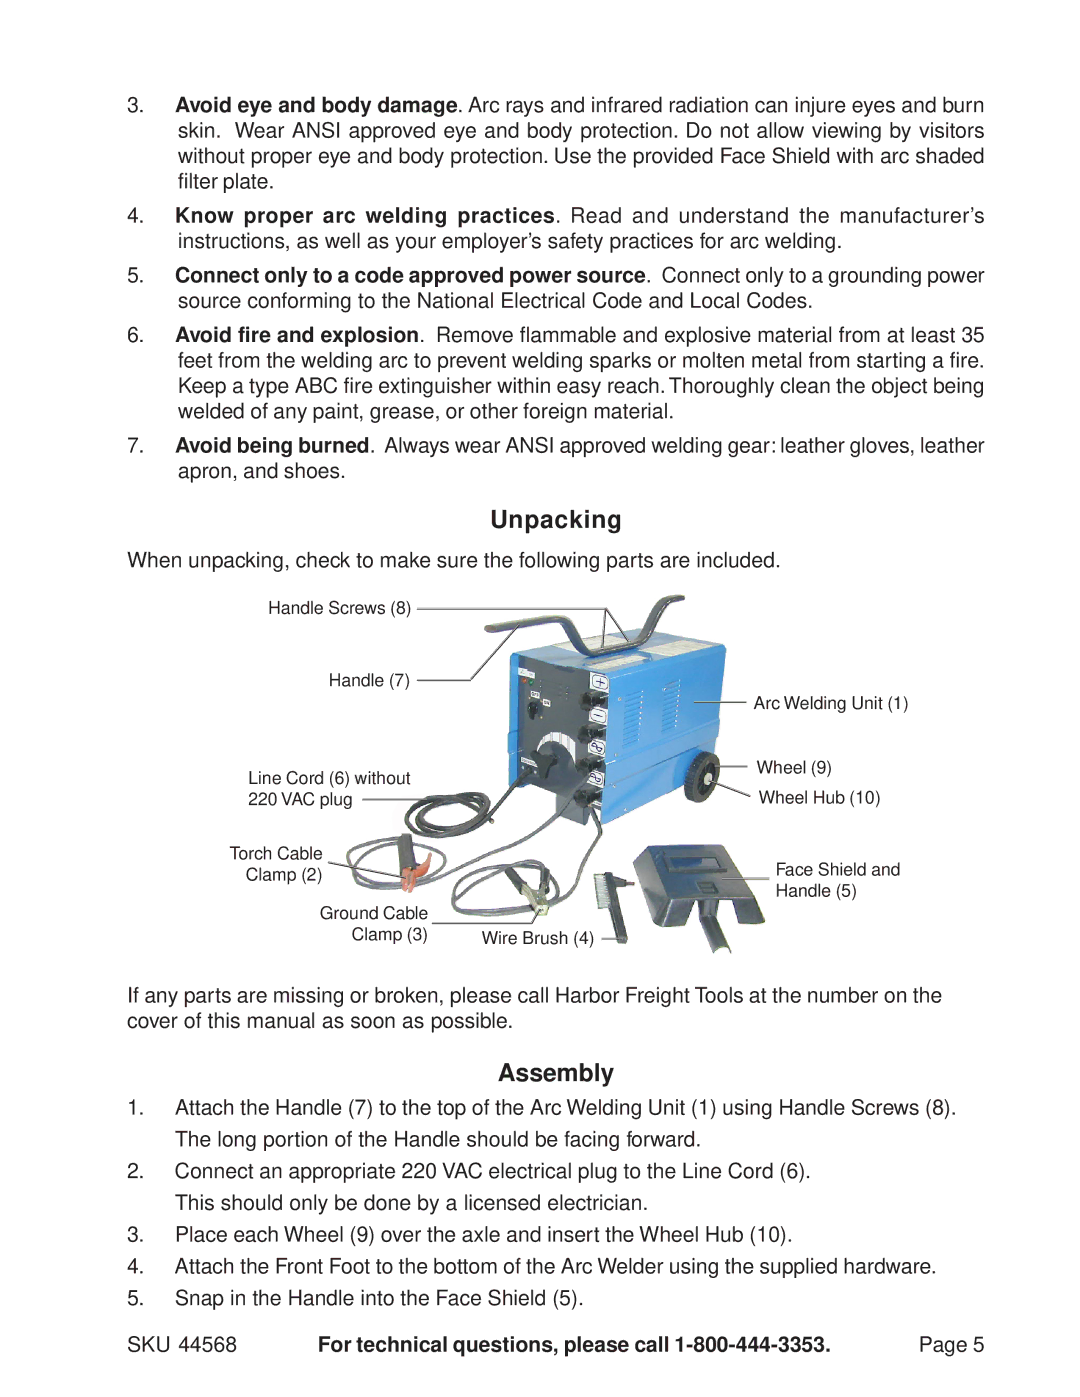
When unpacking, check to make sure the following parts are included.
Handle Screws (8)
Handle (7)
|
|
|
|
|
| Arc Welding Unit (1) |
|
|
|
|
| ||
Line Cord (6) without |
|
|
| Wheel (9) | ||
|
|
| ||||
|
|
| Wheel Hub (10) | |||
220 VAC plug |
|
|
|
|
| |
|
|
|
| |||
Torch Cable
Clamp (2) ![]()
![]() Face Shield and
Face Shield and
Handle (5)
Ground Cable |
|
Clamp (3) | Wire Brush (4) |
If any parts are missing or broken, please call Harbor Freight Tools at the number on the cover of this manual as soon as possible.
Assembly
1.Attach the Handle (7) to the top of the Arc Welding Unit (1) using Handle Screws (8). The long portion of the Handle should be facing forward.
2.Connect an appropriate 220 VAC electrical plug to the Line Cord (6). This should only be done by a licensed electrician.
3.Place each Wheel (9) over the axle and insert the Wheel Hub (10).
4.Attach the Front Foot to the bottom of the Arc Welder using the supplied hardware.
5.Snap in the Handle into the Face Shield (5).
SKU 44568 | For technical questions, please call | Page 5 |
